Baking chicken meatballs might sound simple, but it’s a game-changer on busy nights. No fussing with frying pans or worrying about uneven cooking—just pop them in the oven and get on with your evening. The smell of roasting garlic and browned edges makes the house feel welcoming, even if dinner’s rushed.
What I love most is how this method keeps the meatballs tender inside with a golden crust outside. It’s honest, straightforward cooking—no tricks, just practical. Plus, they stay moist and flavorful, which is a relief after too many overcooked or dried-out batches.
This recipe is the kind of thing I turn to when I want real, satisfying food without the hassle. It’s perfect for making ahead, too, so I can enjoy a warm plate even when the clock is against me. In the end, it’s all about getting a wholesome dinner on the table fast, without sacrificing taste.
Focusing on how baking chicken meatballs can simplify weeknight cooking without sacrificing flavor or texture, making it a practical yet satisfying choice for busy evenings.
The story behind this recipe
- This recipe came about during a busy week when I needed something reliable, filling, and easy to pull together. I wanted chicken meatballs that weren’t dry or bland, and baking seemed like the best way to keep them juicy without fuss. Plus, the oven did all the work, freeing me up for other things in the kitchen.
- One night, I accidentally left a batch in the oven a little longer than planned, and the edges turned beautifully crispy—something I hadn’t expected but loved. It became my go-to method, especially for weeknights when time is tight but flavor still matters.
- Now, I make these whenever I want a simple, honest dinner that feels a little special—crispy outside, tender inside, and packed with enough flavor to satisfy without extra fuss. They remind me that good food doesn’t need to be complicated.
Key ingredients and tips
- Ground chicken: I prefer it lean but juicy—adds a mild, almost sweet flavor. Swap for turkey if you like, but watch for dryness.
- Breadcrumbs: I use slightly toasted ones for crunch; they help keep the meatballs tender. Cornmeal works too if you want more texture.
- Egg: It’s the binder that keeps everything together. Skip or reduce if you’re making smaller batches, but expect less cohesion.
- Garlic: Fresh and pungent, it blossoms in the oven—use more if you love that bold aroma. Dried garlic powder can stand in if pressed for time.
- Parmesan: Adds a salty, nutty depth. If you’re out, Pecorino’s a good substitute, but skip the cheese for a dairy-free version.
- Herbs (parsley, basil): Brightens the flavor and adds freshness. Dried herbs can replace fresh, but use less—half the amount works.
- Olive oil: For coating, it helps the meatballs brown evenly and stay moist. Use a neutral oil if you prefer a lighter touch.
Spotlight on key ingredients
Ground chicken:
- I prefer it lean but juicy—adds a mild, almost sweet flavor. Swap for turkey if you like, but watch for dryness.
- Breadcrumbs: I use slightly toasted ones for crunch; they help keep the meatballs tender. Cornmeal works too if you want more texture.
- Egg: It’s the binder that keeps everything together. Skip or reduce if you’re making smaller batches, but expect less cohesion.
Herbs and cheese:
- Garlic: Fresh and pungent, it blossoms in the oven—use more if you love that bold aroma. Dried garlic powder can stand in if pressed for time.
- Parmesan: Adds a salty, nutty depth. If you’re out, Pecorino’s a good substitute, but skip the cheese for a dairy-free version.
- Herbs (parsley, basil): Brighten the flavor and add freshness. Dried herbs can replace fresh, but use less—half the amount works.
Notes on ingredient swaps
- Dairy-Free: Swap Parmesan for nutritional yeast or omit cheese altogether. Expect less nutty richness but still flavorful.
- Breadcrumbs: Use crushed oats or gluten-free crackers if you need a gluten-free option. They add crunch and help bind, just like bread crumbs.
- Egg: Replace with a flaxseed or chia seed slurry (1 tbsp seeds + 3 tbsp water). Keeps them binding but may alter texture slightly.
- Herbs: Fresh parsley or basil can be swapped with dried versions—use half the amount, and expect a more subdued brightness.
- Garlic: Use garlic powder or roasted garlic for milder, sweeter flavor. Fresh gives a punch that’s hard to replicate dried.
- Oil: If you want less fat, skip the brushing step or use a spray. The meatballs will still brown, but a little less crispiness.
- Meat: Ground turkey or pork can replace chicken. Turkey is lean and mild, pork adds richness but may need a touch more seasoning.
Equipment & Tools
- Baking sheet: To hold the meatballs during baking and ensure even heat exposure.
- Mixing bowl: To combine all ingredients thoroughly before forming meatballs.
- Measuring spoons and cups: For accurate ingredient measurements and consistency.
- Spoon or scoop: To portion out the mixture evenly for uniform meatballs.
- Pastry brush or spray: To apply a light coating of oil for browning.
- Instant-read thermometer: To check internal doneness for safety and perfect juiciness.
Step-by-step guide to baked meatballs
- Preheat your oven to 200°C (400°F). Line a baking sheet with parchment or lightly grease it. This helps the meatballs brown evenly and prevents sticking.
- In a large bowl, combine 1 pound (450g) ground chicken, 1/2 cup breadcrumbs, 1 beaten egg, 2 minced garlic cloves, 1/4 cup grated Parmesan, 2 tbsp chopped parsley, 1 tsp salt, and 1/2 tsp pepper. Mix until just combined but don’t overmix, or the meatballs get dense.
- Using your hands, roll the mixture into 1 1/2-inch (4 cm) balls. Place them on the prepared baking sheet, leaving space between each. Slightly flattening the tops helps them cook evenly.
- Brush the meatballs lightly with olive oil. This promotes a golden, crispy exterior. If you prefer, you can spray them with cooking spray instead.
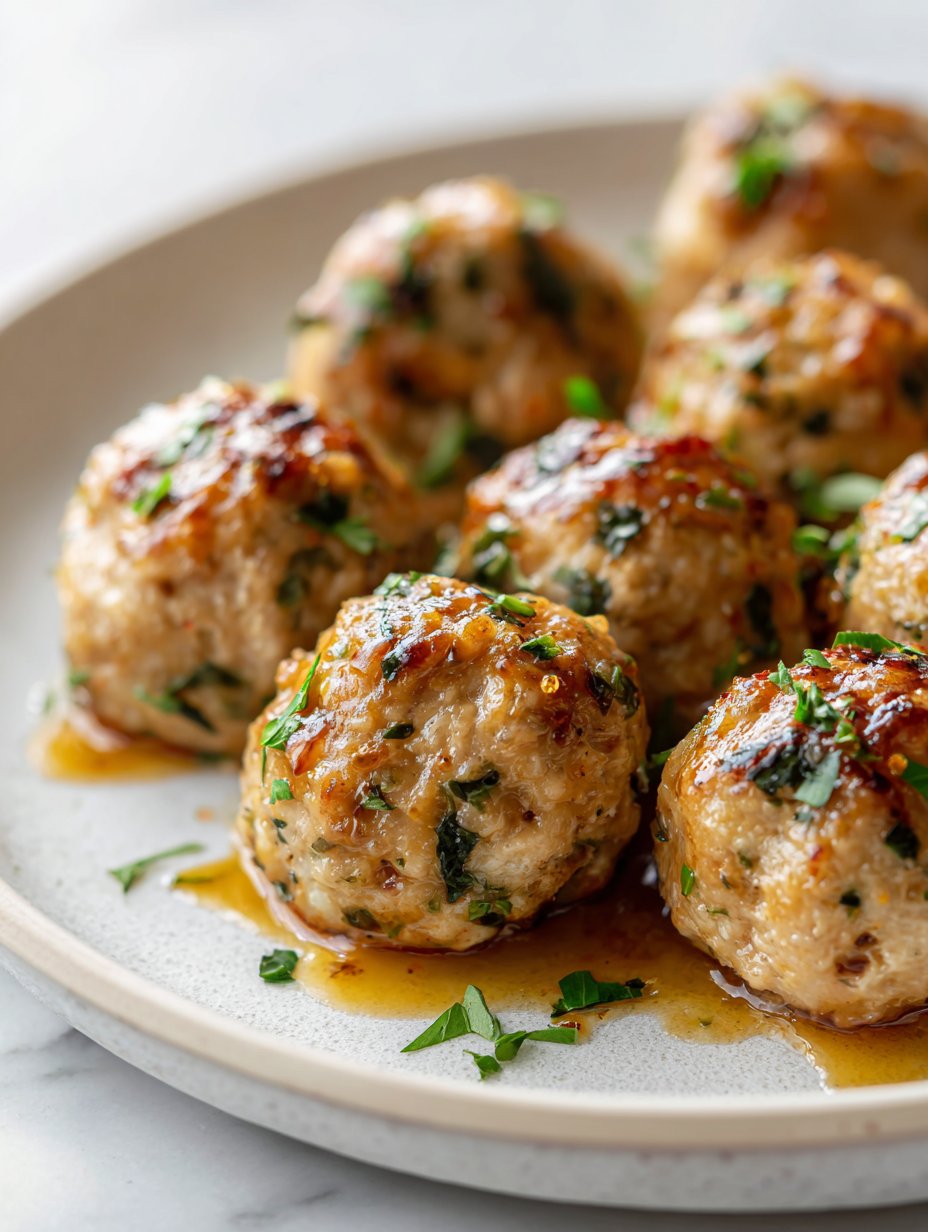
- Bake in the preheated oven for 18-20 minutes. Check after 15 minutes; they should be a deep golden brown and slightly firm to the touch. The edges may crack a little, and that’s fine.
- Once baked, remove from oven and let rest for 5 minutes. Resting allows juices to redistribute inside. Serve with your favorite sauce or on a bun for a quick meatball sandwich.
Let the meatballs rest on the baking sheet for 5 minutes. Serve warm with sauce, pasta, or on a bun. Garnish with extra herbs or cheese if desired.
How to Know It’s Done
- Meatballs are deep golden brown and firm but not hard.
- Internal temperature reaches 75°C (165°F) when tested with a probe.
- Juices run clear when gently pressed with a finger or utensil.
Baked Chicken Meatballs
Ingredients
Equipment
Method
- Preheat your oven to 200°C (400°F). Line a baking sheet with parchment paper or lightly grease it to prevent sticking.
- In a large mixing bowl, combine the ground chicken, toasted breadcrumbs, beaten egg, minced garlic, grated Parmesan, chopped parsley, salt, and pepper. Gently mix everything together until just combined, being careful not to overmix.
- Using your hands or a scoop, portion out the mixture into 1 1/2-inch (4 cm) balls, rolling gently to shape them evenly. Place each meatball on the prepared baking sheet, spacing them apart for even cooking.
- Lightly brush each meatball with olive oil using a pastry brush or spray them with a cooking spray. This will help them develop a crispy, golden exterior.
- Pop the baking sheet into the oven and bake for about 18-20 minutes, or until the meatballs are deep golden brown and firm to the touch. Check after 15 minutes and turn them halfway through for even browning.
- Once baked, remove the meatballs from the oven and let them rest on the sheet for 5 minutes. This allows the juices to redistribute, keeping them moist inside.
- Serve the baked chicken meatballs warm, with your favorite sauce, pasta, or on a bun. Enjoy the crispy exterior with a tender, juicy inside that’s bursting with flavor.
Pro tips for perfect baked meatballs
- Use slightly wet hands when rolling the meatballs to prevent sticking and keep them smooth.
- Chill the mixture for 15 minutes before shaping to firms up the ingredients and make rolling easier.
- Bake on a rack set inside your baking sheet for even air circulation and crispier bottoms.
- Turn the meatballs halfway through baking to ensure uniform browning and a crispy exterior all around.
- If the meatballs crack or split, gently press the crack closed and return to the oven to finish cooking.
- For extra flavor, brush the meatballs with a garlic-infused olive oil immediately after baking for a fragrant finish.
- Rest the meatballs on a wire rack for a few minutes after baking to prevent sogginess and maintain crispness.
Common mistakes and how to fix them
- FORGOT to preheat the oven → Always preheat to ensure even cooking and browning.
- DUMPED all ingredients at once → Mix gently to avoid dense meatballs; overmixing toughens.
- OVER-TORCHED the meatballs → Watch for deep golden edges, not burnt. Reduce heat if needed.
- SKIPPED resting time → Rest for 5 minutes to let juices redistribute for maximum moistness.
Quick fixes and pantry swaps
- When meatballs crack, splash a little water on the baking sheet to create steam and soften cracks.
- If sticking occurs, patch with a damp finger and gently press to seal small breaks.
- DUMPED too much oil? Use a paper towel to blot excess, preventing greasy bites.
- Over-baked meatballs? Rest on a wire rack to cool quickly and regain some moisture.
- For a quick rescue, brush with a garlic-infused oil to add flavor and moisture after baking.
Prep, store, and reheat tips
- Prepare the meatball mixture up to 24 hours in advance; keep covered in the fridge to maintain freshness and prevent drying out.
- Shape the meatballs ahead of time and store them on a plate covered tightly with plastic wrap; they can be refrigerated for up to 12 hours without losing texture.
- Cooked meatballs can be refrigerated in an airtight container for 3-4 days, with a slight change in flavor as the juices settle and intensify.
- Reheat gently in a 180°C (350°F) oven for about 10 minutes until warmed through, with a crackle on the outside and a warm, juicy interior.
Top questions about baked chicken meatballs
1. Can I use ground turkey instead?
Use ground chicken with a little fat for juiciness. Lean chicken can dry out, so consider adding a splash of broth if you like.
2. How long should I bake the meatballs?
Bake at 200°C (400°F) for about 18-20 minutes until golden and firm. Every oven varies, so start checking at 15 minutes.
3. Can I freeze these meatballs?
Yes, you can freeze uncooked meatballs on a tray, then transfer to a bag. Bake straight from frozen, adding 5-7 minutes.
4. Can I substitute dried herbs?
Use fresh herbs for bright flavor, but dried herbs work in a pinch—just halve the amount since they are more concentrated.
5. Can I make these dairy-free?
Yes, skip the cheese for dairy-free, or use nutritional yeast for a cheesy flavor without dairy. The texture stays tender.
6. Should I oil the meatballs before baking?
Apply a light brush of oil before baking for crisp edges, but avoid over-oiling to prevent greasy meatballs.
7. How do I know when they’re cooked?
Ensure the meatballs are cooked to an internal temperature of 75°C (165°F). They should be juicy and no pink inside.
8. How do I avoid tough meatballs?
Use a gentle hand when mixing to keep the mixture tender. Overmixing makes the meatballs dense and tough.
9. Should I rest the meatballs before serving?
Rest the baked meatballs for 5 minutes after removing from the oven to let the juices settle, keeping them moist.
10. How do I reheat leftovers?
Reheat in a 180°C (350°F) oven for about 10 minutes. They should shimmer with warmth and stay juicy inside.
These baked chicken meatballs are a real weeknight lifesaver. They come together quickly and stay juicy, which is a small victory after busy days. I like how the oven does all the work, and the smell of garlic and browned edges fills the house, making dinner feel special even on chaos-filled nights.
In the end, it’s about honest, practical food that you can rely on. They’re forgiving, adaptable, and just plain good—perfect for those evenings when you want something satisfying without fuss. Sometimes, the simplest dishes make the biggest difference.

Hi, I’m Emily Carter, the creator and recipe developer behind Salt Strategist. I’m so happy you’re here. This blog is where my love for flavor, creativity, and thoughtful cooking comes together in one beautiful, ever evolving space.


