Crispy chicken wings are one of those snacks that seem simple but can get tricky without the right technique. I’ve found that oven baking, when done right, can deliver that satisfying crunch without the mess of deep frying, plus it’s a lot safer and easier to control. It’s about balancing heat and patience, letting the skin get that perfect golden crackle.
I used to think crispy wings needed a fryer full of hot oil, but then I started experimenting with just a hot oven and a few tricks. Now, I often prefer this method—less greasy, more control, and still that crave-worthy crunch. Plus, the smell of wings roasting, with those spicy, smoky notes, really gets everyone in the house excited.
This recipe is a reminder that you don’t need fancy gear or complicated steps to get genuinely good wings. Just a solid oven, some good seasoning, and a little patience. It’s honest cooking, the way I like it—straightforward, practical, and totally satisfying.
Focusing on how to achieve perfectly crispy chicken wings using a simple oven technique, without deep frying or fancy equipment, so you get that satisfying crunch every time.
Crispy Oven-Baked Wings
- Cooking wings always brings a rush of childhood nostalgia, that smoky smell filling the house and everyone rushing to the table.
- There’s a strange pride in mastering the oven-crisped wing without the greasy mess of frying—like I’ve cracked some secret code.
- Getting that perfect crunch is chaotic—the first batch is always a gamble, but when it works, it’s pure joy.
- I love how these wings turn out with just a handful of ingredients, making them feel simple but totally satisfying.
- Nothing beats the relief of pulling golden, crackly wings from the oven and knowing I nailed that crispy skin again.
The story behind this recipe
- This recipe was born out of a simple craving and a kitchen experiment. I wanted wings that stayed crispy beyond the first bite, not soggy leftovers. One rainy weekend, I played around with different oven temps and seasoning blends, trying to find that perfect balance of crunch and flavor.
- The real inspiration came from a messy backyard barbecue I attended years ago. The smell of charred wings, smoky and spicy, stuck with me. I thought, why not try to recreate that in a more controlled, less chaotic way? Turns out, you can get that same satisfying crackle with just a little patience and the right technique.
- heading: ‘The story behind this recipe’
Trivia and history of chicken wings
- Chicken wings as a popular snack date back to the 1960s in Buffalo, New York, where they were first served at a local bar.
- The term ‘Buffalo wings’ was coined because of their origin city, and they gained fame for their spicy, vinegary sauce.
- Initially considered a bar food, wings became a cultural phenomenon, especially with the rise of sports bars and tailgate parties.
- In the 1980s, wings started appearing in mainstream restaurants, evolving into a versatile dish with countless sauce variations.
Key ingredients for crispy wings
- Chicken wings: I like using fresh, skin-on wings. The juicy fat and crispy skin come alive when baked properly, giving that oozy, smoky flavor; skip frozen if you want maximum crunch.
- Baking powder: A little helps create that crackly, golden crust. Aluminum-free is best—just a small spoonful sprinkled evenly over the wings for that crispy edge.
- Salt: Essential for flavor, I prefer coarse sea salt for a more pronounced crunch and deeper seasoning—don’t skimp here.
- Paprika: Adds smoky depth, especially if you use smoked paprika. The vibrant red color and earthy aroma make the seasoning pop.
- Garlic powder: For a subtle savory punch that complements the skin’s crispness; avoid overdoing it so it doesn’t overpower the wings’ natural richness.
- Hot sauce: Use your favorite—something tangy and spicy, like Frank’s. The bright, vinegary kick really lifts the flavor and keeps the wings lively.
- Oil (optional): A splash of neutral oil helps with even browning, but I skip it if I want a leaner, crispier result—just ensure the skin is dry before baking.
Spotlight on key ingredients
Chicken wings:
- I prefer skin-on, fresh wings—they stay juicy and get that oozy, smoky flavor when baked. Frozen wings can be hit or miss for crispness.
- Baking powder: A tiny sprinkle creates a crackly, golden crust. Aluminum-free is best—don’t skip this step if you want that crunch.
Spice blend (paprika, hot sauce):
- Hot sauce: Use your favorite—bright, tangy, with a spicy kick. It’s what makes the wings lively and keeps them from tasting flat.
- Paprika: Adds smoky depth and a vibrant hue. Smoked paprika is ideal for a deeper, more complex aroma.
Notes for ingredient swaps
- Dairy-Free: Swap butter-based sauces for vinegar or citrus-based dips. Keep the tang and spice without the creaminess.
- Low-Sodium: Use salt substitutes or reduce added salt. Watch out for salty sauces to keep the flavor balanced.
- Gluten-Free: Replace soy sauce with coconut aminos or tamari. The umami remains, but check for added gluten in sauces.
- Sweetener: Substitute honey with maple syrup or agave nectar. The flavor shifts slightly, but sweetness stays balanced.
- Hot Sauce: Use a milder or different brand if you prefer less heat or want a unique flavor profile. The spice level varies.
- Oil: Switch to avocado or sesame oil for a different aroma and richer flavor, especially in finishing touches.
- Paprika: Smoked paprika adds depth; use sweet paprika if you want milder, or chili powder for extra heat and complexity.
Equipment & Tools
- Oven: To bake the wings evenly and achieve crispiness.
- Wire rack: Allows air circulation for even cooking and crisping.
- Mixing bowl: To toss wings with baking powder and seasoning.
- Tongs: For flipping wings without breaking the skin.
- Measuring spoons: To measure baking powder and salt accurately.
Step-by-step guide to crispy wings
- Equipment & Tools: Preheat oven to 220°C (430°F). Use a baking sheet with a wire rack for even crisping. Have a mixing bowl, a measuring spoon, and tongs ready.
- Prep the wings: Pat wings dry thoroughly with paper towels. Removing moisture is key to crispiness. Toss in a bowl with 1 teaspoon baking powder and 1/2 teaspoon salt. Mix well—aim for an even coating.
- Arrange wings: Place wings on the wire rack, skin side up. Space them out—don’t crowd—so air circulates freely. This promotes crisping and even cooking.
- Bake first round: Pop into the oven. Bake for 25-30 minutes, checking at 25. Wings should turn golden with a crackly surface. If they look pale, give them a few extra minutes.
- Flip & season: Use tongs to flip wings skin side down. Brush with your favorite hot sauce or seasoning mix if desired. Return to oven for another 10-15 minutes, until crispy and bubbling.
- Check for doneness: The skin should be deeply golden, crackling, and the meat jiggles slightly when moved. Wings should reach an internal temp of 75°C (165°F). The smell will be smoky, spicy, and inviting.
- Rest & serve: Let wings rest for 5 minutes on the rack. This helps the skin settle and stay crispy. Serve immediately with a side of cooling ranch or celery sticks for contrast.
Rest wings on the rack for 5 minutes. Serve hot with your preferred sides and sauces. Plate directly from the rack for maximum crunch.
How to Know It’s Done
- Wings are golden and crackly, not pale or soggy.
- Internal temperature reaches 75°C (165°F).
- Skin feels firm and crackles when pressed.
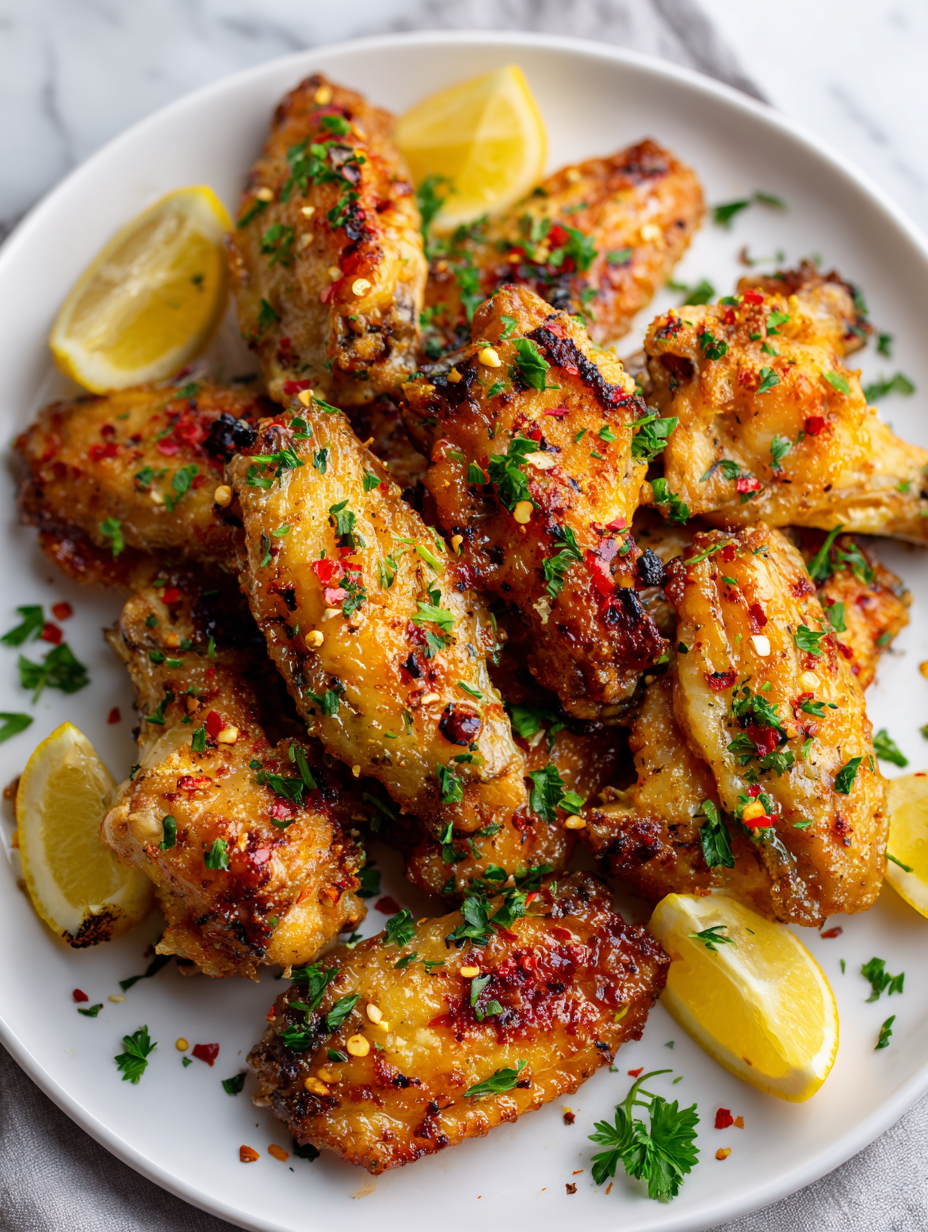
Crispy Oven-Baked Chicken Wings
Ingredients
Equipment
Method
- Preheat your oven to 220°C (430°F) and place a wire rack on a baking sheet to ensure even crisping.
- Pat the chicken wings dry thoroughly with paper towels; removing surface moisture helps them crisp up better. Place the wings in a mixing bowl.
- Sprinkle the baking powder, salt, smoked paprika, and garlic powder over the wings. Toss everything together with tongs until the wings are evenly coated, ensuring the baking powder is well distributed.
- Arrange the wings skin side up on the wire rack, giving each piece plenty of space to allow air circulation. This promotes even crisping and prevents sogginess.
- Bake the wings in the preheated oven for about 25-30 minutes, or until they turn deep golden and the skin looks crackly. Keep an eye on them after 25 minutes to prevent burning.
- Use tongs to flip the wings carefully, skin side down, then return them to the oven. Bake for an additional 10-15 minutes, or until they are crispy and bubbling.
- Once done, transfer the wings to a clean plate and brush them with hot sauce while they’re still hot. This keeps the skin crisp and adds vibrant flavor. Let them rest for 5 minutes to settle and stay crispy.
- Serve the wings immediately, enjoying their golden, crackly exterior and juicy interior. Pair with celery sticks or your favorite dipping sauce for the perfect bite.
Pro tips for perfect wings
- Bolded mini-head: Use baking powder sparingly. Too much can give a bitter taste, so stick to just a teaspoon per batch.
- Bolded mini-head: Dry wings thoroughly before seasoning. Moisture is the enemy of crispiness; pat with paper towels until no sheen remains.
- Bolded mini-head: Space wings out on the rack. Crowding traps steam and softens skin—give each piece room to breathe.
- Bolded mini-head: Flip wings midway. Turning them skin-side down helps achieve an even, golden crust all over.
- Bolded mini-head: Watch your oven temperature. Too high can burn the skin before the meat is cooked; aim for 220°C (430°F) for best results.
- Bolded mini-head: Rest wings before serving. A five-minute pause lets juices settle, keeping the meat tender and the skin crisp.
- Bolded mini-head: Apply hot sauce after baking. Tossing wings in sauce post-cook prevents sogginess and keeps the skin crackly.
Common mistakes and how to fix them
- FORGOT to dry wings thoroughly → Pat dry for maximum crispness.
- DUMPED hot sauce directly on wings → Toss in hot sauce after baking for even coating.
- OVER-TORCHED wings → Reduce oven temperature or shorten baking time to prevent burning.
- SKIPPED resting period → Rest wings 5 minutes for better crunch and flavor lock-in.
Fast fixes for crispy wings
- When wings aren’t crispy, splash a little more baking powder and broil briefly.
- If wings look pale, increase oven temperature slightly or extend baking time by 5 minutes.
- Splash wings with hot sauce after baking to prevent sogginess and enhance flavor.
- Patch soggy spots with a quick blast under the broiler for 5 seconds to shimmer and crisp.
- Shield from moisture by storing wings in an airtight container, then reheat in a hot oven for quick rescue.
Prep, store, and reheat tips
- Prep the wings: Pat them dry thoroughly and toss with baking powder and salt. This step can be done a day ahead and kept covered in the fridge, which helps start the crisping process early.
- Store cooked wings: Once baked and cooled, place leftovers in an airtight container. They stay good in the fridge for up to 3 days, but the skin may lose some of its crunch.
- Reheat with crispness: To revive that crispy exterior, reheat wings in a hot oven at 200°C (390°F) for about 10 minutes. The smell of smoky, spicy wings will fill your kitchen again, and the skin will regain some crunch.
- Flavor change over time: Keep in mind, flavors mellow slightly after a day or two, so they’re best eaten fresh or reheated carefully for that crispy texture.
- Sensory note for reheating: The wings will crackle again if you listen closely as they heat, and the aroma should be smoky and spicy—just like when they first came out of the oven.
Top questions about chicken wings
1. Can I use frozen wings?
Use chicken wings that are fresh and not frozen for the best crispiness. Thaw if frozen and pat dry thoroughly before cooking.
2. How long do I bake chicken wings?
Bake wings at 220°C (430°F) on a wire rack for about 30 minutes, flipping halfway. Look for deep golden color and crackly skin.
3. Should I sauce wings before or after baking?
Apply hot sauce after baking to keep the skin crispy. Toss wings in sauce while hot for even coverage.
4. Does baking powder make wings crispy?
Yes, baking powder (aluminum-free) helps create a crispy crust. Use about 1 teaspoon per pound of wings.
5. How long should I rest wings before serving?
Rest wings for 5 minutes after baking to help the skin set and stay crispy when served.
6. How do I get crispy wings without frying?
Use a hot oven and place wings on a wire rack. Proper spacing and flipping are key to even crisping.
7. How do I reheat wings and keep them crispy?
Reheat leftovers in a hot oven at 200°C (390°F) for about 10 minutes. Listen for crackling and smell smoky and spicy.
8. Where do chicken wings come from?
Buffalo wings originated in the 1960s in Buffalo, NY, famous for their spicy, vinegary sauce and crispy texture.
9. What are good seasonings for wings?
Use smoked paprika for a deeper smoky flavor, and hot sauce of your choice for a spicy tang.
10. Why are my wings not crispy?
Avoid overcrowding the baking sheet to ensure proper air circulation and crisp skin. Space wings apart.
There’s something satisfying about pulling crispy wings out of the oven, the aroma smoky and spicy filling the kitchen. They remind me that simple techniques can still deliver bold, satisfying flavor without the fuss of frying. Plus, they’re perfect for sharing, whether it’s a casual weeknight or a weekend get-together.
In the end, it’s about that crunch—the kind that makes you pause and really enjoy each bite. No matter how many times I make these, I still smile at how straightforward and honest they are. It’s good food, done right, with just a bit of patience and a lot of flavor.

Hi, I’m Emily Carter, the creator and recipe developer behind Salt Strategist. I’m so happy you’re here. This blog is where my love for flavor, creativity, and thoughtful cooking comes together in one beautiful, ever evolving space.


