Making mozzarella sticks at home has always felt like a small act of rebellion—taking a fast-food favorite and elevating it with fresh herbs and a crispy coating. It’s a way to reclaim that gooey, cheesy comfort with a bit of a flavor twist that surprises even the most devoted cheese fans.
What I love about this recipe is how customizable it is. A pinch of thyme, a dash of smoked paprika, or a sprinkle of oregano in the breadcrumb mixture makes each batch unique. It’s chaos in the best way—messy, fragrant, and utterly satisfying on a cold evening or when friends drop by unannounced.
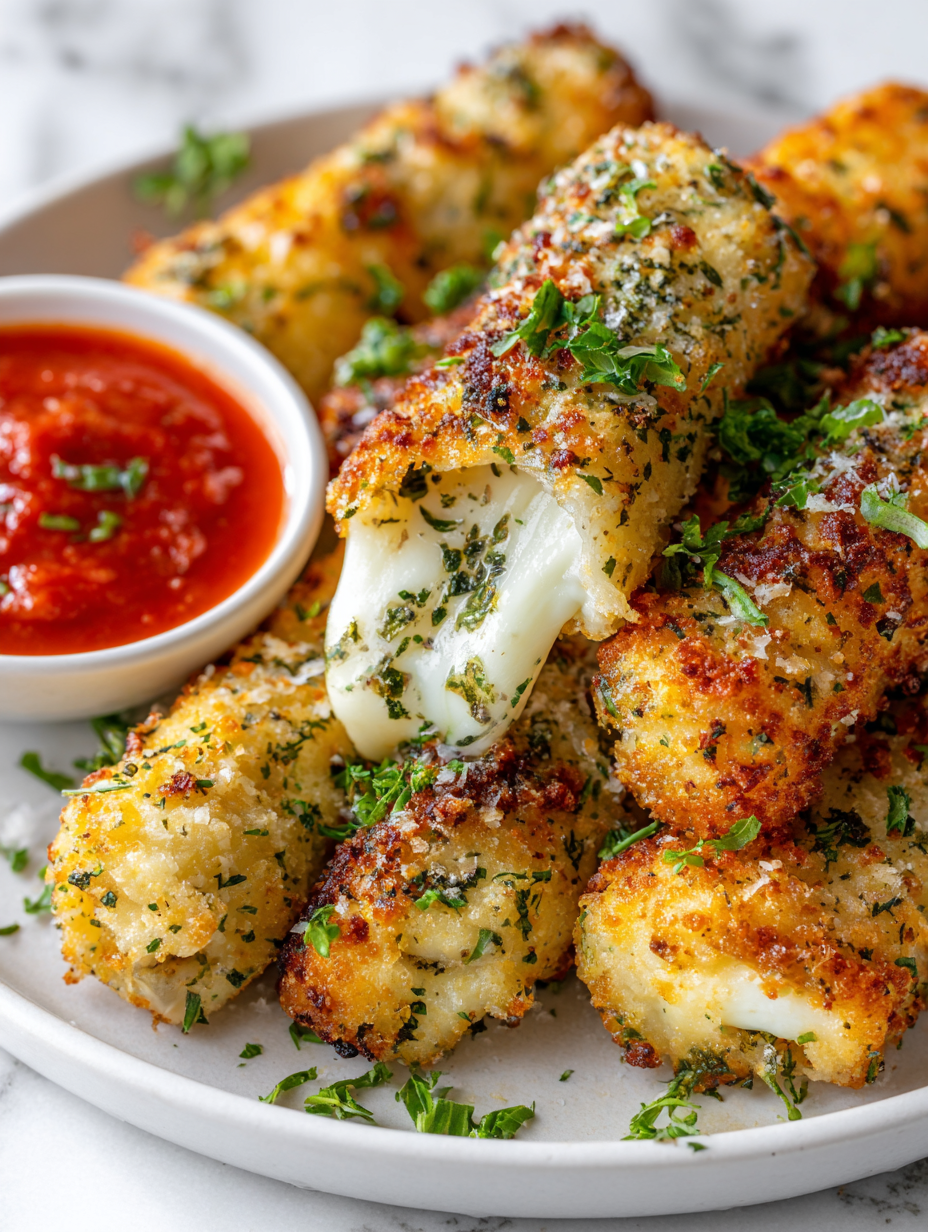
Focusing on the nostalgic comfort of homemade mozzarella sticks, but with a twist—using unexpected herbs and spices in the coating for a flavor boost that surprises and delights.
A Surprising Herb Twist
- Sharing these mozzarella sticks always sparks nostalgia, reminding me of childhood snack times and lazy weekends.
- I get a thrill from experimenting with herbs in the coating—each batch turning out a little different, a little more exciting.
- There’s a quiet pride in making something so gooey and cheesy from scratch, especially when guests ask for seconds.
- The smell of melted cheese and crispy breadcrumbs wafting through the kitchen is pure comfort, even on the busiest days.
- Nothing beats that moment when you bite into a perfectly golden stick—crispy outside, gooey inside, and just the right amount of salty.
The story behind this recipe
- This recipe actually started from a kitchen experiment gone wrong. I was trying to make a more flavorful coating, and somehow, it turned into a cheesy, crispy revelation. Since then, I’ve been tweaking and perfecting that messy moment into a reliable snack that’s just as fun as it is delicious.
- There’s something about frying cheese that feels like a small act of culinary rebellion—like sneaking a guilty pleasure into a weeknight. I remember the first time I got the cheese to melt perfectly inside that crispy shell, thinking, ‘Okay, this is worth the mess.’ It’s a dish that’s all about comfort, chaos, and a little bit of pride.
- I love how this recipe invites improvisation—more herbs, a smoky spice, a dash of heat. It’s a playful way to make a classic feel fresh. And honestly, the smell of bubbling cheese and toasted breadcrumbs filling the kitchen is the best kind of chaos for a chilly evening or when friends unexpectedly drop by.
Trivia and Origins
- Mozzarella sticks gained popularity in American diners during the 1970s, quickly becoming a fast-food staple.
- The concept of breaded, fried cheese has roots in Italian antipasti, where crispy cheese snacks have been enjoyed for centuries.
- Early recipes used string cheese or mozzarella logs, but modern versions often feature a more hand-crafted approach with fresh cheese.
- The invention of frozen mozzarella sticks in the 1980s helped popularize the snack across grocery stores and movie theaters.
Key Ingredients Breakdown
- Mozzarella: I prefer using fresh, high-moisture mozzarella for that perfect gooey stretch. If you can’t find it, a good block and shredding just before coating works too.
- Breadcrumbs: I like panko for extra crunch, but seasoned or herbed breadcrumbs add a flavor boost. Skip the spices if you want a pure cheese experience.
- Eggs: They help the coating stick and create a crispy shell. Whisk thoroughly to avoid clumps; a splash of water can help loosen the mixture if needed.
- Flour: Just a light dusting to help the egg adhere. Use all-purpose, or swap with cornstarch for a lighter, crispier crust—just don’t skip this step.
- Herbs & Spices: I toss in a pinch of smoked paprika and dried oregano for depth. Feel free to experiment with cayenne or garlic powder for extra punch.
- Oil: I recommend neutral oil like vegetable or canola for frying. Keep it hot—around 180°C (355°F)—to get that perfect golden crunch without burning.
- Optional: A squeeze of lemon or a sprinkle of flaky sea salt right after frying adds a bright, fresh finish that balances the richness.
Spotlight on key ingredients
Mozzarella:
- I prefer using fresh, high-moisture mozzarella for that perfect gooey stretch. If you can’t find it, a good block and shredding just before coating works too.
- It melts beautifully and gives that irresistible stretch, but watch out for excess moisture which can cause splattering during frying.
- The quality really shows—cheap cheese tends to be rubbery or greasy, so choose wisely for the best melt and flavor.
Breadcrumbs:
- I like panko for extra crunch, but seasoned or herbed breadcrumbs add a flavor boost. Skip the spices if you want a pure cheese experience.
- They should be crispy and golden, providing that satisfying crunch that contrasts with the gooey cheese inside.
- Toast them lightly before coating for an extra toasty flavor and better adhesion during frying.
Notes for ingredient swaps
- Dairy-Free: Use plant-based mozzarella alternatives like cashew or coconut-based cheeses. They melt differently and may lack the oozy stretch, but work well in a pinch.
- Gluten-Free: Swap regular panko breadcrumbs for gluten-free versions, or crushed rice crackers for extra crunch and flavor.
- Low-Sodium: Choose unsalted or low-salt cheese and breadcrumbs; you can adjust seasoning in the coating to suit your taste.
- Vegan: Use vegan cheese sticks and plant-based egg substitutes like aquafaba or flaxseed meal mixed with water for the coating process.
- Herb Variations: Replace oregano and smoked paprika with cumin, curry powder, or fresh herbs like basil for a different flavor profile.
- Oil Choices: Use neutral oils like vegetable, canola, or peanut oil. For a milder taste, avoid strongly flavored oils like extra virgin olive oil which can burn at high heat.
- Extra Crunch: Add a handful of crushed nuts or seeds to breadcrumbs for an extra crispy and textured coating.
Equipment & Tools
- Baking sheet: For freezing and setting the coated cheese sticks.
- Deep-fry thermometer: To monitor oil temperature precisely.
- Shallow dish: For coating stations, holding flour, egg wash, and breadcrumbs.
- Slotted spoon: To safely lower and lift sticks from hot oil.
- Paper towels: To drain excess oil and keep sticks crispy.
Step-by-step Mozzarella Sticks Guide
- Equipment & Tools: Gather a small baking sheet, a deep-fry thermometer, a shallow dish for coating, a slotted spoon, and paper towels for draining.
- Freeze mozzarella sticks: Place pre-cut sticks on a baking sheet and freeze for at least 30 minutes. This prevents melting during frying.
- Prepare coatings: In one dish, beat eggs with a splash of water. In another, mix panko breadcrumbs with herbs and spices. Place flour in a third dish.
- Coat the cheese: Roll each frozen mozzarella stick in flour, tapping off excess. Dip into egg wash, then coat thoroughly with breadcrumb mixture. Repeat for a thicker crust.
- Chill coated sticks: Arrange coated sticks on a tray and freeze for 15 minutes. This helps set the coating and prevents melting.
- Heat oil: Fill a deep pot with at least 5cm (2 inches) of oil. Heat to 180°C (355°F), using the thermometer to check temperature. It should shimmer and crackle gently.
- Fry in batches: Carefully lower a few sticks into hot oil using a slotted spoon or tongs. Fry for 2-3 minutes, turning occasionally, until golden brown. Watch for bubbling and color.
- Drain and cool: Remove sticks with a slotted spoon. Drain on paper towels. Let rest for 2-3 minutes to avoid burns and ensure crispness.
- Final fry check: The coating should be crisp and golden. Cheese should be gooey inside. If cheese leaks or coating is pale, fry longer or increase heat slightly.
- Serve immediately: Plate with dipping sauces. For best texture, eat within 10 minutes of frying. Reheat in oven if needed, for 5-7 minutes at 180°C (355°F).
Let the mozzarella sticks rest for 2-3 minutes on paper towels to settle. Serve hot with your favorite dips—think garlic aioli, marinara, or spicy mustard. Keep an eye on serving time; they’re best crispy and gooey right out of the fryer.
How to Know It’s Done
- Golden, crispy exterior with an even color.
- Cheese inside is melted and gooey, but not leaking excessively.
- Coating is firm and crunchy when bitten.
Herb-Infused Homemade Mozzarella Sticks
Ingredients
Equipment
Method
- Place mozzarella sticks on a baking sheet and freeze for at least 30 minutes to prevent melting during frying.
- Set up your coating stations: in one shallow dish, place the flour; in another, beat the eggs with a splash of water; and in a third, combine panko breadcrumbs with oregano and smoked paprika.
- Take each frozen mozzarella stick and roll it in the flour, pressing lightly to coat evenly.
- Dip the floured stick into the egg wash, ensuring it’s fully coated.
- Roll the egg-coated stick in the breadcrumb mixture, pressing gently to adhere the coating thoroughly.
- Repeat the coating process—dip in egg and breadcrumb mixture—to build a thicker, more crispy shell.
- Place the coated sticks back on the baking sheet and freeze for another 15 minutes to set the coating.
- Heat the oil in a deep pot to 180°C (355°F), monitoring with a deep-fry thermometer until shimmering and crackling gently.
- Carefully lower a few mozzarella sticks into the hot oil using a slotted spoon, frying for 2-3 minutes until golden and crispy, turning occasionally.
- Remove the fried sticks with a slotted spoon and drain on paper towels, letting them rest for 2-3 minutes to settle and avoid burns.
- Serve immediately while hot and gooey, paired with your favorite dipping sauces like marinara or garlic aioli.
Pro Tips for Perfect Mozzarella Sticks
- Breading Technique: Use one hand for flour and egg, the other for breadcrumbs to keep coating even and neat.
- Oil Temperature: Maintain 180°C (355°F); use a thermometer to avoid greasy or undercooked sticks.
- Freezing: Chill coated sticks for at least 15 minutes before frying to prevent cheese leakage and ensure crisp coating.
- Frying Batches: Don’t overcrowd the pan; fry in small batches to keep oil temperature steady and get crispy results.
- Cooking Time: Fry for 2-3 minutes until golden; watch for bubbling and color to prevent burning or undercooking.
- Resting: Let fried sticks sit on paper towels for 2 minutes to drain excess oil and keep them crispy.
- Serving: Serve immediately for maximum gooey cheese and crunch—reheat in oven if needed, for 5-7 minutes at 180°C (355°F).
Common mistakes and how to fix them
- FORGOT to dry cheese thoroughly → causes oil splatter, pat dry with paper towels.
- DUMPED cheese directly into hot oil → leads to uneven melting, freeze cheese before frying.
- OVER-TORCHED breadcrumbs → burns quickly, toast gently until golden-brown.
- SKIPPED cooling step → coating may fall off, freeze coated sticks briefly before frying.
Quick Fixes for Mozzarella Sticks
- When oil shimmers and crackles, it’s ready for frying—don’t rush this step.
- Splash a little water into hot oil if it’s not crackling—heat up for a few seconds.
- Patch a burnt breadcrumb coating with fresh crumbs—keep a small bowl nearby for quick fixes.
- DUMPED cheese leaks out during frying? Freeze coated sticks longer, then fry in batches.
- Shield oily splatters by carefully lowering sticks and using a splatter guard—stay safe!
Prep, store, and reheat tips
- Prep the coated mozzarella sticks: Assemble and freeze them for at least 15 minutes to prevent melting during frying, ensuring a crispy exterior.
- Store fried sticks: Keep in an airtight container in the fridge for up to 2 days. Reheat in the oven for best crispness, watching for puffing and bubbling.
- Shelf life: Frozen, coated sticks can be kept up to 1 month in the freezer. Avoid freezer burn by wrapping tightly and using within that time.
- Reheating: Bake at 180°C (355°F) for 5-7 minutes until hot and crispy. Avoid microwave reheating to keep the crunch and gooey cheese intact.
- Sensory notes: Reheated sticks should shimmer with crispness on the outside, and the cheese inside should be melty but not leaking excessively.
Top questions about mozzarella sticks
1. What kind of mozzarella is best?
Use high-moisture mozzarella for that gooey stretch. If it’s too dry, it won’t melt properly inside the coating.
2. Do I need to freeze mozzarella sticks before frying?
Freeze the coated sticks for at least 15 minutes before frying. This prevents the cheese from melting out and keeps the coating intact.
3. How hot should the oil be for frying?
Oil should be around 180°C (355°F). Use a thermometer; it’s the best way to get that perfect crispy shell without burning.
4. How many sticks should I fry at once?
Fry in small batches—around 3-4 sticks at once. Overcrowding drops the oil temperature and makes them soggy.
5. Can I reheat leftover mozzarella sticks?
Serve immediately after frying for the best gooey-cheese experience. Reheat in the oven at 180°C (355°F) if needed.
6. Why did my coating fall off during frying?
If the coating falls off, it’s probably too warm or not chilled enough. Chill coated sticks longer and fry at the right temperature.
7. Can I use different breadcrumbs?
Use panko breadcrumbs for extra crunch. For a flavor boost, toss them with herbs or spices like smoked paprika or garlic powder.
8. Why is my cheese leaking out during frying?
Keep the cheese dry—pat it with paper towels. Excess moisture causes oil splatters and prevents even melting.
9. What oil is best for frying mozzarella sticks?
Use neutral oils like vegetable or canola. They handle high heat well and won’t add unwanted flavors.
10. How can I get a thicker coating?
Make the coating thicker by repeating the egg and breadcrumb dip. This creates a crunchier shell that holds up better.
Making these mozzarella sticks at home isn’t just about the cheese—it’s about the small chaos of frying, the smell of toasted breadcrumbs, and that perfect moment when they’re crispy and gooey. It’s a messy, satisfying process, but totally worth it for that first crispy bite.
In a world of quick snacks, these homemade sticks stand out—they’re nostalgic, flavorful, and just a little rebellious. Plus, they’re a reminder that sometimes, the best comfort food is the simplest one, done with a little extra care and a lot of cheese.

Hi, I’m Emily Carter, the creator and recipe developer behind Salt Strategist. I’m so happy you’re here. This blog is where my love for flavor, creativity, and thoughtful cooking comes together in one beautiful, ever evolving space.


