Chicken tenders are often seen as just a kid-friendly snack, but when you focus on that crispy coating, they become something more. I’ve spent years experimenting with breading techniques, trying to get that perfect crunch that holds up whether you’re dunking in sauce or biting straight through. It’s about elevating a simple piece of chicken into a satisfying texture experience.
What really makes or breaks these tenders is the coating. Not just the flavor, but how it crisps up and stays crispy. I love playing with different spices and breading mixes—sometimes I add a touch of smoked paprika, other times a sprinkle of garlic powder—trying to find that sweet spot where the crunch and flavor dance together. It’s honest work, but it’s always worth it when you get that first crackle under your teeth.
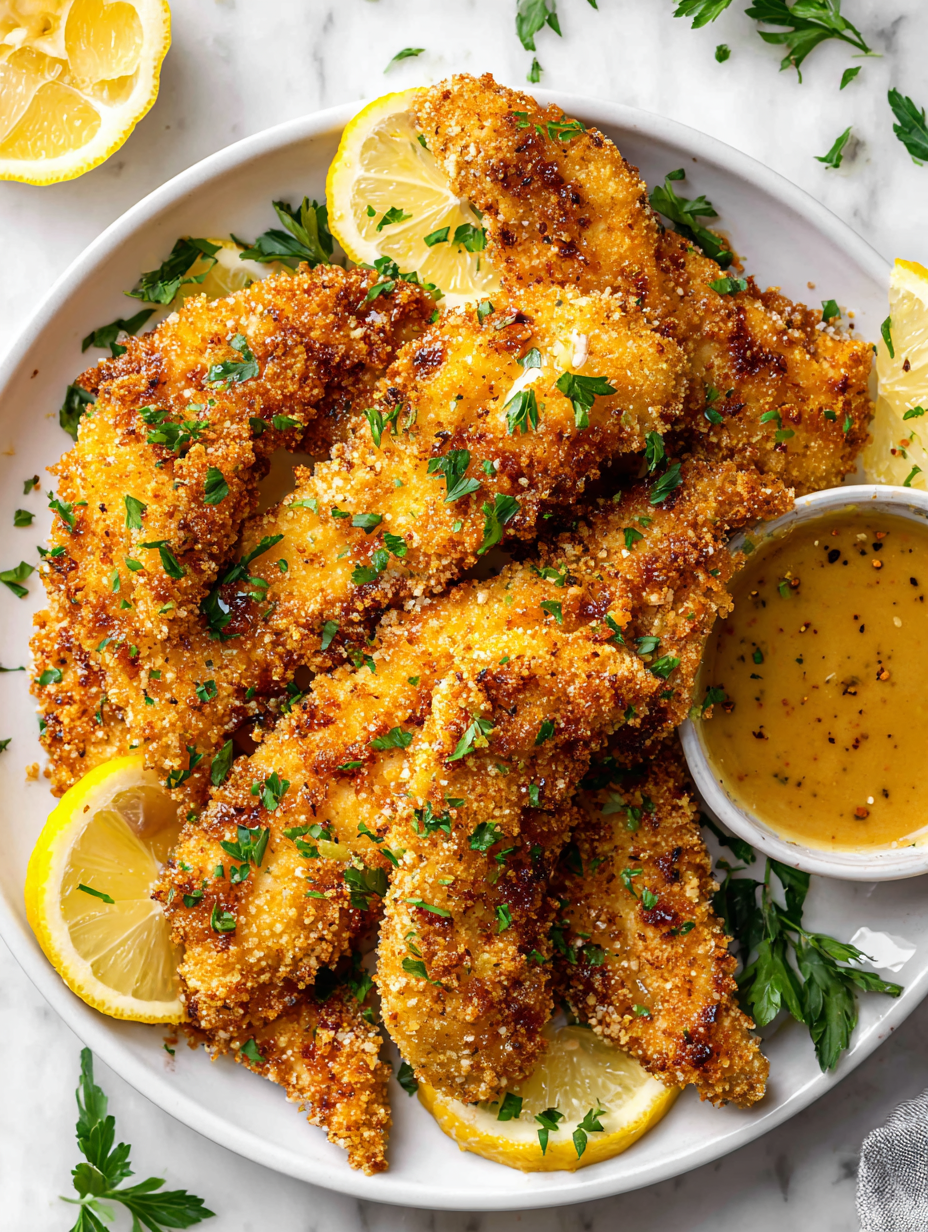
Focusing on the underrated importance of the crispy coating, I explore how different breading techniques and spice blends can elevate simple chicken tenders into a memorable snack or meal, emphasizing texture and flavor balance over the chicken itself.
Crunchy Coating Secrets
- Crunchy coating has always been my obsession—nothing beats that first crackle under my teeth.
- I remember the chaos of trying different spice blends, chasing that perfect balance of heat and aroma.
- This recipe takes me back to late nights experimenting in my tiny kitchen, chasing crispy perfection.
- There’s a strange pride in mastering the breading technique that keeps the tenders juicy inside and crisp outside.
- Honestly, nothing beats the joy of serving these with a side of homemade sauce and hearing the kids cheer.
The story behind this recipe
- This recipe was born out of a late-night snack craving that turned into a quest for the perfect crunch. I wanted something crispy and juicy, but with a coating that stayed crispy even after a few minutes. It’s funny how a simple dish like chicken tenders can become a little experiment in texture, spice, and patience.
- I remember the chaos of trying different breading mixes—some too thick, some too bland—until I finally hit that sweet spot. Now, it’s my go-to for when I want something comforting but with a bit of a crunchy twist. Sharing this feels like passing on a secret I’ve kept tucked away in my kitchen notes.
- heading: ‘The story behind this recipe’
Historical & Trivia Insights
- Chicken tenders as we know them today gained popularity in American diners during the mid-20th century, evolving from simple fried chicken strips served to kids and families alike.
- The term ‘tenders’ was likely coined to emphasize the juicy, tender interior that contrasts with the crispy coating—highlighting texture as the dish’s main appeal.
- In some regions, similar crispy chicken strips predate the commercial versions, often made at home with leftover cooked chicken and simple breading, highlighting its humble origins.
- The rise of fast-food chains in the 1980s and 90s standardized the tenders, but home cooks have long experimented with breading styles, from seasoned flour to panko coatings.
Ingredient breakdown: key components
- Chicken breasts: I prefer skinless, boneless breasts—they stay juicy and cook evenly, giving that tender bite. If you want darker meat, thighs work too, but watch the cooking time to prevent dryness.
- Flour: I use all-purpose flour for the main breading—it’s reliable and gives a light, crisp crust. For a crunchier coat, swap in some cornstarch or rice flour; it shimmers and crackles better during frying.
- Egg wash: A simple beaten egg mixed with a splash of milk helps the coating stick. If you’re gluten-free, try adding a bit of water or buttermilk for adhesion and flavor.
- Breadcrumbs: Panko breadcrumbs are my go-to—they create that airy, crispy exterior. If you want more flavor, toss them with a pinch of smoked paprika or garlic powder before coating.
- Spices and seasonings: Salt, pepper, garlic powder, smoked paprika—they all add depth. A touch of cayenne gives a smoky heat, but go easy if you’re sensitive to spice.
- Oil: Use vegetable or peanut oil for frying—high smoke points and neutral flavor. Keep the oil around 175–180°C (347–356°F) for best crispiness without burning.
- Optional herbs: Fresh thyme or parsley can brighten the flavor if sprinkled in the breading or served as a garnish—adds a fresh, herbal contrast to that crispy bite.
Spotlight on key ingredients
Chicken breasts:
- I prefer skinless, boneless breasts—they stay juicy and cook evenly, giving that tender bite. If you want darker meat, thighs work too, but watch the cooking time to prevent dryness.
- Flour: I use all-purpose flour for the main breading—it’s reliable and gives a light, crisp crust. For a crunchier coat, swap in some cornstarch or rice flour; it shimmers and crackles better during frying.
Breadcrumbs and Oil:
- Breadcrumbs: Panko breadcrumbs are my go-to—they create that airy, crispy exterior. If you want more flavor, toss them with a pinch of smoked paprika or garlic powder before coating.
- Oil: Use vegetable or peanut oil for frying—high smoke points and neutral flavor. Keep the oil around 175–180°C (347–356°F) for best crispiness without burning.
Notes for ingredient swaps
- Dairy-Free: Use almond milk or water instead of milk in the egg wash. It won’t add richness but keeps things cohesive.
- Gluten-Free: Swap all-purpose flour with rice flour or a gluten-free flour blend. Keeps the coating light and crisp, with less chew.
- Low-Sodium: Omit salt from the breading and seasoning. Enhance flavor with herbs or a splash of lemon juice after frying.
- Spice Variations: Add cayenne pepper or chili powder to the breadcrumbs for a smoky heat. Adjust to your spice tolerance.
- Breadcrumbs: Use crushed cornflakes or crispy fried onions for a different crunch and flavor profile. Adds a sweet or savory note.
- Oil Choices: Switch to avocado or sesame oil for a different smoky or nutty flavor. Keep an eye on temperature, these oils have unique smoke points.
- Herb Boost: Mix chopped fresh herbs like parsley or thyme into the breading for a bright, herbal contrast to the crispy coating.
Equipment & Tools
- Shallow dishes: For breading stations—flour, eggs, breadcrumbs.
- Thermometer: To monitor oil temperature for perfect crisping.
- Slotted spoon: To safely remove tenders from hot oil.
- Paper towels: To drain excess oil and keep tenders crispy.
- Large frying pan: Provides ample space for frying in batches.
Step-by-step guide to crispy tenders
- Equipment & Tools: Set up a shallow dish for flour, a bowl for eggs, and a plate with panko breadcrumbs. Use tongs for handling chicken and a thermometer for oil temperature.
- Prepare chicken: Cut breasts into strips, about 1-inch wide. Pat dry with paper towels to ensure crisp coating.
- Season: Lightly season chicken strips with salt and pepper. Set aside for a minute.
- Flour coat: Dredge each piece in flour, shaking off excess. This helps the egg wash stick better.
- Egg wash: Beat eggs with a splash of milk in a bowl. Dip each floured piece into the mixture, coating thoroughly.
- Breadcrumb coating: Roll the chicken in panko, pressing gently to adhere evenly. For extra flavor, toss breadcrumbs with spices beforehand.
- Heat oil: Pour vegetable or peanut oil into a deep skillet or large frying pan, about 2 inches deep. Heat to 180°C (356°F). Use a thermometer to check.
- Fry in batches: Carefully place chicken tenders into hot oil. Do not overcrowd; fry in batches for even crispiness.
- a. Cook for 3-4 minutes per side, until golden brown. Flip carefully with tongs or a slotted spoon.
- b. Check for doneness: the coating should be deep amber, and chicken should be firm and opaque inside.
- c. If oil smokes or chicken browns too quickly, lower heat slightly. If tenders aren’t crisping, increase heat slightly.
- Drain: Remove tenders with a slotted spoon, drain on paper towels to absorb excess oil.
- Resting & Finishing: Let tenders rest for 2 minutes. Serve immediately with your favorite dipping sauce, still hot and crispy.
Let the tenders rest for a couple of minutes on a wire rack or paper towels. Serve hot with a side of dipping sauces or salads for contrast.
How to Know It’s Done
- Golden-brown crust with crackle sound when pressed.
- Internal temperature reaches 75°C (165°F) when checked with a meat probe.
- Chicken feels firm but yields easily when gently pressed, no pink inside.
Crispy Chicken Tenders
Ingredients
Equipment
Method
- Set up your breading station with three shallow dishes: one with flour, one with beaten eggs, and one with panko breadcrumbs mixed with salt, pepper, and garlic powder.
- Pat the chicken strips dry with paper towels to ensure the coating adheres well and crisps up nicely.
- Dredge each chicken strip in the flour, shaking off any excess to create a light, even coating.
- Dip the floured chicken into the beaten eggs, ensuring each piece is thoroughly coated and the excess drips off.
- Roll the egg-coated chicken in the panko breadcrumbs, pressing gently to make sure the crumbs stick evenly and form a thick, crispy layer.
- Heat the oil in a large frying pan over medium-high heat until it reaches 180°C (356°F), confirmed with a thermometer. You should see gentle bubbling around a test breadcrumb.
- Carefully place the coated chicken tenders into the hot oil, working in batches to avoid overcrowding. Fry for about 3-4 minutes per side, until they are golden brown and crispy, with a crackling sound.
- Use a slotted spoon to remove the tenders from the oil and transfer them to a paper towel-lined plate to drain excess oil.
- Repeat with remaining chicken strips, maintaining the oil temperature and frying until all are crispy and cooked through.
- Let the tenders rest for a minute, then serve immediately with your favorite dipping sauces or sides for maximum crunch and flavor.
Tips for perfect crispy tenders
- Bolded mini-head: Use a gentle press when coating to ensure breadcrumbs adhere evenly.
- Bolded mini-head: Keep oil temp steady at 180°C (356°F) for consistent crispiness and color.
- Bolded mini-head: Add a splash of lemon juice to the egg wash for a bright, tangy flavor contrast.
- Bolded mini-head: For extra crunch, double-dip the chicken in egg and breadcrumbs before frying.
- Bolded mini-head: Use tongs instead of a fork to handle chicken—keeps the coating intact and prevents splashes.
- Bolded mini-head: Rest cooked tenders on a wire rack instead of paper towels to avoid sogginess.
- Bolded mini-head: When frying in batches, keep cooked tenders warm in a low oven (around 90°C/200°F) to prevent cooling and sogginess.
Common mistakes and how to fix them
- FORGOT to dry chicken properly → Pat dry for crisp coating adherence.
- DUMPED too much oil → Keep oil at consistent temperature for even frying.
- OVER-TORCHED coating → Maintain 180°C (356°F) for perfect crunch and color.
- MISSED resting time → Let tenders rest 2 minutes to settle juices and crispness.
Quick fixes and pantry swaps
- When oil smokes, splash a little water to calm the heat and stop burning smell.
- If chicken sticks, patch with extra oil and cook on slightly lower heat.
- Splash with lemon juice if coating turns dull or greasy during frying.
- DUMPED too much breading? Rescue with a quick spray of cooking spray and re-crisp in the oven.
- When in doubt, pantry swap panko for crushed cornflakes for extra crunch, smell that sweet crackle.
Prep, store, and reheat tips
- Prep chicken tenders: Cut and season the chicken ahead; keep covered in the fridge for up to 24 hours. The flavors meld and the chicken stays juicy.
- Breading station: Set up flour, egg wash, and breadcrumbs in separate shallow dishes; prep can be done a day in advance, covered and refrigerated.
- Storage: Keep cooked tenders in an airtight container in the fridge for up to 2 days. Reheat in the oven for best crispiness, about 180°C (356°F) for 10 minutes, until hot and crackling.
- Reheating: For leftovers, bake at a moderate temperature to revive crispness. Expect some softness; the coating might not be as crunchy as fresh but still tasty.
- Sensory note: When reheating, you’ll notice a gentle shimmer of oil and a familiar crackle as they reheat, signaling that crispy texture is coming back.
Top questions about chicken tenders
1. Can I use chicken thighs instead of breasts?
Use chicken breasts for a tender, juicy bite, but thighs work well if you prefer darker meat with more flavor.
2. Can I bake these instead of frying?
Yes, you can bake them at 200°C (400°F) for about 20 minutes until golden and cooked through.
3. What temperature should the oil be?
Make sure the oil is at 180°C (356°F) for crisp, golden tenders. Use a thermometer for accuracy.
4. Should I double coat the chicken for extra crispiness?
Yes, you can double-dip for extra crunch. Just be gentle to avoid tearing the coating.
5. What kind of breadcrumbs work best?
Use panko breadcrumbs for a light, airy crunch. For more flavor, toss with spices before coating.
6. How do I reheat leftovers?
Reheat in a 180°C (356°F) oven for about 10 minutes. They’ll regain much of their crispness if not overdone.
7. My tenders aren’t crispy enough, what should I do?
If the coating isn’t crisping properly, increase the oil temperature slightly or fry in smaller batches.
8. What oil should I use for frying?
Use neutral oils like vegetable or peanut to avoid imparting extra flavor and to reach high frying temperatures.
9. How do I keep them crispy after frying?
To prevent sogginess, drain cooked tenders on a wire rack instead of paper towels, which can trap steam.
10. Can I add herbs or spices to the breading?
Add herbs like parsley or thyme to the breadcrumbs for a fresh, aromatic boost that complements the crispy coating.
These chicken tenders are a reminder that simple ingredients can deliver big on flavor and texture. The aroma of crispy coating and the satisfying crunch make them hard to resist, especially when fresh out of the fryer. It’s a dish that’s rooted in comfort but elevated by attention to detail.
Whether you serve them for a quick weeknight dinner or a casual gathering, they bring a sense of homemade pride. Once you master that perfect crunch, you’ll find yourself craving these tenders on repeat, especially when dipped in a good, tangy sauce. They’re honest, messy, and utterly satisfying every time.

Hi, I’m Emily Carter, the creator and recipe developer behind Salt Strategist. I’m so happy you’re here. This blog is where my love for flavor, creativity, and thoughtful cooking comes together in one beautiful, ever evolving space.


