Mini pizzas have a special place in my kitchen, especially when I want a quick, fun meal that sparks creativity. There’s something about customizing each tiny pie with unexpected toppings that feels like a little culinary adventure. It’s a playful way to get everyone involved, whether it’s family dinner or a casual get-together with friends.
I love how these mini pizzas turn simple ingredients into a canvas for flavor and personality. No two are alike, and each bite can surprise you with a burst of cheese, smoky sauce, or a crunchy edge. Plus, they’re forgiving—if one toppings doesn’t turn out perfect, there’s always another to try on the next one.
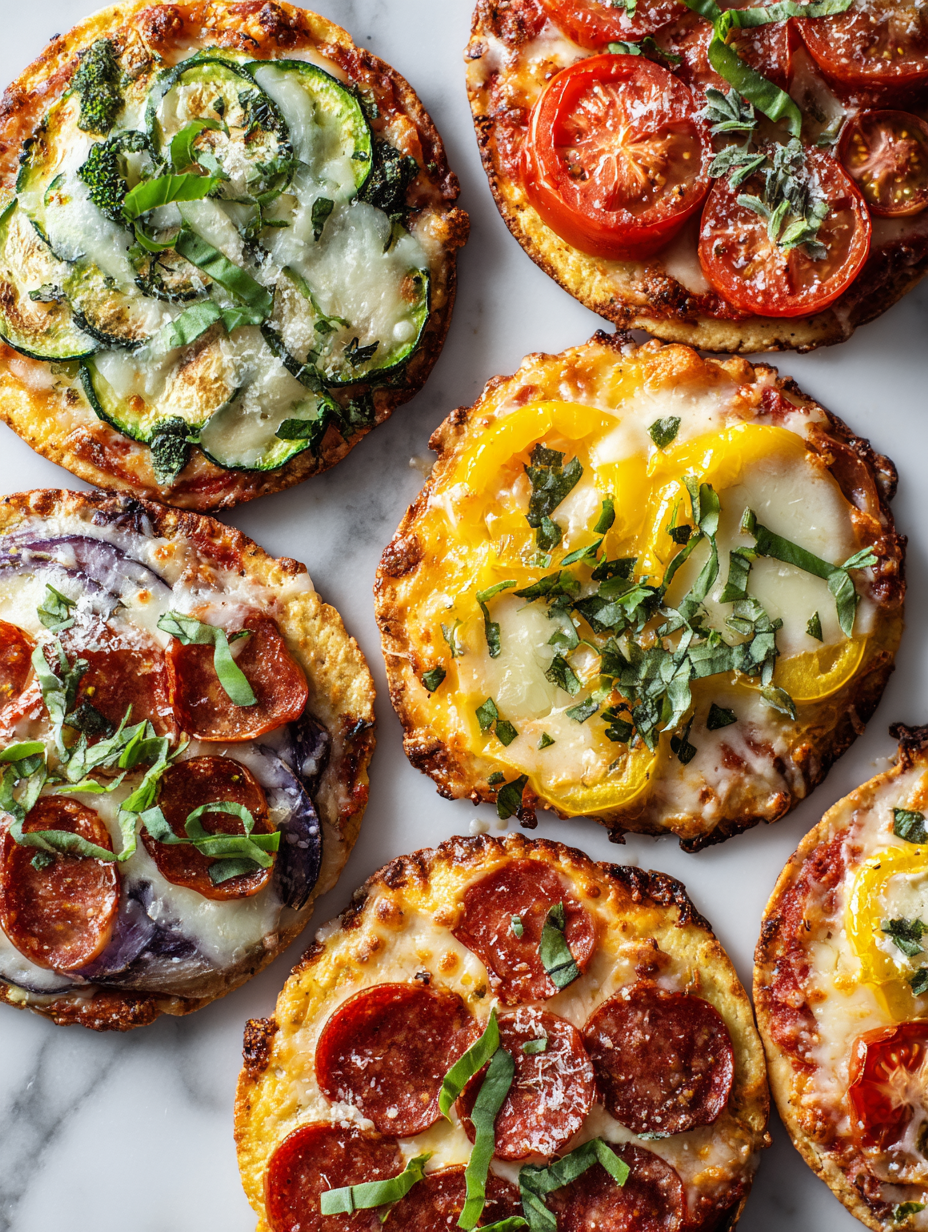
Focusing on the nostalgic joy of creating personalized mini pizzas with unexpected toppings, turning simple ingredients into a playful, interactive meal for family or friends.
Nostalgic bites of childhood
- Creating mini pizzas feels like a tiny rebellion in the kitchen, a chance to be playful with ingredients.
- There’s a nostalgic rush—reminds me of weekend afternoons spent experimenting with toppings and laughter.
- I love the chaos of laying out all the toppings and watching everyone’s eyes light up with choices.
- Nothing beats the pride of pulling out a tray of perfectly golden, bubbling mini pies after a busy day.
- These pizzas bring a simple, honest joy—no fuss, just good food shared with good company.
The story behind this recipe
- Making mini pizzas has always been my way of turning a busy weeknight into a tiny celebration. I remember a night when I was short on time but craving something warm and satisfying, and these little pies came to the rescue. They’re like edible canvases, inviting you to toss on whatever you’ve got left in the fridge and watch it transform into a crispy, cheesy delight.
- What keeps me coming back to this recipe is how it’s become a sort of family ritual—each person picks their own toppings, and I get to see their personalities come out in their choices. It’s imperfect, chaotic, but always delicious. Plus, they’re a perfect way to clear out odds and ends—no waste, just flavor.
- heading
- story_type
Trivia and history of mini pizzas
- Mini pizzas originated in Italy, but their modern playful form gained popularity in American kitchens during the 1980s snack and party scene.
- They’re a clever way to repurpose leftover bread, cheese, and toppings, turning what could be waste into a fun, shareable dish.
- The idea of tiny individual pizzas taps into a long tradition of personalized, small-portion foods that encourage communal eating and customization.
Ingredient breakdown: key components
- All-purpose flour: I use it for the dough—simple, reliable, and gives a nice chewy base. Consider whole wheat for a nuttier flavor and denser bite.
- Yeast: Fresh or active dry works—just proof it until frothy. It’s the magic that makes the crust rise and get that airy, light texture.
- Tomato sauce: I love a smoky, slow-cooked flavor—spread it generously but not too thick, so it doesn’t soggy the crust. You can swap for pesto for a burst of herbaceous richness.
- Cheese: Mozzarella is classic—melts beautifully, creates that gooey, stringy layer. For a sharper tang, sprinkle some Parmesan or a dash of crumbled feta.
- Toppings: Think beyond pepperoni—fennel sausage, roasted veggies, even pineapple if you like a touch of sweetness. Use fresh and pre-cooked ingredients for best results, and don’t overload.
- Olive oil: A drizzle before baking adds a golden finish and helps crisp the crust. Use a good extra virgin for that fruity, peppery aroma that wakes up the whole pizza.
- Herbs & spices: Fresh basil, oregano, or chili flakes—add just before serving. They brighten the flavors and give each mini pizza a personality.
Spotlight on key ingredients
Cheese & Sauce:
- Mozzarella: I love its gooey, stretchy melt—watch it bubble and turn golden in the oven. It’s the cheesy hug that holds each bite together.
- Tomato sauce: Bright, slightly smoky, and fragrant—spread it evenly to avoid soggy spots. Swap for pesto for a herby twist that wakes up the palate.
- Olive oil: A drizzle before baking adds a shimmering finish and helps crisp the crust. Use a good extra virgin for that peppery aroma that energizes each bite.
Notes for ingredient swaps
- Dairy-Free: Use a plant-based cheese—melts less but still adds creaminess and flavor.
- Gluten-Free: Swap regular flour for a gluten-free blend—watch for differences in texture and rise.
- Low-Sodium: Choose low-sodium tomato sauce and cheeses—keeps salt levels in check without losing flavor.
- Vegan: Replace cheese with cashew-based or store-bought vegan cheese—may alter the gooeyness slightly.
- Whole Wheat: Use whole wheat flour for a nuttier flavor and denser crust—be prepared for a slightly chewier bite.
- Extra Veggies: Add more colorful vegetables—bell peppers, mushrooms, or spinach for a fresh, crisp bite.
- Spicy Kick: Incorporate chili flakes or hot sauce—adds heat, so adjust based on spice tolerance.
Equipment & Tools
- Baking tray: To bake the mini pizzas evenly.
- Rolling pin: To flatten the dough into even circles.
- Mixing bowl: To prepare and knead the dough.
- Parchment paper: To prevent sticking and make cleanup easier.
Step-by-step guide to mini pizzas
- Gather your equipment: a small baking tray, rolling pin, and a mixing bowl. Preheat your oven to 220°C (430°F).
- Make the dough: mix 2 cups of all-purpose flour, 1 teaspoon of yeast, a pinch of salt, and 3/4 cup warm water. Knead until smooth, about 5 minutes. Cover and let rise for 15 minutes.
- Divide the dough into 8 equal parts. Roll each piece into a small circle, about 10 cm (4 inches) diameter, on a lightly floured surface.
- Place the dough circles on a baking tray lined with parchment paper. Spread about 1 tablespoon of tomato sauce on each, leaving a small border.
- Add toppings: sprinkle shredded mozzarella, then layer with your chosen ingredients—pepperoni, peppers, olives, or whatever you love. Don’t overload.
- Bake: slide the tray into the oven and bake for 12-15 minutes, until the crust is golden and cheese bubbly and slightly browned.
- Check for doneness: the crust should be crisp at the edges, cheese melted and bubbling, toppings cooked through. If it looks pale, bake a few more minutes.
- Remove from oven: let sit for 2-3 minutes. Finish with a drizzle of olive oil and fresh herbs if desired. Serve hot, straight from the tray.
Let the pizzas rest for 2 minutes after baking to settle. Garnish with herbs or a drizzle of olive oil before serving. Plate directly from the tray for a casual look.
How to Know It’s Done
- Crust is golden and crisp at the edges.
- Cheese is melted and slightly browned.
- Toppings are cooked through and fragrant.
Mini Personalized Pizzas
Ingredients
Equipment
Method
- In a mixing bowl, combine the flour, yeast, and salt. Pour in the warm water and stir until a shaggy dough forms. Knead with your hands or a spoon until smooth and elastic, about 5 minutes. Cover with a clean towel and let rise in a warm spot for 15 minutes until slightly puffy.
- Once the dough has rested, divide it into 8 equal portions. Lightly flour your surface and roll each piece into a small circle about 10 cm (4 inches) in diameter, aiming for an even thickness.
- Place each dough circle on a parchment-lined baking tray. Spread about 1 tablespoon of tomato sauce evenly over each, leaving a small border around the edges. This layer provides the flavorful base for your toppings.
- Sprinkle a generous layer of shredded mozzarella cheese over the sauce on each mini pizza. Add your chosen toppings—pepperoni, vegetables, or meats—layering them neatly without overloading to prevent sogginess.
- Drizzle a little olive oil over each pizza and sprinkle with fresh herbs or chili flakes if desired. This adds flavor and helps the edges crisp up nicely during baking.
- Preheat your oven to 220°C (430°F). Bake the mini pizzas on the middle rack for 12-15 minutes, until the crust is golden and crispy, and the cheese is bubbling and slightly browned.
- Once baked, remove the tray from the oven and let the mini pizzas rest for 2-3 minutes. This allows the toppings to settle and makes them easier to handle.
- Finish with an extra drizzle of olive oil or fresh herbs if desired. Serve hot straight from the tray, enjoying the crispy crust and gooey, cheesy toppings.
Mini Pizza Cooking Tips
- Use a hot oven — 220°C (430°F) ensures a crispy crust and bubbly cheese.
- Roll dough evenly — aim for 10 cm (4 inches) circles for consistent baking.
- Don’t overload toppings — too much moisture will make the crust soggy; spread evenly.
- Add cheese last — helps prevent burning and keeps a gooey, melty layer on top.
- Finish with a drizzle — a splash of olive oil before baking adds shine and flavor.
- Use parchment paper — prevents sticking and makes cleanup smoother.
- Keep an eye near the end — cheese should be golden and bubbling, not burnt.
Common mistakes and how to fix them
- FORGOT to preheat the oven → Always preheat for even cooking and crisp crust.
- DUMPED too much sauce → Use a light hand to prevent soggy bases.
- OVER-TORCHED the cheese → Keep an eye near the end, cheese should be bubbly and golden, not burnt.
- MISSED resting time → Let pizzas sit 2 minutes after baking to prevent toppings from sliding off.
Quick Fixes for Mini Pizzas
- When sauce is too runny → Splash a little cornstarch slurry to thicken quickly.
- If dough sticks → Patch with a dusting of flour and gentle scraping.
- When cheese isn’t melting → Shield with foil and bake 2 more minutes.
- Dumped too much oil → Rescue with paper towels for a less greasy finish.
- When toppings burn → Swap to a higher rack or cover loosely with foil for 5 seconds.
Prep, store, and reheat tips
- Prepare the dough up to 24 hours in advance; wrap tightly and refrigerate for a quick start later. The flavors deepen overnight and the dough becomes easier to handle.
- Assemble the mini pizzas without toppings and freeze on a tray for up to 1 month. Wrap well to prevent freezer burn. Add toppings after thawing for best texture.
- Reheat baked mini pizzas in a 180°C (350°F) oven for 8-10 minutes until cheese is bubbly and crust is crisp again. The aroma of melted cheese and toasted crust will tell you they’re ready.
- Store leftovers in an airtight container in the fridge for up to 2 days. Reheat with a quick broil or oven session to restore crunch and gooey cheese. Expect a slightly softer crust but warm, flavorful bites.
Top questions about mini pizzas
1. How do I prevent the crust from getting soggy?
Use a small spoon or squeeze bottle to spread sauce evenly. It helps prevent sogginess and keeps each bite balanced.
2. What’s the ideal oven temperature and baking time?
Bake at 220°C (430°F) for 12-15 minutes until the cheese is bubbly and the crust is golden.
3. Which cheese works best for mini pizzas?
Use shredded mozzarella for gooey texture. For a sharper flavor, sprinkle some Parmesan or feta on top.
4. How important is preheating?
Preheat your oven thoroughly before baking. A hot oven crisps the crust and melts the cheese perfectly.
5. Can I prepare mini pizzas in advance?
Yes, these can be made ahead. Freeze assembled pizzas on a tray, then bake directly from frozen for convenience.
6. How do I get even mini pizza bases?
Use a rolling pin for even dough circles. Keep the thickness consistent to ensure uniform baking.
7. What’s the best way to layer toppings?
Overloading toppings causes sogginess. Use a light hand, especially with moist ingredients like peppers or tomatoes.
8. How do I fix cheese that’s not melting?
If cheese isn’t melting properly, increase oven time slightly or move the tray closer to the heat source.
9. When should I add herbs and spices?
Add fresh herbs like basil or oregano after baking. They retain their bright flavor and aroma that way.
10. What’s the best way to prevent sticking?
Use parchment paper to prevent sticking and make cleanup easier. It also promotes even baking.
These mini pizzas are more than just a quick snack; they’re a canvas for creativity and nostalgia. The smell of melting cheese and crispy edges can turn any day into a small celebration. Sometimes, it’s the simple pleasures that stick with you, especially when shared around a cluttered kitchen table.
In a world that often moves too fast, these tiny pies remind me to slow down and enjoy the process—messy, flavorful, and totally worth it. Whether it’s a lazy weekend or a spontaneous get-together, they’re a little bit of comfort that’s always ready to serve.

Hi, I’m Emily Carter, the creator and recipe developer behind Salt Strategist. I’m so happy you’re here. This blog is where my love for flavor, creativity, and thoughtful cooking comes together in one beautiful, ever evolving space.


