Vegetable cutlets are one of those humble dishes that hide a surprising amount of nutrition behind their crispy exterior. I’ve always loved how they transform simple, often leftover vegetables into something savory and satisfying, especially on hectic weeknights when I need quick, wholesome comfort food. There’s a certain joy in knowing that each bite packs in greens, grains, and a bit of nostalgia for childhood snacks gone homemade.
Making these cutlets has become my go-to way to sneak more vegetables into my family’s diet without the fuss. I like to think of them as a little secret—crispy bites that feel indulgent but are loaded with fiber, vitamins, and good energy. Plus, the process of shaping, frying, and then flipping them in a hot pan is oddly therapeutic, almost like a mini meditation during busy evenings.
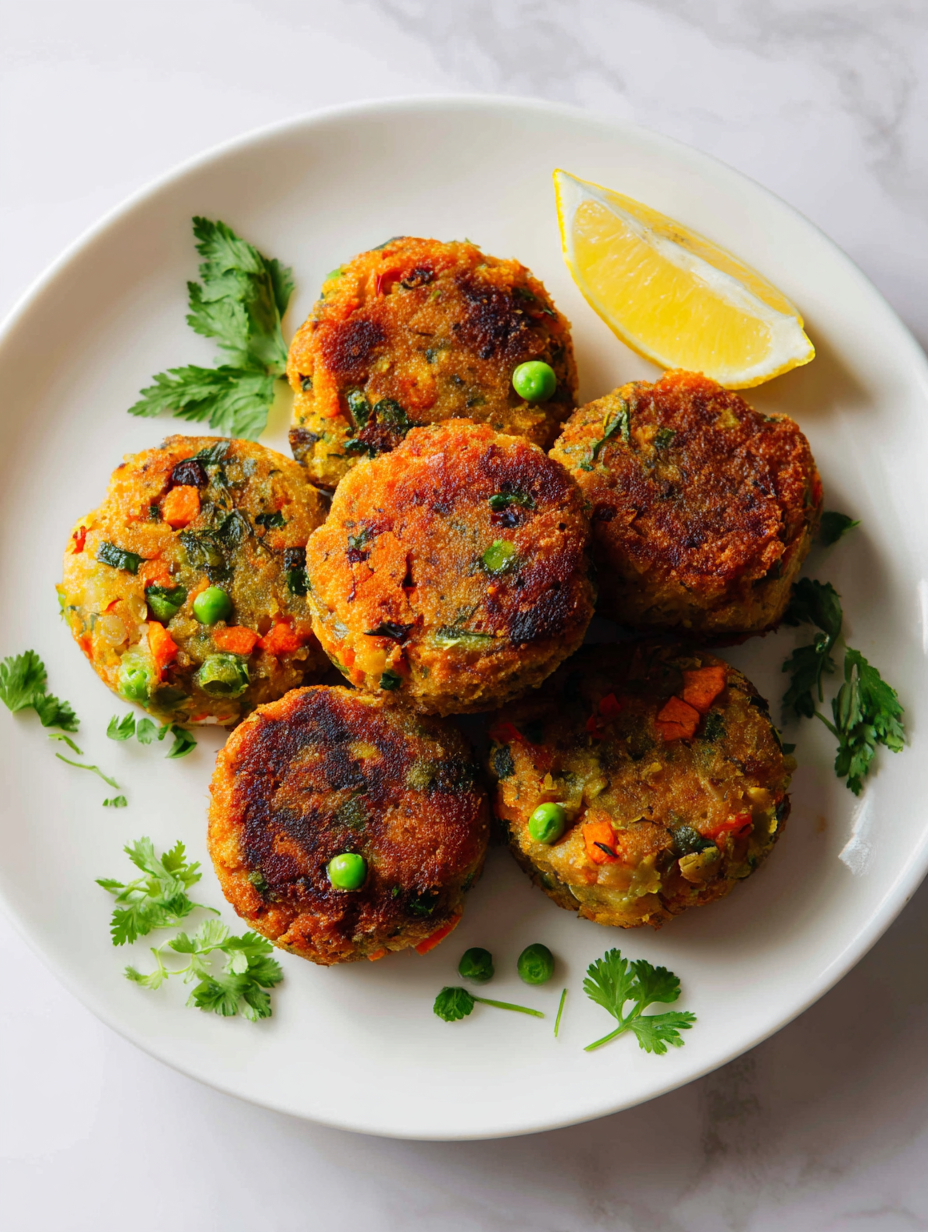
Focusing on the hidden nutritional power of vegetable cutlets, this recipe emphasizes transforming humble, everyday ingredients into a satisfying, wholesome meal that sneaks in extra greens and grains, making it perfect for picky eaters or busy weeknights.
Hidden Nutrition in Crispy Bites
- I love how these cutlets turn humble veggies into crispy, golden bites that disappear fast on the plate.
- There’s a quiet pride in sneaking extra greens into my kids’ meals without any fuss or complaints.
- Nothing beats the smell of frying spices and vegetables filling the kitchen on a busy weeknight.
- I get a nostalgic rush thinking about childhood snacks, but these are way more wholesome and satisfying.
- Frying these up always reminds me how simple ingredients can create something unexpectedly delicious.
The story behind this recipe
- This recipe for vegetable cutlets comes from a night when I was desperately trying to use up a jumble of leftovers in the fridge. I wanted something quick, satisfying, and adaptable—something that could be tweaked based on what I had at hand. The first batch was a bit rough around the edges, but the crispy edges and the fragrant spices kept me coming back for more.
- Over time, I started experimenting with different vegetable combos and spice blends, turning these humble bites into a little canvas of flavor and texture. They became my standby for busy weeknights, potluck appetizers, or even a sneaky way to get my kids to eat more greens. Each batch carries a memory of improvisation, patience, and the joy of turning everyday ingredients into something special.
- heading
Historical & Cultural Roots
- Vegetable cutlets have roots in street food stalls across India, where they serve as hearty, affordable snacks.
- Originally, these crispy bites were a way to use leftover vegetables, turning scraps into satisfying street fare.
- In some regions, they’re tied to festive gatherings, where families gather around street vendors and share hot, spiced cutlets.
- The technique of binding vegetables with spices and frying dates back centuries, blending local flavors with simple cooking methods.
- Today, vegetable cutlets have traveled beyond their humble beginnings, appearing in modern vegetarian menus worldwide.
Key Ingredients Breakdown
- Potatoes: I prefer starchy, fluffy potatoes for a tender base; they give the cutlets a light, airy texture. Swap with sweet potatoes if you want a sweeter touch, but keep an eye on moisture.
- Mixed Vegetables: Carrots, peas, and bell peppers add color and sweetness—I chop them fine so they bind well. Use frozen if fresh isn’t available; just thaw and drain excess moisture.
- Breadcrumbs: They give that satisfying crunch. I like panko for extra crispness, but regular dried bread crumbs work fine. Toast them lightly for a richer flavor if you like.
- Spices: Cumin, coriander, and a hint of garam masala—these bring warmth and depth. Adjust to your taste; more spice if you want a bolder bite, less for a milder flavor.
- Binding Agents: I mash in some cooked lentils or a little gram flour to hold everything together. If the mixture feels too loose, add a touch more flour or breadcrumbs until it holds shape.
- Oil: Use a neutral oil like vegetable or sunflower for frying. The sizzle of the oil tells me when it’s hot enough—around 180°C (350°F). Keep an eye on the temperature to avoid burning.
- Fresh Herbs: Cilantro or parsley brighten the flavor and add a fresh, herbal note. Chop finely and sprinkle just before shaping or serving to keep their vibrant flavor.
Spotlight on key ingredients
Potatoes:
- I prefer starchy, fluffy potatoes for a tender base; they give the cutlets a light, airy texture. Swap with sweet potatoes if you want a sweeter touch, but keep an eye on moisture.
- Mixed Vegetables: Carrots, peas, and bell peppers add color and sweetness—I chop them fine so they bind well. Use frozen if fresh isn’t available; just thaw and drain excess moisture.
Spices:
- Breadcrumbs: They give that satisfying crunch. I like panko for extra crispness, but regular dried bread crumbs work fine. Toast them lightly for a richer flavor if you like.
- Cumin, coriander, and a hint of garam masala—these bring warmth and depth. Adjust to your taste; more spice if you want a bolder bite, less for a milder flavor.
Notes for ingredient swaps
- Dairy-Free: Use mashed avocado or a touch of coconut milk instead of eggs for binding. It adds creaminess but changes the richness slightly.
- Gluten-Free: Replace breadcrumbs with crushed gluten-free crackers or oats for a softer crunch and different texture.
- Vegan: Swap eggs for flaxseed meal mixed with water or use chickpea flour slurry. Expect a slightly denser, earthier bite.
- Low-Sodium: Opt for fresh vegetables and skip added salt, relying on spices and herbs for flavor punch.
- Extra Flavor: Add a dash of smoked paprika or cayenne to spice things up—smoky and fiery notes that wake up the palate.
Equipment & Tools
- Large mixing bowl: Combine ingredients evenly.
- Potato masher or fork: Mash potatoes smoothly.
- Flat plate: Coat cutlets with breadcrumbs.
- Frying pan: Cook cutlets with even heat.
- Spatula: Flip cutlets without breaking.
- Paper towels: Drain excess oil.
Step-by-step Vegetable Cutlets Guide
- Equipment & Tools: Gather a large mixing bowl (for mixing), a potato masher or fork (to mash veggies), a flat plate (for coating), a frying pan (for cooking), a spatula (to flip), and paper towels (to drain).
- Boil potatoes: Peel and chop 2 large potatoes, boil in salted water until very tender, about 15 minutes at 100°C (212°F). Drain and let cool slightly.
- Prepare vegetables: Finely chop 1 cup mixed vegetables (carrots, peas, bell peppers). Sauté in 1 tbsp oil until slightly soft, about 5 minutes. Let cool.
- Mash potatoes: In the mixing bowl, mash the cooled potatoes until smooth and fluffy. Mix in the sautéed vegetables, 1 tsp cumin, 1 tsp coriander, ½ tsp garam masala, and salt to taste.
- Bind the mixture: Add 2 tbsp cooked lentils or gram flour for structure. Mix well. The mixture should hold together when pressed. If too loose, add more flour or breadcrumbs.
- Shape cutlets: Divide mixture into 8 portions. With damp hands, shape each into a flat, round patty about 1.5 cm thick.
- Coat and fry: Lightly coat each cutlet with breadcrumbs. Heat 2-3 tbsp oil in the pan over medium heat (about 180°C/350°F). Fry in batches, 3–4 minutes per side, until golden and crispy.
- Check for doneness: The cutlets should be golden brown, firm but slightly yielding, and fragrant with spices. The edges crackle when ready.
- Rest and serve: Transfer to paper towels to drain excess oil. Rest for 2 minutes before plating. Serve hot with chutney or yogurt.
- Final checks: The cutlets should have a crispy exterior, a tender interior, and a rich aroma. The color should be deep golden, not burnt.
Let the cutlets rest for 2 minutes on a wire rack or paper towels to keep them crispy. Serve immediately with your favorite dips or chutneys.
How to Know It’s Done
- Color: Deep golden brown with crispy edges.
- Texture: Firm but tender inside when pressed gently.
- Appearance: Even coating and no raw spots after frying.
Vegetable Cutlets
Ingredients
Equipment
Method
- Peel and chop the potatoes into small chunks, then boil in salted water until very tender, about 15 minutes. Drain and set aside to cool slightly.
- While the potatoes are boiling, finely chop the mixed vegetables—carrots, peas, and bell peppers—and sauté them in a little oil until slightly soft and fragrant, about 5 minutes. Let them cool.
- Once the potatoes are cool enough to handle, mash them thoroughly with a fork or potato masher until smooth and fluffy.
- Mix the mashed potatoes with the sautéed vegetables in a large bowl. Add cumin, coriander, garam masala, and salt, stirring to combine all the flavors evenly.
- Stir in the cooked lentils or gram flour to help bind the mixture and make it easier to shape. Adjust seasoning if needed.
- Divide the mixture into 8 equal portions. With damp hands, shape each portion into a flat, round patty about 1.5 cm thick.
- Lightly coat each cutlet with breadcrumbs, pressing gently to adhere. Heat oil in a frying pan over medium heat until shimmering, about 180°C (350°F).
- Fry the cutlets in batches, about 3–4 minutes per side, until golden brown and crispy. Use a spatula to flip gently, avoiding breakage.
- Transfer the cooked cutlets to paper towels to drain excess oil. Rest for 2 minutes to firm up the crust.
- Serve the vegetable cutlets hot with chutney, yogurt, or your favorite dipping sauce. Enjoy their crispy exterior and tender, flavorful interior.
Pro Tips for Perfect Cutlets
- Bolded mini-head: Use a gentle hand when shaping the cutlets to keep them even and compact.
- Bolded mini-head: Keep the oil at a steady 180°C (350°F) for uniform frying and crispness.
- Bolded mini-head: Press gently when flipping to avoid breaking the delicate edges.
- Bolded mini-head: Add breadcrumbs gradually to the mixture; it should hold together without being too crumbly.
- Bolded mini-head: Rest the fried cutlets for a couple of minutes to let the flavors settle and the crust firm up.
- Bolded mini-head: If the cutlets brown too quickly, reduce heat slightly to prevent burning while cooking through.
- Bolded mini-head: For extra crunch, double-coat with breadcrumbs—dip, then coat again before frying.
Common mistakes and how to fix them
- FORGOT to preheat oil → ensure oil is hot before frying to prevent sticking.
- DUMPED too much flour → add gradually until mixture holds shape, not crumbly.
- OVER-TORCHED the cutlets → fry on medium heat; adjust if they brown too quickly.
- FAILED to drain excess moisture → pat vegetables dry to avoid soggy cutlets.
Quick Fixes and Pantry Swaps
- When oil shimmers, splash a tiny drop of water—if it crackles, it’s ready.
- Splash a little vinegar or lemon juice to brighten dull flavors quickly.
- Patch over burnt spices with fresh herbs or a squeeze of citrus for freshness.
- Shield soggy cutlets by reheating in a hot, dry skillet for crisping.
- If mixture feels loose, swap with crushed crackers or oats for quick stability.
Prep, store, and reheat tips
- Prepare the vegetable mixture and shape the cutlets a day in advance; keep covered in the fridge for up to 24 hours. The flavors meld overnight, and they fry up even better.
- Store cooked cutlets in an airtight container in the fridge for up to 2 days. Reheat in a hot skillet until crispy, feeling the sizzle and smelling that warm, toasted aroma.
- Freeze uncooked or cooked cutlets for up to 1 month. Wrap tightly to prevent freezer burn. To reheat, bake at 180°C (350°F) or fry directly from frozen until golden and hot inside.
- Reheating will soften the crust slightly; crisp them up again in a hot pan or oven. Expect a gentle crackle and a fragrant, slightly toasted scent when ready.
- For best flavor and texture, consume within the first couple of days after reheating. The cutlets should remain crispy, fragrant, and tender inside—no sogginess allowed.
Top questions about vegetable cutlets
1. Can I bake vegetable cutlets instead of frying?
Yes, you can bake them at 200°C (390°F) for about 20-25 minutes until golden, flipping halfway. They’ll be less crispy but still tasty.
2. My mixture is too sticky, what do I do?
If the mixture feels too loose, add a little more breadcrumbs or gram flour until it holds shape when pressed.
3. Can I use frozen vegetables for this recipe?
Use frozen mixed vegetables; just thaw and drain excess water. Fresh vegetables work best for flavor, but frozen is handy.
4. Can I replace potatoes with sweet potatoes?
Yes, substitute with sweet potatoes for a sweeter flavor and softer texture. Adjust cooking time as needed.
5. What kind of breadcrumbs should I use?
Use panko breadcrumbs for extra crunch, or regular dried crumbs if that’s what you have. Toast them lightly for more flavor.
6. How do I know when the oil is ready?
Ensure oil is hot enough—around 180°C (350°F)—by dropping in a small piece of bread or vegetable. It should sizzle immediately.
7. Should I rest the cutlets before serving?
Rest the cutlets for 2 minutes after frying to firm up the crust. Serve hot with chutney or yogurt.
8. Can I make these in advance?
You can prepare the shaped cutlets ahead, cover, and refrigerate for up to 24 hours before frying.
9. How should I reheat leftover cutlets?
Reheat in a hot skillet for 3-4 minutes until crispy and fragrant. Expect a crackling sound and a warm aroma.
10. What if my cutlets burn during frying?
If the cutlets burn quickly, lower the heat slightly and cook slowly. For extra crispness, double coat with breadcrumbs before frying.
These vegetable cutlets are more than just a quick snack; they’re a way to turn everyday leftovers into something crispy and satisfying. Each batch reminds me how simple ingredients can come alive with a little heat and spice, filling my kitchen with warm, inviting aromas.
In the end, it’s about those small moments—frying, flipping, tasting—that make cooking feel a little more real. They’re perfect for busy nights or whenever I need a veggie boost that’s honest and comforting. No matter how many I make, they never fail to bring a little joy to the table.

Hi, I’m Emily Carter, the creator and recipe developer behind Salt Strategist. I’m so happy you’re here. This blog is where my love for flavor, creativity, and thoughtful cooking comes together in one beautiful, ever evolving space.


