Mini fritters are my secret weapon for turning snack time into a lively, interactive affair. There’s something about shaping tiny bites that invites sharing, makes kids giggle, and sparks spontaneous tasting sessions. The best part? They’re so versatile, you can adapt them to any season or mood, from bright herbs in summer to cozy spices in winter.
I love how these little bites bring people together — whether it’s a quick afternoon snack or a crowd-pleasing appetizer. Each fritter is like a tiny package of flavor, crispy on the outside and tender inside, ready to be dipped or topped with whatever strikes your fancy. It’s honest cooking, simple and unpretentious, but with a little fun woven in.
Focusing on mini fritters as a way to make snack-time more fun and interactive, encouraging sharing and spontaneous bites.
Tiny Bites, Big Smiles
- These tiny fritters remind me of childhood afternoons spent sneaking bites from my grandma’s kitchen counter.
- I feel a rush of pride when I see guests eagerly reaching for seconds, knowing I’ve made something simple yet special.
- Sometimes, the chaos of the kitchen makes me forget how much I love these little bites — but they always bring me back to the moment.
- Cooking these fritters is a small act of joy, a way to turn everyday ingredients into a fun, shared experience.
- There’s a fleeting, almost nostalgic feeling when I hear the crisp crackle as they hit the pan — like a tiny celebration.
The story behind this recipe
- This recipe came about during a messy brunch weekend, when I wanted something quick, satisfying, and fun to make with my kids. We kept dropping spoonfuls into hot oil, giggling at the sizzle and the uneven shapes. It’s become a little tradition now, turning a chaotic morning into a playful cooking session that ends with crispy bites and sticky fingers.
- What I love most is how these fritters transform simple leftovers into something irresistible. It’s a reminder that cooking doesn’t have to be perfect—sometimes, it’s just about improvising, tasting, and tweaking on the fly. These tiny things feel like a small rebellion against the polished, planned meals we often chase.
- story_type
Contextual origin, trivia, or history
- Mini fritters have roots in street food traditions across Asia, where small, crispy snacks are perfect for quick bites.
- Historically, fritters were a way to stretch pantry staples like vegetables and grains during lean times.
- In medieval Europe, small fried snacks similar to fritters were sold at markets as affordable, portable treats.
- The concept of tiny, shareable bites gained popularity in recent years through tapas and small plates movements.
- Many cultures have their own version of fritters—think Indian pakoras, Japanese tempura, or Caribbean accras—each with unique flavors and techniques.
Ingredient breakdown: key components
- All-purpose flour: I like the neutral, slightly nutty flavor it gives—if you want a gluten-free version, try rice flour for a crispier bite.
- Eggs: They help bind everything together, making the fritters tender inside. For a vegan tweak, use mashed chickpeas or silken tofu as a binder.
- Vegetables: I prefer grated zucchini or carrot—keep the moisture in check by squeezing out excess water, or they’ll be too soggy and oily.
- Herbs & spices: Fresh parsley or chives add brightness, but if you’re feeling adventurous, a pinch of smoked paprika gives a subtle smoky kick.
- Oil: Use a neutral oil like canola or sunflower for frying—if you want more flavor, a splash of sesame oil in the batter adds depth, but don’t overdo it.
- Salt & pepper: Adjust generously—these tiny bites need a good seasoning punch to really sing, especially if using bland vegetables.
- Optional cheese: A little grated Parmesan or feta can add richness—if you’re dairy-free, skip it or try nutritional yeast for a cheesy note.
Spotlight on key ingredients
Zucchini:
- I love how the moisture creates a tender bite, but squeezing out excess water is crucial or they turn soggy.
- During frying, it releases a faintly sweet, vegetal aroma that signals it’s time to flip.
- When cooked properly, it stays moist inside, with a slightly shiny, crispy exterior.
All-purpose flour:
- I notice it gives a neutral, slightly nutty smell when sizzling, helping the fritters hold together.
- It reacts with moisture to form a light crust, turning golden within a few minutes of frying.
- When you see the edges darken just a touch, it’s ready to be flipped for even crispness.
Notes for ingredient swaps
- Gluten-Free: Swap all-purpose flour for rice or almond flour. Expect a slightly denser, nuttier fritter.
- Vegan: Replace eggs with mashed chickpeas or silken tofu. The texture will be a tad softer, but still delicious.
- Low-Oil: Use an air fryer instead of frying. Fritters won’t be as crisp but still tasty and a bit healthier.
- Dairy-Free: Skip cheese or use nutritional yeast for a cheesy flavor. Keeps them savory without dairy.
- Herbs & Spices: Fresh herbs like parsley brighten the fritters, but dried herbs work in a pinch—just use less.
- Vegetable Variations: Sweet corn or chopped spinach can replace zucchini or carrots—just adjust moisture if needed.
- Oil for Frying: Use avocado oil for a milder flavor and higher smoke point, especially if frying at higher temps.
Equipment & Tools
- Small mixing bowl: Mix ingredients thoroughly.
- Whisk: Combine batter evenly.
- Tablespoon: Portion batter accurately.
- Non-stick skillet: Fry fritters evenly without sticking.
- Spatula: Flip and remove fritters safely.
Step-by-step guide to mini fritters
- Equipment & Tools: Gather a small mixing bowl, a whisk, a tablespoon, a non-stick skillet, and a spatula. The bowl is for mixing, the skillet for frying, the spatula for turning.
- In the bowl, whisk together 1 cup of all-purpose flour, 1 beaten egg, a pinch of salt, and 1/4 teaspoon of baking powder. Mix until just combined. This forms your batter base.
- Grate 1 cup of zucchini or carrot. Squeeze out excess moisture using a clean cloth or paper towel. Add the grated veg to the batter. Stir well, ensuring even distribution.
- Heat 2 tablespoons of neutral oil (like canola) over medium heat in your skillet. When shimmering, it’s ready. To test, sprinkle a tiny bit of batter — it should sizzle immediately.
- Using a tablespoon, scoop small dollops of batter into the hot oil. Flatten them slightly with the back of the spoon. Cook in batches, leaving space between fritters.
- Fry for 2-3 minutes per side, until golden brown. Keep an eye on the color; if they brown too quickly, lower the heat. The fritters should be crispy on the outside and tender inside.
- Step 6a: Check for doneness by inspecting color and texture. The fritters should be crackly and golden. Use tongs or a spatula to turn if needed.
- Step 6b: If they’re not crisp enough, cook a bit longer until they shimmer with a golden hue and feel firm to the touch.
- Step 6c: If they’re soggy or greasy, let them drain on paper towels and adjust heat if necessary.
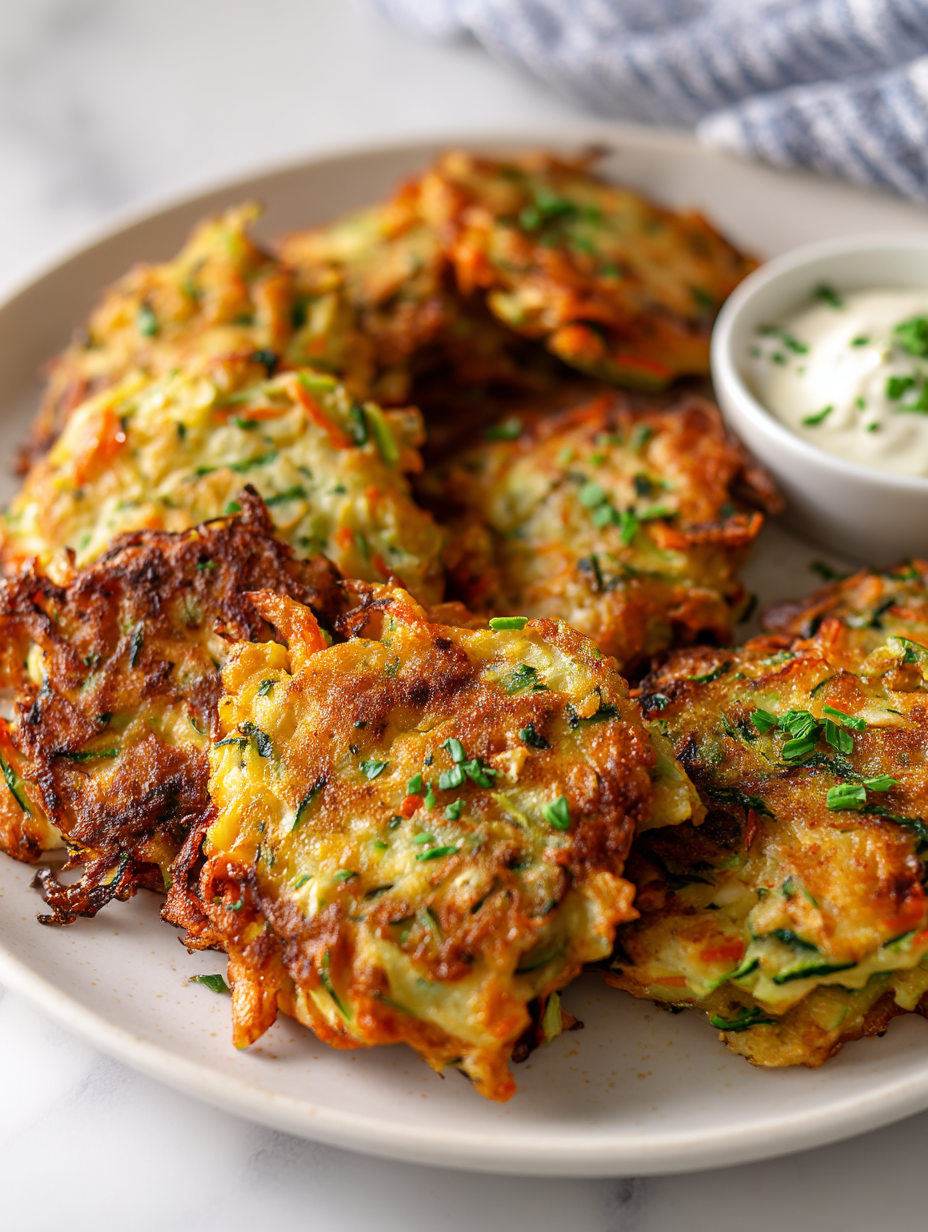
- Remove from skillet, let rest for 1-2 minutes. Serve warm with a dollop of sour cream, yogurt, or your favorite dip. They’re great for snacking or as a side.
- Resting & Finishing: Gently transfer fritters to a plate lined with paper towels. Finish with a sprinkle of sea salt and fresh herbs if desired. Plate and enjoy with your preferred dip.
Let the fritters rest on paper towels for a minute. Finish with a sprinkle of sea salt and herbs. Serve warm with dips or toppings of your choice.
How to Know It’s Done
- Fritters are golden and crispy outside, tender inside.
- Oil crackles softly when batter hits the pan.
- Fritters hold their shape without falling apart.
Mini Vegetable Fritters
Ingredients
Equipment
Method
- Gather a small mixing bowl, a whisk, a tablespoon, a non-stick skillet, and a spatula. Ready your tools before starting.
- In the bowl, whisk together the flour and egg until just combined, creating a thick batter that feels smooth and slightly sticky.
- Fold in the grated vegetables, squeezing out any excess moisture beforehand to prevent sogginess, then stir in chopped herbs and season generously with salt and pepper.
- Heat the neutral oil in your skillet over medium heat until shimmering and just starting to ripple, with a faint scent of warming oil filling the air.
- Using your tablespoon, scoop a small dollop of batter into the hot oil, gently pressing it down to shape a tiny, flat round fritter.
- Fry each fritter for 2-3 minutes on each side, watching for a golden-brown crust and listening for a gentle crackle as they crisp up.
- Use a spatula to carefully flip the fritters once they turn golden and crispy, then cook the other side until similarly browned and firm.
- Remove the cooked fritters and transfer to a paper towel-lined plate to drain excess oil, letting them rest for a minute.
- Repeat the scooping and frying process with the remaining batter, ensuring not to overcrowd the pan for even crispiness.
- Serve the mini fritters warm, topped with fresh herbs or your favorite dips, enjoying their crispy exterior and tender inside.
Pro tips for perfect fritters
- Bolded Mini-Head: Use a gentle touch when mixing the batter to keep it light and airy.
- Bolded Mini-Head: Keep oil at a steady medium heat—too hot and fritters burn, too low and they get greasy.
- Bolded Mini-Head: Scoop batter carefully to maintain uniform size, ensuring even cooking and crisp edges.
- Bolded Mini-Head: When frying, don’t overcrowd the pan—work in batches for the crispiest results.
- Bolded Mini-Head: Use a spatula to gently press down the fritters after placing in oil—helps them cook evenly.
- Bolded Mini-Head: Rest finished fritters on paper towels briefly—this keeps them crispy and prevents sogginess.
- Bolded Mini-Head: For extra crunch, briefly broil the fritters after frying until edges shimmer with golden brown.
Common mistakes and how to fix them
- FORGOT to dry vegetables thoroughly → Soggy fritters. Pat dry and squeeze out excess moisture.
- DUMPED too much oil in pan → Fritters greasy. Use just enough to cover the base thinly.
- OVER-TORCHED when frying at high heat → Burnt flavor. Lower heat once oil shimmers.
- MISSED resting time before serving → Soggy fritters. Rest on paper towels briefly.
Fast fixes for crispy results
- When fritters are soggy, splash a little vinegar into the batter for a tangy lift.
- If oil shimmers excessively, patch with a small splash of cold water to reduce heat.
- DUMPED too much flour? Shake off excess before frying for crisper bites.
- When fritters stick or break, shield with a gentle spatula and cook at lower heat.
- If batter is too thick, open a splash of water or milk to loosen it slightly.
Prep, store, and reheat tips
- Prepare the batter up to a day in advance; keep covered in the fridge to let flavors meld and reduce prep time later, the batter might thicken slightly but stir well before using.
- Cook the fritters in batches, then store in an airtight container lined with paper towels in the fridge for up to 24 hours. Reheat in a hot skillet until crispy, aiming for that crackly exterior and tender inside.
- Fritters are best enjoyed fresh, but leftovers keep well for up to 2 days. Reheat in a 180°C (350°F) oven for 5–7 minutes, watching for that initial shimmer of crispness returning.
- To reheat, avoid the microwave which can make them soggy. Instead, use a skillet or oven to preserve their crunch and aroma, listen for the crackle as they heat up.
- For longer storage, freeze cooked fritters in a single layer, then bag tightly; reheat directly from the freezer, adding a minute or two, until steaming hot and crispy.
Common Questions About Mini Fritters
1. How do I keep fritters crispy?
Use grated vegetables that are well-drained and squeeze out excess moisture to prevent sogginess.
2. How do I know when they’re done frying?
Look for a golden-brown color and a crackling sound when you flip them in the pan.
3. What temperature should I fry at?
Adjust the heat so the oil is shimmering but not smoking; fry at medium heat (~160°C/320°F).
4. Can I make these gluten-free?
You can substitute with gluten-free flours like rice or chickpea flour, but expect a denser texture.
5. Can I use dried herbs instead of fresh?
Fresh herbs like parsley or chives add brightness, but dried herbs can be used in a pinch—use half as much.
6. How do I prep the vegetables?
Squeeze out excess moisture from the grated vegetables to avoid soggy fritters and excessive oil absorption.
7. What if my batter is too thick?
If the batter is too thick, stir in a splash of water or milk to loosen it before frying.
8. How do I flip the fritters without breaking them?
Use a slotted spoon or spatula to turn the fritters gently to prevent breaking.
9. How should I reheat leftovers?
Reheat leftover fritters in a hot skillet for a few minutes until crispy again, avoiding the microwave.
10. How long can I store them?
Fritters are best served immediately, but can be stored in the fridge for up to 24 hours and reheated as suggested.
These tiny fritters are such a simple way to bring a little joy to snack time, especially when you want something interactive and fun. They’re crispy, warm, and just a bit addictive, perfect for sharing around the table or popping in your mouth one after the other.
Plus, they’re flexible—use whatever vegetables you have on hand, tweak the seasonings, and make them your own. It’s honest, unpolished cooking that’s all about the small moments and spontaneous bites that bring people together.

Hi, I’m Emily Carter, the creator and recipe developer behind Salt Strategist. I’m so happy you’re here. This blog is where my love for flavor, creativity, and thoughtful cooking comes together in one beautiful, ever evolving space.


