Cheese pinwheels might seem like just a simple snack, but I’ve always loved how they invite creativity. Swirling in seasonal herbs, spices, or even a touch of zest transforms them into a vibrant, personalized treat. It’s like turning something familiar into a small celebration of flavors every time you bake them.
What I find most satisfying is how forgiving they are—messy dough, loose fillings, no problem. Baking these feels like a quiet act of joy, especially when I see the colorful herbs peek through the golden crust. It’s a little moment of pride, turning simple ingredients into something unexpectedly lively.
This recipe’s real charm is how adaptable it is. You can make it your own with whatever herbs or spices you have on hand, making each batch unique. It’s perfect for a quick brunch, a casual gathering, or just a snack that feels special without fuss.
Focusing on the unexpected joy of customizing cheese pinwheels with seasonal herbs and spices, turning a simple snack into a personalized, vibrant treat that elevates everyday baking.
Unexpected Joy of Customization
- Baking these cheese pinwheels always surprises me how quickly they disappear, especially when I add a dash of chili flakes for that unexpected kick.
- I remember the first time I made them with my grandma’s secret herb mix—such a chaotic kitchen moment, but the aroma was pure comfort.
- There’s something thrilling about watching the cheese ooze out when you cut into a freshly baked pinwheel, like a little burst of joy.
- I love how these pinwheels turn an ordinary afternoon into a small celebration, especially when I swap in seasonal herbs just for fun.
- The best part? When the edges get crispy and golden, releasing that nutty, cheesy smell that makes everyone come running.
The story behind this recipe
- Making cheese pinwheels always takes me back to weekend mornings at my childhood kitchen. My mom would roll out dough with a clumsy, loving hand, the aroma of melting cheese filling the air, promising a simple, satisfying bite ahead. It was our little ritual, a way to turn a basic snack into a moment of togetherness, even if it was just for us. Those memories keep me coming back to this recipe, tweaking it with new herbs or cheeses, always trying to capture that same warm, imperfect charm.
- The beauty of these pinwheels isn’t just in how they taste but how they bring a touch of nostalgia into the kitchen. It’s a recipe that’s forgiving—dough that can be a little sticky, fillings that can be rough around the edges, but still turn out beautifully. Baking them feels like a small act of love, a reminder that simple ingredients, handled with care, can create something delightful.
- heading
- story_type
Contextual origin, trivia, or history
- Cheese pinwheels have roots in European pastry traditions, with variations popping up in French and Eastern European cuisines.
- During wartime, similar simple, portable snacks became popular as quick, comforting treats for busy households.
- The swirling technique to encase cheese and herbs is believed to have originated from rustic bakeries trying to make baking more playful and personalized.
Ingredient breakdown: key components
- Flour: I prefer a light, all-purpose flour for a tender crust, but whole wheat adds a nutty depth if you swap it in.
- Cheese: Sharp cheddar melts beautifully and gives a punch of flavor, yet Gruyère can add a smoky, nutty note if you choose.
- Herbs: Fresh basil or thyme brighten the filling with a vibrant aroma and lively flavor—dried works in a pinch but less punchy.
- Butter: Cold, cubed butter creates flaky layers—if you only have margarine, it’ll still work but won’t be quite as crisp.
- Egg wash: Adds shine and helps the crust turn golden—try milk for a softer finish, or a splash of cream for extra richness.
- Seasonings: A pinch of paprika or chili flakes can spice things up—use sparingly to avoid overpowering the cheese.
- Filling options: Mix in caramelized onions or sautéed mushrooms for richer, more complex bites—just keep the filling balanced.
Spotlight on Key Ingredients
Cheddar cheese:
- I love its sharp, tangy melt that oozes out irresistibly. It’s the backbone of flavor here.
- Cheddar: When melted, it develops a gooey, slightly crispy edge that’s hard to resist. It’s the star that makes these pinwheels special.
Fresh herbs:
- Basil and thyme release vibrant, aromatic oils when baked, filling the kitchen with a lively scent.
- Herbs: They add a bright, fresh note that balances the richness of the cheese, making every bite lively and fragrant.
Notes for ingredient swaps
- Dairy-Free: Swap regular cheese for a plant-based version—won’t melt quite the same but still flavorful.
- Gluten-Free: Use a gluten-free flour blend instead of all-purpose—expect a slightly denser, crumblier crust.
- Vegan: Replace butter with coconut oil or vegan margarine; cheese with a nut-based or vegan cheese alternative.
- Low-Sodium: Choose reduced-salt cheese and skip added salt in dough—flavor will be milder but still tasty.
- Herb Variations: Fresh herbs like dill or parsley can replace basil or thyme—adds a different, vibrant aroma.
- Cheese Types: Switch cheddar for mozzarella for a milder, creamier experience or blue cheese for a bold twist.
- Additional Fillings: Incorporate sautéed spinach or sun-dried tomatoes for extra flavor and texture.
Equipment & Tools
- Rolling pin: To evenly roll out the dough.
- Sharp knife or pizza cutter: To slice the rolled dough cleanly.
- Baking sheet with parchment: To bake the pinwheels evenly without sticking.
- Pastry brush: To apply the egg wash for a golden finish.
Step-by-step guide to cheese pinwheels
- Equipment & Tools: Gather a rolling pin (for even dough), a sharp knife or pizza cutter (for clean cuts), a baking sheet (preferably lined with parchment), and a pastry brush (for egg wash).
- Prepare the dough: Mix 2 cups all-purpose flour, 1/2 teaspoon salt, and 1/2 teaspoon sugar in a bowl. Cut in 1/2 cup cold butter until crumbly. Add 1/4 cup cold water gradually, mixing until dough just comes together. Form into a flat disk, wrap in plastic, and chill for 30 minutes at 4°C (39°F).
- Preheat oven: Set to 200°C (390°F). Line your baking sheet with parchment paper.
- Roll out dough: Lightly flour your surface and rolling pin. Roll chilled dough into a rectangle about 0.5cm (1/4 inch) thick, roughly 30x20cm (12×8 inches).
- Spread filling: Mix 1 cup grated sharp cheddar with 2 tablespoons chopped fresh herbs (basil, thyme). Evenly sprinkle over the dough, leaving about 1cm (1/2 inch) border.
- Roll and cut: Starting from the long edge, carefully roll the dough into a tight log. Use a sharp knife or pizza cutter to slice into 2cm (3/4 inch) thick pinwheels. Place cut side up on the prepared baking sheet, spacing about 2cm (1 inch) apart.
- Egg wash: Beat 1 egg with a teaspoon of water. Brush over the top of each pinwheel for a shiny, golden finish.
- Bake: Place in the oven for 15–20 minutes. Check at 15 minutes — the edges should be golden and crispy, cheese bubbling slightly.
- Cooling & resting: Remove from oven and let sit for 5 minutes. They firm up as they cool, making them easier to handle.
- Serve: Arrange on a platter, drizzle with a tiny bit of spicy honey if you like, or just enjoy warm.
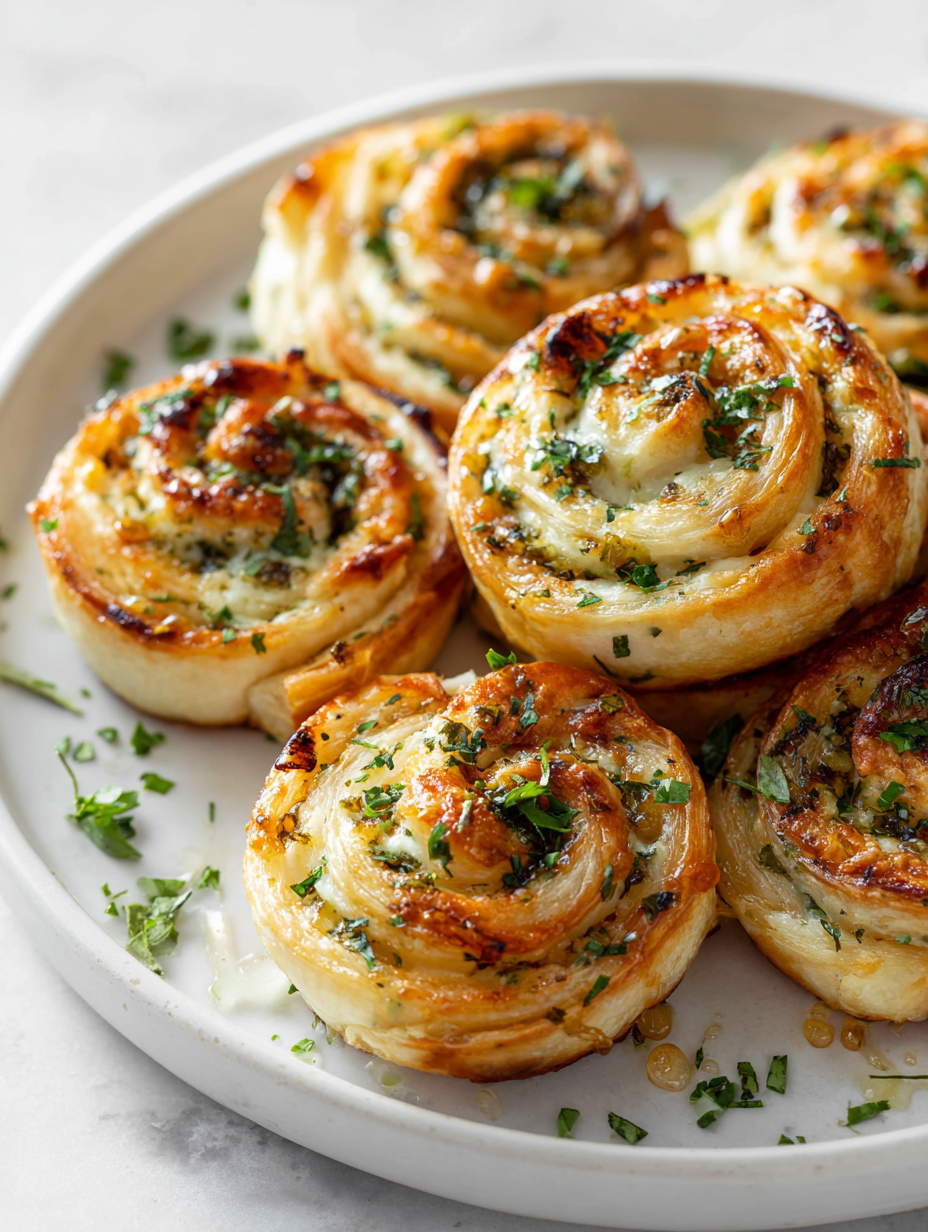
Let the baked pinwheels rest for 5 minutes. Serve warm or at room temperature for best flavor and texture. Arrange on a plate with a sprinkle of herbs if desired.
How to Know It’s Done
- Cheese is melted and bubbly, edges are golden.
- Dough is flaky and crisp at the edges.
- Pinwheels hold their shape without spreading or collapsing.
Herb-Infused Cheese Pinwheels
Ingredients
Equipment
Method
- In a large mixing bowl, combine flour, salt, and sugar. Add the cold, cubed butter and use your fingers or a pastry cutter to work it in until the mixture resembles coarse crumbs.
- Gradually pour in the cold water, stirring gently until the dough begins to come together. Knead lightly on a floured surface until smooth, then flatten into a disk, wrap in plastic wrap, and chill in the fridge for about 30 minutes.
- Preheat your oven to 200°C (390°F). Line a baking sheet with parchment paper and set aside.
- On a lightly floured surface, roll out the chilled dough into a rectangle about 0.5cm (1/4 inch) thick, roughly 30x20cm (12x8 inches).
- Mix the grated cheese with chopped herbs and evenly sprinkle the mixture over the surface of the dough, leaving about 1cm (1/2 inch) border around the edges.
- Starting from the long edge, carefully roll the dough into a tight log, ensuring the filling stays inside. Use a sharp knife or pizza cutter to slice the roll into 2cm (3/4 inch) thick rounds.
- Place the pinwheels cut side up on the prepared baking sheet, spacing them about 2cm (1 inch) apart. Beat the egg and brush it over the tops of each pinwheel for a glossy, golden finish.
- Bake in the preheated oven for 15–20 minutes, until the edges are golden brown and cheese is bubbling. Keep an eye on them after 15 minutes to prevent over-browning.
- Remove the pinwheels from the oven and let them rest for about 5 minutes. The cheese will set slightly, making them easier to handle and enjoy.
- Serve the pinwheels warm or at room temperature, arranging them on a platter. They’re crispy, cheesy, and bursting with herb flavor — perfect for sharing!
Notes
Pro tips for perfect pinwheels
- Chill the dough: Cold dough is easier to roll out without sticking or tearing, making your pinwheels look tidy.
- Even filling spread: Use an offset spatula to distribute cheese and herbs smoothly, for uniform bites and neat slices.
- Roll tight: Keep the dough firm but not too tight—snug rolls hold their shape during slicing and baking.
- Brush generously: Apply egg wash liberally for a shiny, golden crust that’s irresistible and crispy at the edges.
- Slice carefully: Use a sharp, serrated knife and a gentle sawing motion to get clean, even rounds without squashing the filling.
- Bake until golden: Check at 15 minutes—edges should be crisp, cheese bubbling, and the aroma rich and cheesy.
- Rest before serving: Let the pinwheels sit for 5 minutes post-baking—this helps them set and makes for easier eating.
Common mistakes and how to fix them
- FORGOT to check oven temperature—make sure it’s exactly 200°C (390°F).
- DUMPED filling ingredients—spread evenly to prevent uneven baking and cheese oozing out.
- OVER-TORCHED edges—cover with foil if edges brown too quickly after 15 minutes.
- FAILED to chill dough—chill for at least 30 minutes, or it will be sticky and hard to roll.
Quick fixes and pantry swaps
- If cheese isn’t melting smoothly, splash a tiny bit of milk to loosen it.
- When dough cracks, patch with small bits of cold, crumbled dough and re-roll gently.
- Splash cold water on the filling if it’s too dry and crumbly before spreading.
- Patch torn dough edges with scraps and gently press to seal for even baking.
- Shield edges with foil if they brown too quickly, keeping the centers from burning.
Prep, store, and reheat tips
- Prep the assembled pinwheels up to 24 hours in advance by wrapping them tightly in plastic wrap and refrigerating. They stay fresh and retain their flavor, but the cheese may firm up slightly.
- Store baked pinwheels in an airtight container in the fridge for up to 3 days. Reheat in a 180°C (350°F) oven for 8-10 minutes until warm and crispy, with melted cheese aroma returning.
- Freezing baked or unbaked pinwheels is possible for up to 1 month. Wrap well to prevent freezer burn. Reheat directly from frozen, adding extra minutes for thorough warming.
- Reheating will soften the crust initially, but baking briefly at 180°C (350°F) restores crispiness. Watch for the cheese to bubble and smell invitingly cheesy again.
- For best sensory experience, reheat until the edges are golden and the filling is steaming, with cheese gooey and herbs aromatic.
Top questions about cheese pinwheels
1. How do I get clean slices?
Use a sharp knife and cut slowly to avoid squishing the rolls and losing the filling. Chill the rolled dough to make slicing easier and neater.
2. How do I know when they are done?
Preheat your oven to 200°C (390°F). Bake until the edges are golden, cheese is bubbling, and the aroma is rich and cheesy, about 15-20 minutes.
3. Any tips for flaky crust?
Keep the dough chilled before rolling and slicing. Use cold butter in the dough for flakiness. Don’t skip the egg wash for a shiny, crispy crust.
4. Can I change the cheese or herbs?
Feel free to swap the cheese for mozzarella, gouda, or even a spicy pepper jack for different flavor profiles. Fresh herbs can be replaced with dried ones, but fresh gives a brighter aroma.
5. Can I prepare these in advance?
Yes, these pinwheels can be made ahead. Wrap tightly in plastic and refrigerate for up to 24 hours before baking or reheat baked ones in the oven at 180°C (350°F) for 8-10 minutes.
6. What if the dough tears or cheese leaks?
If the dough cracks when rolling, patch with small pieces of cold dough and re-roll gently. If cheese leaks out, chill the slices before baking to help them hold shape.
7. How do I get a shiny crust?
Use a pastry brush to apply egg wash evenly for a glossy, golden finish. Keep the oven at 200°C (390°F) and bake until crispy and cheese is bubbling.
8. How do I reheat without losing crunch?
When reheating, cover the pinwheels with foil to prevent burning the edges. Reheat until cheese is melty and the crust is crisp again, about 8-10 minutes at 180°C (350°F).
9. Can I add other fillings?
Feel free to add sautéed veggies like spinach or sun-dried tomatoes for extra flavor. Use herbs like dill or parsley for a different aromatic twist.
10. What if they brown or cheese doesn’t melt?
If the edges brown too fast, shield them with foil during baking. If the cheese isn’t melting well, splash a tiny bit of milk over the filling before baking.
Baking these cheese pinwheels is a small, honest act—simple ingredients, warm oven, familiar smells. They remind me that comfort can be quick to make and deeply satisfying, especially when you tweak herbs or cheeses based on what’s in the fridge.
In the end, it’s about sharing something homemade, even if it’s just with yourself. A little flaky, cheesy, herb-laced bite — that’s enough to make any day feel a bit more special.

Hi, I’m Emily Carter, the creator and recipe developer behind Salt Strategist. I’m so happy you’re here. This blog is where my love for flavor, creativity, and thoughtful cooking comes together in one beautiful, ever evolving space.


