There’s something about cheese balls that takes me straight back to childhood snack times—crisp on the outside, gooey and warm inside. I’ve always loved how simple ingredients transform into something so addictive, but lately I’ve been playing with baking instead of frying to get that perfect crunch without all the oil mess.
This baked version feels a little more grown-up, a little more controlled, but it still has that nostalgic punch. Plus, baking it means you can make them ahead, serve warm or at room temp, and they stay crispy longer. It’s like capturing a fleeting childhood memory and making it part of your adult table—no fuss, just real comfort.
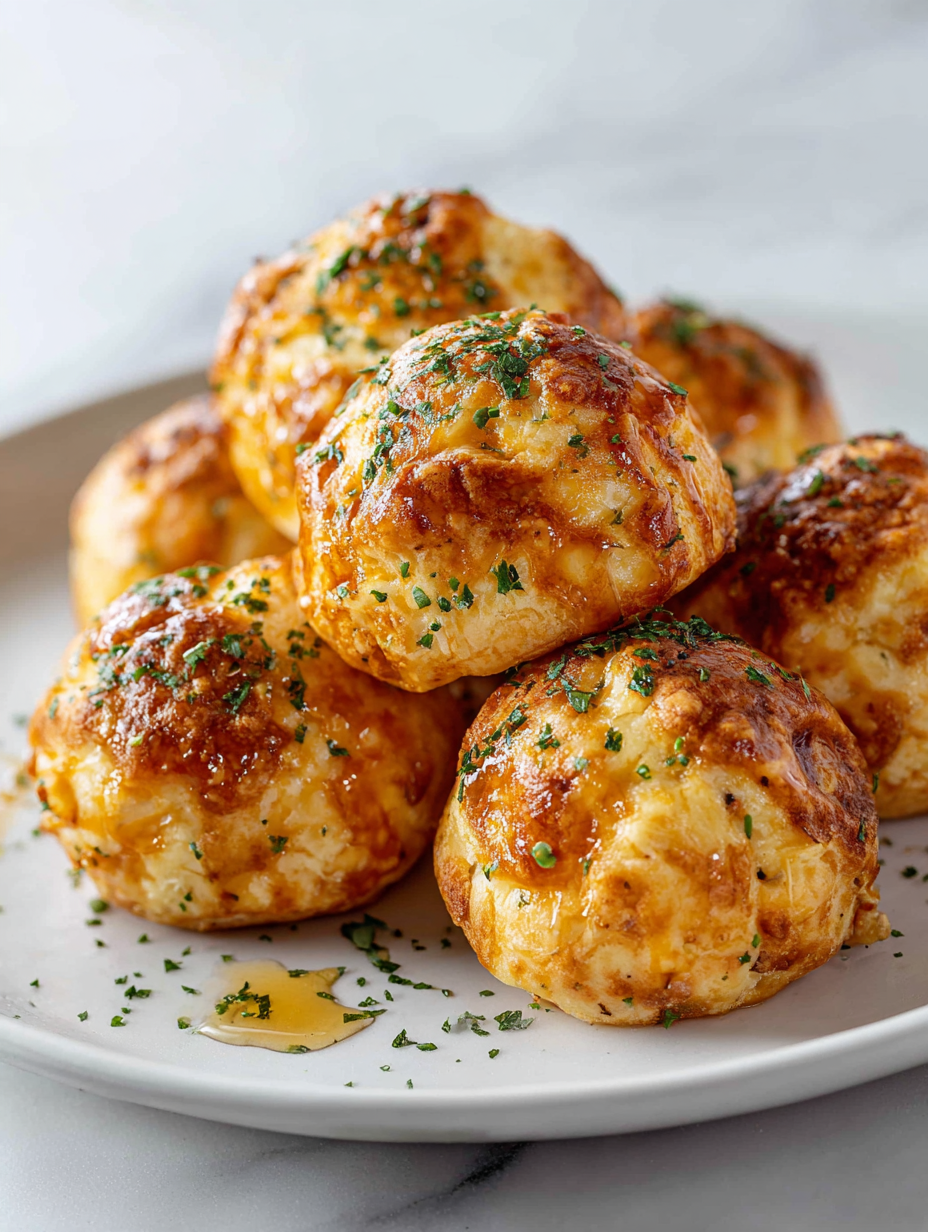
Focusing on the nostalgic comfort of childhood snacks, transforming simple cheese balls into a sophisticated baked appetizer that balances gooey richness with a crispy exterior.
The story behind this recipe
- This recipe came together after a chaotic family dinner, where I realized how much everyone craved that familiar cheesy bite but without the greasy mess. I started experimenting with baking, thinking maybe I could keep that gooey interior but get rid of the oil-fried crust.
- One night, I mixed up some cheeses, rolled them into balls, and baked them until golden and crispy. The smell of melted cheese and toasted breadcrumbs filled the kitchen, instantly transporting me back to cozy childhood afternoons.
- Now, these baked cheese balls are my go-to for quick snacks or unexpected guests. They’re simple enough to whip up in a flash but hold onto that nostalgic, cheesy warmth that makes everyone smile.
Key ingredients explained
- Cream cheese: I like it soft and tangy, giving that gooey center. If yours is firm, soften in the microwave for 10 seconds before mixing.
- Cheddar cheese: Sharp and flavorful, it melts beautifully. For a milder bite, swap in Monterey Jack or mozzarella, but stay away from processed singles—they won’t melt right.
- Breadcrumbs: I prefer panko for extra crunch, especially if you double coat. For a softer bite, use regular fine breadcrumbs but keep an eye on crispiness.
- Egg: It binds everything smoothly and helps the coating stick. If you’re out, a splash of milk works, but the balls might be a tad less cohesive.
- Herbs & spices: A pinch of smoked paprika or chopped chives gives a subtle flavor boost. Skip if you want pure cheese, but it’ll add a lovely aroma during baking.
- Salt & pepper: I add just enough to enhance the cheese’s flavor. Be cautious with salted cheese—taste first before adding extra salt.
- Oil spray: A light mist before baking ensures a crispy exterior. If you don’t have spray, brush gently with melted butter or a neutral oil for shine and crunch.
Spotlight on key ingredients
Cheese (Cream and Cheddar):
- Cream cheese: I like it soft and tangy, giving that gooey center. If yours is firm, soften in the microwave for 10 seconds before mixing.
- Cheddar cheese: Sharp and flavorful, it melts beautifully. For a milder bite, swap in Monterey Jack or mozzarella, but stay away from processed singles—they won’t melt right.
- Breadcrumbs: I prefer panko for extra crunch, especially if you double coat. For a softer bite, use regular fine breadcrumbs but keep an eye on crispiness.
Herbs & Spices:
- Breadcrumbs: I prefer panko for that extra crunch, especially if you double coat. It crackles more and adds heft to the exterior.
- Egg: It acts as the glue that holds everything together. If you’re out, a splash of milk works—just expect a slightly softer ball.
- Chopped chives or smoked paprika add aroma and a subtle flavor layer, but skip if you want pure cheesy simplicity.
Notes for ingredient swaps
- Dairy-Free: Swap cream cheese for blended silken tofu or cashew cheese. Will lose that rich, gooey texture, but still satisfy that cheesy craving.
- Cheddar Cheese: Use Monterey Jack, mozzarella, or Gruyère for different flavor profiles. Mild to sharp, but always melts well.
- Breadcrumbs: Panko gives extra crunch; regular fine breadcrumbs soften the crust. For gluten-free, try crushed rice crackers or gluten-free panko.
- Egg: Flaxseed or chia seed gel can replace egg as a binder. Expect a slightly denser, less crisp exterior.
- Herbs & Spices: Fresh parsley, dill, or basil can replace chives. Adds freshness but alters the flavor punch.
- Oil Spray: Use melted butter, neutral oil, or even bacon fat for different crispiness and aroma. Just a light mist needed.
- Seasoning: Skip or reduce salt if your cheese is very salty. Always taste before adding extra salt or spices.
Equipment & Tools
- Baking sheet: To hold and bake the cheese balls evenly.
- Parchment paper or silicone mat: Prevent sticking and make cleanup easier.
- Mixing bowls: Combine ingredients thoroughly.
- Cookie scoop or tablespoon: Portion out uniform cheese balls.
- Pastry brush or spray bottle: Apply oil for crispiness.
- Oven thermometer (optional): Ensure accurate baking temperature.
Step-by-step guide to baking cheese balls
- Preheat your oven to 200°C (400°F). Line a baking sheet with parchment paper or a silicone mat for easy cleanup.
- In a mixing bowl, combine 8 oz cream cheese (softened), 1 cup shredded sharp cheddar, and 1/4 cup chopped chives. Mix until smooth and well blended.
- Add 1 cup panko breadcrumbs, 1 beaten egg, 1/2 teaspoon smoked paprika, salt, and pepper to the cheese mixture. Stir thoroughly to incorporate everything evenly.
- Using a tablespoon or small cookie scoop, portion out the cheese mixture and roll into small balls about 1 inch in diameter. Keep hands damp if the mixture sticks.
- Place the cheese balls on the prepared baking sheet, spacing them about 1.5 inches apart. Lightly spray or brush with neutral oil or melted butter for extra crispness.
- Bake in the preheated oven for 15-17 minutes, or until they are golden brown and crispy on the outside. The cheese inside should be gooey and slightly melted.
- Once baked, remove from oven and let rest for 3-5 minutes. They will firm up slightly as they cool. Serve warm with your favorite dipping sauce.
Let the baked cheese balls rest on the tray for 3-5 minutes to set slightly. Serve warm, either plain or with a tangy dip. They’re best enjoyed fresh but can be stored in an airtight container for up to 2 days. Reheat in the oven at 180°C (350°F) for 5-7 minutes until crispy again.
How to Know It’s Done
- Golden, crispy exterior with a slight sheen from the oil spray.
- Cheese inside is gooey and begins to bubble when gently pressed.
- Outer surface is firm and lightly browned, not burnt or undercooked.
Baked Cheese Balls
Ingredients
Equipment
Method
- Preheat your oven to 200°C (400°F) and line a baking sheet with parchment paper or a silicone mat.
- In a large mixing bowl, combine the softened cream cheese, shredded cheddar, and chopped chives. Mix with a spoon or spatula until smooth and creamy, with a speckled green appearance from the herbs.
- Add the panko breadcrumbs, beaten egg, smoked paprika, and a pinch of salt and pepper to the cheese mixture. Stir thoroughly until everything is evenly incorporated and the mixture is slightly sticky but manageable.
- Using a tablespoon or cookie scoop, portion out the mixture and gently roll into small, 1-inch diameter balls. Keep your hands damp if the mixture sticks to prevent tearing.
- Place the cheese balls on the prepared baking sheet, spacing them about 1.5 inches apart. Lightly spray or brush the tops with oil for extra crispness and shine.
- Bake in the preheated oven for 15-17 minutes, or until the exterior is golden brown and crispy. The cheese inside should be melting and slightly bubbling once you remove them from the oven.
- Once out of the oven, let the cheese balls rest for 3-5 minutes. They will firm up slightly and are perfect for serving warm, with a crispy exterior and gooey interior.
- Serve these cheesy baked bites immediately with your favorite dipping sauce or enjoy them plain for a nostalgic treat.
Notes
Pro tips for perfect baked cheese balls
- Bolded mini-head: Use a gentle hand when rolling the cheese mixture to keep the balls uniform and avoid cracks.
- Bolded mini-head: Keep your hands damp while shaping to prevent the mixture from sticking and tearing.
- Bolded mini-head: Spray or brush the cheese balls lightly with oil before baking for a shiny, crispy crust.
- Bolded mini-head: Bake at 200°C (400°F) and watch for a golden-brown exterior—overbaking can dry out the cheese inside.
- Bolded mini-head: Rest the baked cheese balls for a few minutes to allow the cheese to set, making them easier to serve without falling apart.
- Bolded mini-head: If the exterior is browning too quickly, lower the oven temperature slightly or tent with foil.
- Bolded mini-head: Serve immediately for the best gooey texture, but they also reheat well in a hot oven or air fryer for crispness.
Common mistakes and how to fix them
- FORGOT to preheat the oven → Always preheat to ensure even cooking.
- DUMPED cheese mixture too quickly → Chill mixture before rolling for better shape.
- OVER-TORCHED exterior → Reduce baking time or temp if exterior darkens too fast.
- MISSED resting time → Rest cheese balls 3-5 minutes to set before serving.
Quick fixes and pantry swaps
- When cheese mixture is too sticky → Chill for 10 minutes before shaping.
- If cheese balls crack during baking → Dampen hands when rolling for better cohesion.
- Splash a little water if breadcrumbs aren’t sticking well to the cheese balls.
- Patch over any over-browned spots with a quick brush of melted butter.
- Shield cheese balls from direct heat if tops brown unevenly—tent with foil for even baking.
Prep, store, and reheat tips
- You can prepare the cheese mixture a day in advance; keep it covered in the fridge for up to 24 hours. The flavors meld together, and the mixture firms up, making rolling easier.
- Shape the cheese balls ahead of time and store them on a baking sheet lined with parchment, covered tightly with plastic wrap, for up to 4 hours. They’ll stay fresh and maintain their shape.
- Baked cheese balls are best enjoyed fresh, but if needed, store leftovers in an airtight container in the fridge for up to 2 days. The exterior may soften slightly, losing some crispness.
- Reheat in a 180°C (350°F) oven for 5-7 minutes until the exterior crisps up again and the cheese is warm and gooey. Keep an eye on them to prevent over-baking, which can dry out the cheese.
Top questions about baked cheese balls
1. How do I keep the mixture from sticking?
Use cold or chilled cheese mixture to make shaping easier and prevent sticking. Warm cheese tends to be sticky and harder to handle.
2. What oven temperature and time should I use?
Bake at 200°C (400°F) for about 15-17 minutes until golden and crispy. Check at 15 minutes to prevent burning.
3. How do I know when they’re done?
Look for a golden-brown exterior with a slight sheen from oil spray. The cheese inside should be soft and gooey when gently pressed.
4. Can I use different breadcrumbs?
For a softer crust, use regular breadcrumbs and skip double coating. For crunchier, panko breadcrumbs are best.
5. Can I freeze these cheese balls?
Yes, you can freeze shaped cheese balls for up to 2 months. Bake directly from frozen, adding a few extra minutes.
6. Are there dairy-free options?
Substitute with vegan cheese or cashew cheese for dairy-free options. Texture may be slightly less gooey but still tasty.
7. Can I customize the flavor?
Use shredded mozzarella for a milder flavor or smoked paprika for a smoky kick. Adjust herbs and spices to taste.
8. What if they burn or over-brown?
If the exterior over-browns, tent with foil and lower the oven temperature slightly. Keep an eye on them near the end.
9. How should I reheat leftovers?
Serve immediately for best gooey texture. Reheat in a hot oven or air fryer for 5-7 minutes to restore crispness.
10. Can I make these in advance?
Yes, you can prepare the mixture and shape the balls a few hours ahead. Keep covered in the fridge until baking.
These baked cheese balls remind me of lazy weekend afternoons, where the smell of melted cheese and toasted breadcrumbs fills the kitchen. They’re a comfort snack that’s simple enough for a weekday but special enough to serve to friends. Honestly, once you get the hang of shaping and baking them, they become a go-to for any last-minute gathering.
There’s something satisfying about creating something cheesy and crispy without all the oil. It’s a small, imperfect joy—crunching into that warm, gooey center—making every bite worth the effort. And in times like these, that nostalgic crunch feels just right.

Hi, I’m Emily Carter, the creator and recipe developer behind Salt Strategist. I’m so happy you’re here. This blog is where my love for flavor, creativity, and thoughtful cooking comes together in one beautiful, ever evolving space.


