When you think of cheese crackers, it’s easy to stick with the usual salty, cheesy flavor. But what if you could customize that flavor profile to suit your mood or the season? I started experimenting with adding unexpected spice blends and herbs into the dough, turning a simple snack into something more personal—almost gourmet, really.
These baked cheese crackers aren’t just a quick treat; they’re a canvas for your culinary curiosity. A pinch of smoked paprika here, a dash of thyme there, and suddenly your crackers go from ordinary to extraordinary. It’s satisfying to see how small tweaks can totally transform this humble snack into a flavor adventure.
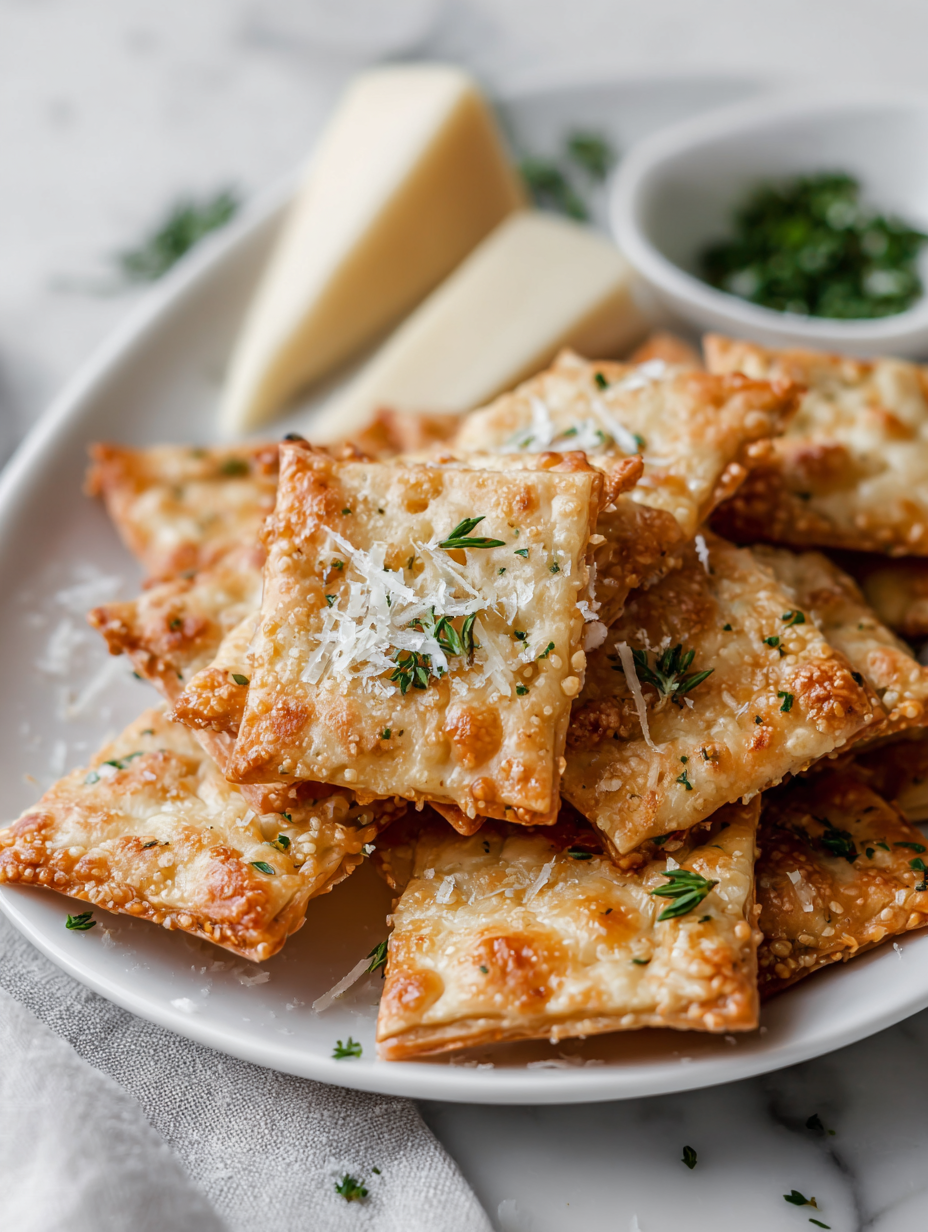
Plus, they bake up crispy and golden, with that irresistible cheesy aroma filling the kitchen. It’s easy to make a batch ahead, and they stay fresh enough to keep on hand for when cravings strike. Honestly, they’ve become a favorite for casual get-togethers or just a cozy afternoon snack—customizable, fun, and totally delicious.
Focusing on customizing the flavor profile of baked cheese crackers by experimenting with unexpected spice blends and herbs, turning a simple snack into a personalized, gourmet treat.
The story behind this recipe
- I remember the first time I made baked cheese crackers—my kids’ eyes lit up when that warm, cheesy aroma filled the kitchen. It was one of those spontaneous moments where I realized how a simple snack could turn into a little family ritual. Now, I keep a batch in the jar just to remind myself that good things come from humble ingredients and a bit of patience.
- It all started because I was tired of store-bought snacks that tasted bland and overly processed. I wanted something I could tweak, something customizable. That’s how I began experimenting with different cheeses and spice blends, trying to find that perfect crispy, cheesy bite that’s just a little bit unexpected.
- heading: The inspiration behind this recipe
Key Ingredients Breakdown
- Cheddar cheese: I love the sharp, nutty flavor it adds—use a good block, grate it fresh for the best melt and taste. Skip pre-shredded to avoid additives that can affect texture.
- Butter: I rely on cold, unsalted butter for a tender, flaky dough—don’t soften it too much, or the crackers won’t crisp up properly. A faint buttery scent signals it’s ready to mix.
- Flour: All-purpose works fine, but I sometimes swap in whole wheat for nuttiness. Keep the flour cold, and don’t overmix to keep the crackers tender and flaky.
- Spices & herbs: A pinch of smoked paprika or thyme can turn simple into sophisticated. Fresh herbs are great, but dried are more concentrated—use sparingly. Mix into the dough evenly.
- Egg wash: Just a beaten egg brushed on before baking gives a lovely golden top and crunch—don’t skip it, or you’ll miss that shiny finish. Add a splash of water if you want a lighter sheen.
- Salt: I prefer fine sea salt for even seasoning—adjust to your taste. Too much can overpower, but just enough enhances the cheese and butter flavor beautifully.
- Optional add-ins: Finely chopped nuts or seeds can add texture—toss them in lightly, and consider a light press into the dough before baking for even distribution.
Spotlight on key ingredients
Cheddar cheese:
- I love the sharp, nutty flavor it adds—use a good block, grate it fresh for the best melt and taste. Skip pre-shredded to avoid additives that can affect texture.
- Butter: I rely on cold, unsalted butter for a tender, flaky dough—don’t soften it too much, or the crackers won’t crisp up properly. A faint buttery scent signals it’s ready to mix.
- Flour: All-purpose works fine, but I sometimes swap in whole wheat for nuttiness. Keep the flour cold, and don’t overmix to keep the crackers tender and flaky.
Notes for ingredient swaps
- Dairy-Free: Swap the cheese for a dairy-free alternative like nutritional yeast or a nut-based cheese. Expect a milder, slightly nuttier flavor.
- Gluten-Free: Use a gluten-free all-purpose flour blend. The texture might be a bit crumblier, but still tasty and crisp.
- Vegan: Replace butter with a plant-based margarine or coconut oil. Cheese can be swapped for vegan cheese shreds for a similar melt and flavor.
- Cheese Varieties: Swap cheddar for Gruyère or Parmesan for a different flavor profile—sharp, nutty, or umami-rich.
- Herbs & Spices: Use fresh herbs instead of dried, but cut the amount in half to prevent overpowering. Smoked paprika can be swapped with cayenne for heat.
- Salt: Use sea salt or Himalayan pink salt for a subtler, mineral-rich saltiness. Adjust to taste, especially if using salty cheese.
- Add-ins: Mix in chopped nuts, seeds, or even bits of cooked bacon before baking for extra texture and flavor.
Equipment & Tools
- Baking sheet: To bake the crackers evenly.
- Rolling pin: To roll out the dough uniformly.
- Sharp knife or cookie cutter: To cut the crackers into shapes.
- Parchment paper: To prevent sticking and promote easy cleanup.
- Wire rack: To cool the crackers evenly.
Step-by-step guide to baked cheese crackers
- Preheat your oven to 180°C (350°F). Gather a baking sheet, rolling pin, and a sharp knife or pizza cutter. Chill your butter and cheese beforehand to keep the dough firm and manageable.
- In a large mixing bowl, combine 1 1/2 cups all-purpose flour, 1/2 teaspoon salt, and any dry herbs or spices you want to infuse into the crackers. Mix well.
- Grate 1 cup of sharp cheddar cheese directly into the flour mixture. Use a coarse grater to get good, flaky bits that melt nicely during baking.
- Cut 1/2 cup cold unsalted butter into small cubes. Add to the dry ingredients. Using your fingertips or a pastry cutter, work the butter into the flour until the mixture resembles coarse crumbs. The texture should be pebble-like, not too smooth.
- Add the grated cheese to the mixture. Mix gently to distribute evenly. Then, pour in 2-3 tablespoons of cold water, one tablespoon at a time, just until the dough comes together when pressed. Avoid overworking to keep crackers tender.
- Turn the dough onto a lightly floured surface. Pat into a flat disk, about 1 inch thick. Wrap in plastic wrap and chill in the fridge for at least 30 minutes. This helps relax the gluten and makes rolling easier.
- Once chilled, roll out the dough to about 1/8 inch thickness. Use a floured rolling pin to prevent sticking. Cut into strips or shapes with a sharp knife or cookie cutter. Place on a parchment-lined baking sheet, spacing them slightly apart.
- Brush the tops lightly with a beaten egg for a glossy, golden finish. Optionally, sprinkle a pinch of extra salt or herbs on top. Bake for 12-15 minutes, or until edges are golden brown and crackers are crisp.
- During baking, keep an eye on the colour. If edges darken too quickly, tent with foil. If crackers aren’t crisp after cooling, return to oven for a few minutes but watch closely to prevent burning.
- Remove from oven and let the crackers cool on a wire rack for at least 10 minutes. They’ll firm up as they cool, becoming satisfyingly crunchy without being brittle. Break any large pieces apart if needed.
- Enjoy once cooled, or store in an airtight container for up to a week. They’re best when fresh but can be reheated briefly in a 150°C (300°F) oven for a few minutes if needed.
Let the baked crackers cool on a wire rack for at least 10 minutes. Serve once cooled and crispy. Store in an airtight container at room temperature for up to a week.
How to Know It’s Done
- Crackers turn a deep golden color and feel firm to the touch.
- Edges are crisp and crackle when broken or bitten.
- Cheese aroma is rich and inviting, with no raw flour scent.
Gourmet Customizable Cheese Crackers
Ingredients
Equipment
Method
- In a large mixing bowl, whisk together the flour, salt, smoked paprika, and thyme to evenly distribute the spices.
- Grate the fresh cheddar cheese directly into the dry mixture, using a coarse grater to ensure good melt and flavor.
- Add the cold, cubed butter to the bowl. Using your fingertips or a pastry cutter, work the butter into the flour mixture until it resembles coarse crumbs with pea-sized bits.
- Pour in 2 tablespoons of cold water, then gently mix with a fork or spatula. Add more water a teaspoon at a time until the dough just comes together when pressed.
- Turn the dough onto a lightly floured surface and press it into a flat disk. Wrap snugly in plastic wrap and refrigerate for at least 30 minutes to relax the gluten and firm up the butter.
- Preheat your oven to 180°C (350°F). Line a baking sheet with parchment paper. Remove the dough from the fridge and roll it out to about 1/8 inch thick with a floured rolling pin.
- Use a sharp knife or cookie cutter to cut the dough into your desired shapes — rectangles, squares, or circles — and transfer them to the prepared baking sheet, spacing them evenly.
- Brush the tops of the crackers lightly with the beaten egg to give them a shiny, golden finish. If desired, sprinkle a tiny pinch of extra salt or herbs on top.
- Bake in the preheated oven for 12-15 minutes, or until the edges are golden brown and the crackers are crispy. Keep an eye on them to prevent over-browning.
- Once baked, remove the crackers from the oven and transfer to a wire rack. Let them cool for at least 10 minutes—they will firm up as they cool and become irresistibly crunchy.
- Enjoy your gourmet cheese crackers plain, or serve with dips. Store leftovers in an airtight container for up to a week to keep them crisp and flavorful.
Pro tips for perfect baked cheese crackers
- & Even: Use a fine grater for cheese to ensure it melts evenly into the dough, avoiding clumps.
- Cold Touch: Keep your butter and water ice-cold to create a flaky, tender texture in the crackers.
- Thin & Uniform: Roll the dough to an even 1/8 inch thickness for consistent crispness across all crackers.
- Color Clue: Watch for a deep golden hue and a crackling sound when cooled for perfect doneness.
- Egg Glaze: Brushing with beaten egg before baking gives a glossy, crisp, and visually appealing top.
- Shape & Space: Cut crackers into uniform shapes and space them well on the baking sheet for even baking.
- Cooling Time: Let crackers cool fully on a wire rack; they crisp up as they lose residual heat.
Common mistakes and how to fix them
- FORGOT to chill butter: Keep it cold to achieve flaky, tender crackers. Use cold butter straight from the fridge.
- DUMPED too much water: Add water gradually until dough just comes together. Too wet makes crackers chewy.
- OVER-TORCHED edges: Keep an eye on baking time. Remove when edges are golden and crackers feel firm.
- SKIPPED egg wash: Brushing with egg gives a shiny, golden top. Don’t skip for that crisp, appealing finish.
Quick fixes and pantry swaps
- When dough feels sticky, splash a little more flour and knead lightly.
- If crackers turn out pale, bump up baking time or increase oven temperature slightly.
- Dumped too much salt? Rinse the cheese briefly and reduce added salt next time.
- Over-torched edges? Shield with foil and lower oven temp for a quicker rescue.
- heading:
Prep, store, and reheat tips
- Prep the dough up to 24 hours in advance, wrap tightly, and refrigerate for easier rolling later. The flavors meld nicely overnight.
- Store baked crackers in an airtight container at room temperature for up to a week. Keep them dry to maintain crispness.
- For longer storage, freeze the crackers in a sealed bag for up to a month. They may lose some freshness, but still good for snacking.
- Reheat in a 150°C (300°F) oven for 3-5 minutes until warm and crispy, watching for a gentle crackle as they heat up. Do not microwave, or they’ll soften.
Top questions about baked cheese crackers
1. Can I use pre-shredded cheese?
Use freshly grated cheddar for the best melt and flavor. Pre-shredded often has additives that can affect texture.
2. Can I make these vegan?
Yes, swap the butter for a plant-based margarine or coconut oil. The flavor might be slightly different, but they’ll still turn out crispy.
3. How do I know when they’re done?
Bake until the edges are golden and crackle when you press them. They should feel firm and smell cheesy and toasty.
4. Should I chill the dough?
Chill the dough for at least 30 minutes before rolling. This makes it easier to handle and helps keep the crackers crisp.
5. How should I cut the crackers?
Use a sharp knife or cookie cutter for clean shapes. Uniform shapes bake evenly and look prettier.
6. How long do they stay fresh?
Store in an airtight container at room temperature for up to a week. Keep away from moisture for maximum crunch.
7. Can I reheat them?
Reheat in a 150°C (300°F) oven for 3–5 minutes until warm and crispy. Avoid microwaving, or they’ll turn soft.
8. Can I customize the spices?
Add herbs like thyme or smoked paprika to the dough for extra flavor. Dried herbs work well and are easy to mix in.
9. Why is cold butter important?
Use cold butter and water during mixing to create a flaky, tender texture that crisps up during baking.
10. What if they don’t brown enough?
If crackers turn out pale, bake a few minutes longer or increase the oven temperature slightly. Keep an eye on them to prevent burning.
Making these baked cheese crackers has become a little ritual in my kitchen, especially when I want something savory and satisfying without much fuss. There’s something about the smell of melted cheese and toasted spices that instantly lifts the mood, even on the busiest days.
They’re simple enough to whip up in a pinch but special enough to serve for a casual get-together or just a quiet evening snack. Once cooled, they stay crisp and inviting, ready to be enjoyed whenever the craving hits.

Hi, I’m Emily Carter, the creator and recipe developer behind Salt Strategist. I’m so happy you’re here. This blog is where my love for flavor, creativity, and thoughtful cooking comes together in one beautiful, ever evolving space.


