Baking mushroom caps might seem straightforward, but it’s a quiet way to really let their earthy, umami richness shine. No fuss, no fussing with a bunch of ingredients—just the mushrooms and a little seasoning, roasted until smoky and tender. It’s one of those recipes that feels almost meditative in its simplicity, yet delivers a surprisingly deep flavor.
I started baking them when I was looking for a way to enjoy mushrooms without masking their natural flavor with too much cheese or heavy sauces. There’s a kind of honesty in this method—each mushroom becomes a little smoky, juicy, and just a touch chewy. Plus, they work as a snack, a side, or even a main if you pile them high on a plate.
If you’re after a way to elevate your mushroom game without complicated prep or fuss, this baked mushroom caps recipe might just sneak into your regular rotation. It’s a method that respects the mushroom’s integrity, turning what could be mundane into something that’s both satisfying and a little bit special.
Choosing to bake mushroom caps as a way to highlight their natural umami and earthy flavor, rather than just stuffing or sautéing, transforms this humble ingredient into a centerpiece that’s simple, smoky, and deeply satisfying.
The story behind this recipe
- I first started baking mushroom caps on a whim, looking for a way to really let their natural earthiness come through without overpowering it. There’s something honest about roasting them whole, letting their juices mingle with a smoky edge from the oven. It’s a simple act, but it feels like coaxing out a secret every time.
- One winter evening, I was tired and craving something warm but not heavy. I tossed some mushrooms in the oven, and as the smell of roasting caps filled the kitchen—deep, smoky, a little nutty—I remembered why I love this method. It’s a bit like giving mushrooms a moment to shine on their own, without much fuss.
- heading: ‘The story behind this recipe’
Key ingredients for perfect baked caps
- Mushroom caps: I choose large, firm caps with a smooth surface—these hold up well and develop a smoky, juicy interior when baked. Skip wrinkled or soft ones if you want a cleaner finish.
- Olive oil: I like a good extra virgin splash—shiny and fragrant—because it helps the caps caramelize and adds a rich, fruity aroma. Use less if you prefer a lighter touch, but don’t skip it.
- Garlic: I finely mince fresh garlic for that punch of aroma—when roasted, it turns sweet and mellow. Crush it slightly before chopping to release more flavor, or skip if you’re sensitive to garlic’s bite.
- Salt & pepper: I season generously—coarse sea salt, freshly cracked black pepper—these bring out the mushroom’s earthy depth. Adjust to taste, but don’t skimp on the salt for flavor contrast.
- Herbs: I use thyme or rosemary—fresh if I have, dry if not—adding a subtle, fragrant layer. Sprinkle over before roasting for a burst of herbal brightness or skip if you want pure mushroom flavor.
- Optional toppings: I sometimes add a sprinkle of grated Parmesan or a dollop of sour cream after baking—these add creaminess or umami, but the mushroom’s natural flavor should always be the star. Feel free to skip or customize.
- Lemon juice: Just a squeeze after roasting—brightens everything and cuts through the earthiness. Use fresh lemon for that zing, or skip if you prefer a milder profile.
Spotlight on key ingredients
Mushroom caps:
- I choose large, firm caps with a smooth surface—these hold up well and develop a smoky, juicy interior when baked. Skip wrinkled or soft ones if you want a cleaner finish.
- Olive oil: I like a good extra virgin splash—shiny and fragrant—because it helps the caps caramelize and adds a rich, fruity aroma. Use less if you prefer a lighter touch, but don’t skip it.
- Garlic: I finely mince fresh garlic for that punch of aroma—when roasted, it turns sweet and mellow. Crush it slightly before chopping to release more flavor, or skip if you’re sensitive to garlic’s bite.
Olive oil:
- I like a good extra virgin splash—shiny and fragrant—because it helps the caps caramelize and adds a rich, fruity aroma. Use less if you prefer a lighter touch, but don’t skip it.
- Garlic: I finely mince fresh garlic for that punch of aroma—when roasted, it turns sweet and mellow. Crush it slightly before chopping to release more flavor, or skip if you’re sensitive to garlic’s bite.
Notes for ingredient swaps
- Dairy-Free: Use nutritional yeast or a sprinkle of toasted sesame seeds instead of cheese for a savory boost, keeping it vegan and nutty.
- Oil Options: Swap olive oil for avocado or grapeseed oil to alter the flavor profile; both have higher smoke points and subtle taste differences.
- Herbs: Fresh thyme can be replaced with rosemary or sage for a more pungent, woody aroma that stands out during roasting.
- Salt: Sea salt can be swapped with smoked salt for a deeper, smoky flavor—perfect if you want an extra smoky punch.
- Garlic: Roast garlic instead of raw for a mellow, sweet undertone—skip raw garlic if you prefer a milder, less pungent taste.
Equipment & Tools
- Baking tray: Holds the mushroom caps during roasting
- Parchment paper: Prevents sticking and makes cleanup easier
- Small bowl: Mixes the oil, garlic, herbs, and seasonings
- Basting brush or spoon: Evenly coats the mushrooms with seasoned oil
- Oven: Provides the heat for roasting
Step-by-step guide to baked caps
- Preheat your oven to 200°C (400°F). Use a baking tray lined with parchment for easy cleanup.
- Clean the mushroom caps gently with a damp cloth. Remove stems if you prefer, but I leave them for extra flavor.
- In a small bowl, mix olive oil, minced garlic, salt, pepper, and chopped herbs. Whisk together until combined.
- Use a brush or spoon to evenly coat the mushroom caps with the seasoned oil mixture. Focus on the gills and edges.
- Arrange the caps upside down on the baking tray, spacing them apart so they roast evenly. Bake for 15-20 minutes.
- Check for doneness: the caps should look slightly shriveled, the edges golden, and smell earthy with garlic aroma.
- If the tops look pale, give them a quick broil for 1-2 minutes until slightly charred and smoky. Watch closely to avoid burning.
- Remove from oven and let rest for 3-5 minutes. Drizzle with lemon juice if desired for brightness.
- Serve warm, topped with a sprinkle of fresh herbs or grated cheese for extra richness.
Let the mushrooms rest for 3-5 minutes to settle their juices. Finish with a squeeze of lemon, a sprinkle of herbs, or cheese before serving. Serve warm on a platter or directly from the tray.
How to Know It’s Done
- Caps are golden and slightly shriveled at the edges.
- The mushroom juices are bubbling faintly and smell fragrant.
- The caps feel tender but firm when gently pressed.
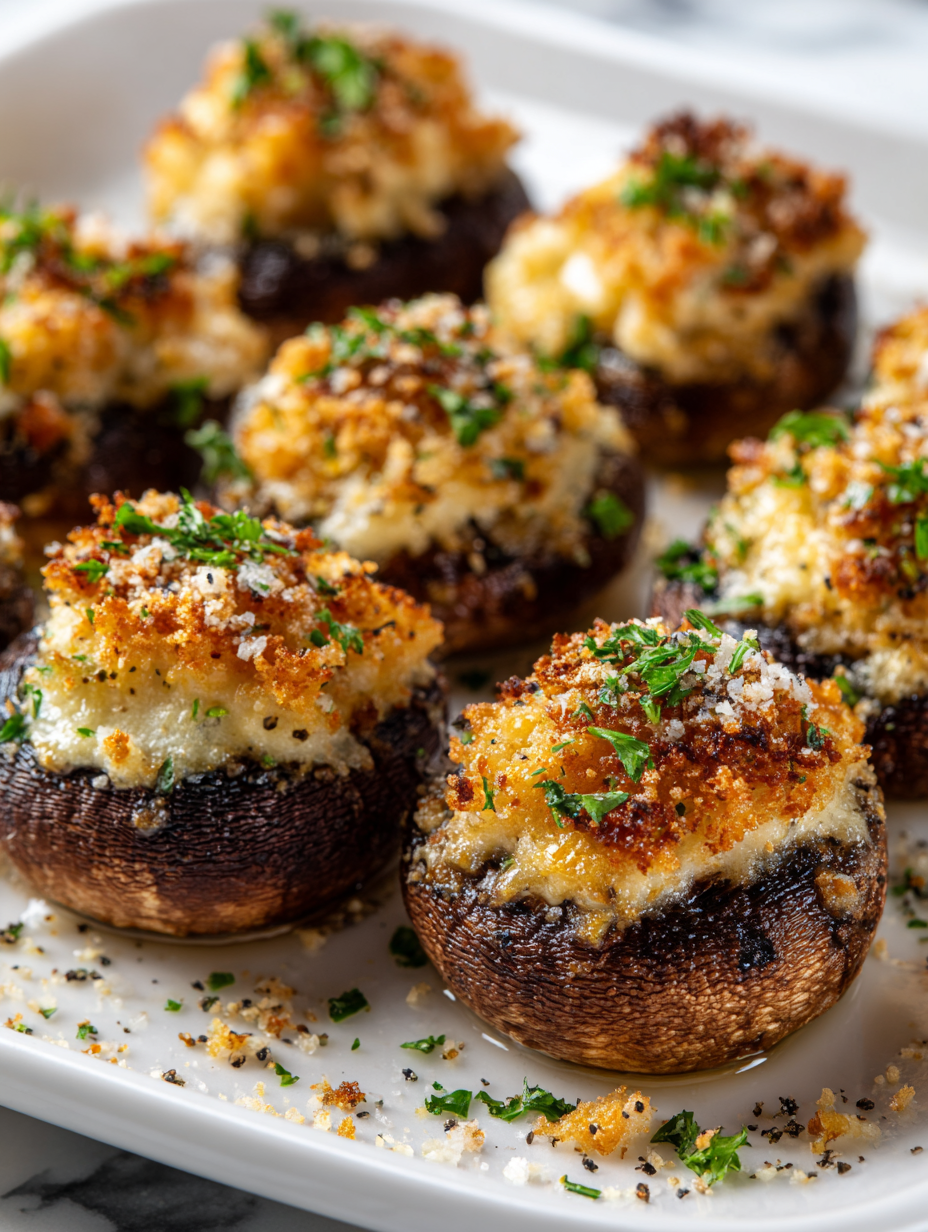
Baked Mushroom Caps
Ingredients
Equipment
Method
- Preheat your oven to 200°C (400°F) and line a baking tray with parchment paper.
- Gently wipe the mushroom caps with a damp cloth to remove any dirt, then remove the stems if desired, leaving the caps intact.
- In a small bowl, whisk together olive oil, minced garlic, salt, pepper, and herbs until well combined.
- Use a brush or the back of a spoon to evenly coat each mushroom cap with the seasoned oil mixture, focusing on the gills and edges.
- Arrange the caps upside down on the prepared baking tray, spacing them apart so they roast evenly.
- Bake in the oven for about 15-20 minutes, until the caps look slightly shriveled and the edges are golden brown, emitting a fragrant earthy aroma.
- If the tops appear pale, briefly broil for 1-2 minutes to achieve a slightly charred, smoky surface, watching carefully to prevent burning.
- Remove the mushrooms from the oven and let them rest for 3-5 minutes; this helps juices settle and enhances flavor.
- Squeeze fresh lemon juice over the caps for brightness, then sprinkle with additional herbs if desired.
- Serve the baked mushroom caps warm, as a flavorful snack, side, or main dish, enjoying their smoky, juicy interior and tender exterior.
Pro tips for perfect baked mushroom caps
- BOLD THE SKIN: Use a sharp knife to score the mushroom caps’ edges to help seasonings penetrate and promote even browning.
- OIL BRUSHING: Apply oil with a brush for a thin, even coat—avoids pooling and encourages a crispy, golden surface.
- GARLIC CARE: Mince garlic finely and crush slightly to release more aroma—avoid burning it to prevent bitterness.
- BAKE UPSIDE DOWN: Roast mushrooms upside down first—this traps juices, keeping them juicy and flavorful inside.
- BROIL LAST MINUTE: For a smoky, slightly charred top, broil the caps briefly—watch carefully to prevent over-torching.
- REST BEFORE SERVING: Let baked caps rest 3 minutes to settle juices—avoids excess moisture and enhances flavor.
- Lemon FINISH: A squeeze of lemon brightens earthy notes and elevates the natural umami—don’t skip this step.
Common mistakes and how to fix them
- FORGOT to preheat the oven → Always preheat for even roasting.
- DUMPED the mushroom stems in the mix → Remove stems if you want neater presentation.
- OVER-TORCHED the caps → Check after 15 minutes to avoid burning.
- MISSED the resting step → Rest mushrooms 3-5 minutes for Juiciness.
Quick fixes and pantry swaps
- When mushrooms release excess moisture, splash a little more oil to crisp the edges.
- If caps are shrinking too much, patch with a tiny dab of butter or oil before returning to oven.
- Over-torched edges? Shield with foil and lower the oven temperature for a softer finish.
- Forgot to preheat? DUMP the mushrooms back in the oven for a quick 5-minute restart.
- Out of lemon? Swap with a splash of vinegar or a pinch of citric acid for brightness.
Prep, store, and reheat tips
- Prep the mushroom caps by cleaning and removing stems up to a day ahead; store in an airtight container in the fridge to keep them firm and fresh.
- You can prepare the seasoned oil mixture a few hours in advance; keep it covered in the fridge, and bring to room temperature before use for better flavor infusion.
- Baked mushroom caps are best enjoyed within 24 hours; store leftovers in an airtight container in the fridge, where they will stay tender but may lose some smoky aroma.
- Reheat gently in a 160°C (320°F) oven for 10 minutes, or until warmed through. They should smell earthy and smoky, with the skins slightly crisp again.
- Avoid reheating in the microwave, as it can make the caps soggy and diminish their smoky flavor. For best results, reheat slowly in the oven, watching for dryness.
Top questions about baked mushroom caps
1. How do I choose the best mushroom caps?
Look for large, firm caps with smooth surfaces. Wrinkled or soft ones won’t hold up well and may turn mushy.
2. How much oil should I use?
Use a light coating of olive oil. Too much will make them greasy, too little will prevent browning and flavor.
3. What’s the ideal baking time and temperature?
Bake at 200°C (400°F) for about 15-20 minutes. They should look slightly shriveled, and smell earthy and smoky.
4. How do I get a smoky, charred top?
If the caps aren’t browning, try broiling for 1-2 minutes, but watch closely so they don’t burn.
5. Should I rest the mushrooms before serving?
Let them rest for 3-5 minutes after baking to allow juices to settle. Then add lemon or herbs for fresh contrast.
6. Can I prep these in advance?
Yes, you can prepare the cleaned mushroom caps a day ahead. Keep them in an airtight container in the fridge.
7. How do I reheat leftovers?
Reheat in a low oven (around 160°C or 320°F) for about 10 minutes. They should smell earthy and still have a slight crisp.
8. Can I omit garlic or substitute it?
Skip the garlic if sensitive, or roast garlic separately for a mellow, sweet flavor addition.
9. What herbs work best?
Use fresh thyme or rosemary for a bright, fragrant note. Dried herbs work too but are more concentrated.
10. What if the mushrooms release too much water?
If mushrooms release too much moisture, give them a quick splash of oil and bake a little longer to crisp.
Baked mushroom caps hold a quiet magic, especially when you let their earthy, smoky essence take center stage. There’s something honest about roasting them whole, simple yet deeply satisfying, perfect for cozy nights or quick bites. Once you taste that rich, juicy interior, you’ll see how humble ingredients can shine with just a bit of heat and patience.
In the end, this recipe is about respecting the mushroom’s natural flavor while adding just enough seasoning to elevate it. It’s a straightforward method that rewards you with a tender, smoky treat—no fuss, no complicated steps. Sometimes, the simplest dishes are the most memorable.

Hi, I’m Emily Carter, the creator and recipe developer behind Salt Strategist. I’m so happy you’re here. This blog is where my love for flavor, creativity, and thoughtful cooking comes together in one beautiful, ever evolving space.


