
Baking paneer tikka might seem plain compared to the traditional tandoor or skillet methods, but it’s surprisingly effective. The oven’s even heat gives the paneer a gentle, smoky char that’s just as satisfying. Plus, no fuss with skewers or fire—just a simple, hands-off process that anyone can pull off.
What I love about this approach is how it transforms the humble paneer into something tender, with a slight caramelized edge that’s packed with flavor. It’s perfect for those cozy nights when you want that smoky, spicy kick without heating up the grill or dealing with oil splatters. Honestly, it’s become my go-to for quick, satisfying snacks or a veggie-packed main.
Focusing on how baking transforms paneer into a smoky, tender treat without the fuss of grilling or frying, making it accessible for home cooks who crave that charred flavor but want simplicity in their oven.
Personal Inspiration for Baked Paneer Tikka
- This dish came together one rainy afternoon when I was craving something smoky and satisfying but didn’t want to fire up the grill. I had a block of paneer in the fridge and a bunch of spices that needed using. Baking gave me that charred, tender edge I was after, without the fuss of traditional methods.
- I remember the first time I made it, the smell of smoky spices filling the kitchen, making everything feel cozy. It struck me how simple ingredients could turn into something with serious depth—kind of like a little culinary secret I stumbled upon. Now, I make it whenever I want a quick, flavorful bite that feels special but is totally fuss-free.
- heading: ‘The story behind this recipe’
Ingredient breakdown
- Paneer: I prefer using fresh, soft paneer that’s cut into thick cubes—gives a tender bite and absorbs the marinade beautifully. If yours is a bit firmer, just let it sit in the marinade longer.
- Yogurt: Thick Greek-style yogurt is my go-to for the marinade, as it clings well and adds a tangy, creamy layer. If you only have regular yogurt, strain it first to remove excess whey.
- Spices: Garam masala, turmeric, and chili powder—these are my staples. I sometimes toss in a pinch of smoked paprika for extra smoky depth. Adjust the chili for your heat preference, but don’t skip the cumin for warmth.
- Lemon juice: Brightens everything with a zesty punch. I squeeze fresh lemon just before baking, but in a pinch, a splash of lime works too—just watch it doesn’t overpower the spices.
- Oil: A drizzle of neutral oil or mustard oil helps the spices stick and promotes browning. I skip the butter for a cleaner, sharper flavor, but a touch of ghee could add richness if you like.
- Skewers: Wooden skewers work fine if soaked beforehand—prevents burning and makes flipping easier. Metal skewers are more durable but can get hot, so handle with tongs.
- Optional herbs: Fresh cilantro or mint sprinkled after baking add a burst of freshness. I love the contrast against the smoky, spicy paneer—bright and lively.
Spotlight on key ingredients
Yogurt:
- Paneer: I prefer using fresh, soft paneer that’s cut into thick cubes—gives a tender bite and absorbs the marinade beautifully. If yours is a bit firmer, just let it sit in the marinade longer.
- Thick Greek-style yogurt is my go-to for the marinade, as it clings well and adds a tangy, creamy layer. If you only have regular yogurt, strain it first to remove excess whey.
- Spices: Garam masala, turmeric, and chili powder—these are my staples. I sometimes toss in a pinch of smoked paprika for extra smoky depth. Adjust the chili for your heat preference, but don’t skip the cumin for warmth.
Spices:
- Yogurt: Thick Greek-style yogurt is my go-to for the marinade, as it clings well and adds a tangy, creamy layer. If you only have regular yogurt, strain it first to remove excess whey.
- Garam masala, turmeric, and chili powder—these are my staples. I sometimes toss in a pinch of smoked paprika for extra smoky depth. Adjust the chili for your heat preference, but don’t skip the cumin for warmth.
Notes for ingredient swaps
- Dairy-Free: Use coconut yogurt instead of regular yogurt. It adds a subtle coconut aroma and slightly thinner coating.
- Vegan Paneer: Substitute with firm tofu, pressed thoroughly to remove excess water. Tofu is milder but absorbs spices well.
- Gluten-Free: Ensure spices are pure and without additives. Use gluten-free baking sheets and skewers for safety.
- Spice Level: Adjust chili powder or add cayenne for more heat. For milder, reduce or omit the chili entirely.
- Lemon Juice: Lime juice gives a slightly different citrus brightness, which works well in the marinade.
- Oil: Use sesame oil for a nutty note, or skip it for a lighter, less greasy finish. It also influences browning.
- Herbs: Fresh mint or cilantro can be swapped or omitted depending on your preference. Dried herbs won’t give the same fresh punch.
Equipment & Tools
- Baking sheet: Holds the paneer and ensures even heat transfer.
- Parchment paper or silicone mat: Prevents sticking and makes cleanup easier.
- Mixing bowl: Prepares the marinade.
- Wooden or metal skewers: Threading paneer for easy handling and even baking.
- Oven (with broil setting): Baking and finishing with smoky char.
Step-by-step guide to baked paneer tikka
- Preheat your oven to 200°C (392°F). Line a baking sheet with parchment paper or a silicone mat for easy cleanup.
- Prepare the marinade: In a bowl, combine thick yogurt, garam masala, turmeric, chili powder, cumin, lemon juice, and a drizzle of oil. Mix well.
- Cut the paneer into 1.5-inch cubes. Gently toss the paneer in the marinade, ensuring each piece is evenly coated. Let sit for at least 15 minutes, or up to 30 for more flavor.
- Thread the marinated paneer cubes onto soaked wooden skewers or metal skewers, leaving a little space between each piece for even cooking.
- Arrange the skewers on the prepared baking sheet. Bake in the middle rack for 20–25 minutes, turning once halfway through. The edges should be golden and slightly charred.
- In the last 5 minutes, switch the oven to broil (about 250°C/482°F) to get a smoky, charred finish. Keep a close eye to prevent burning.
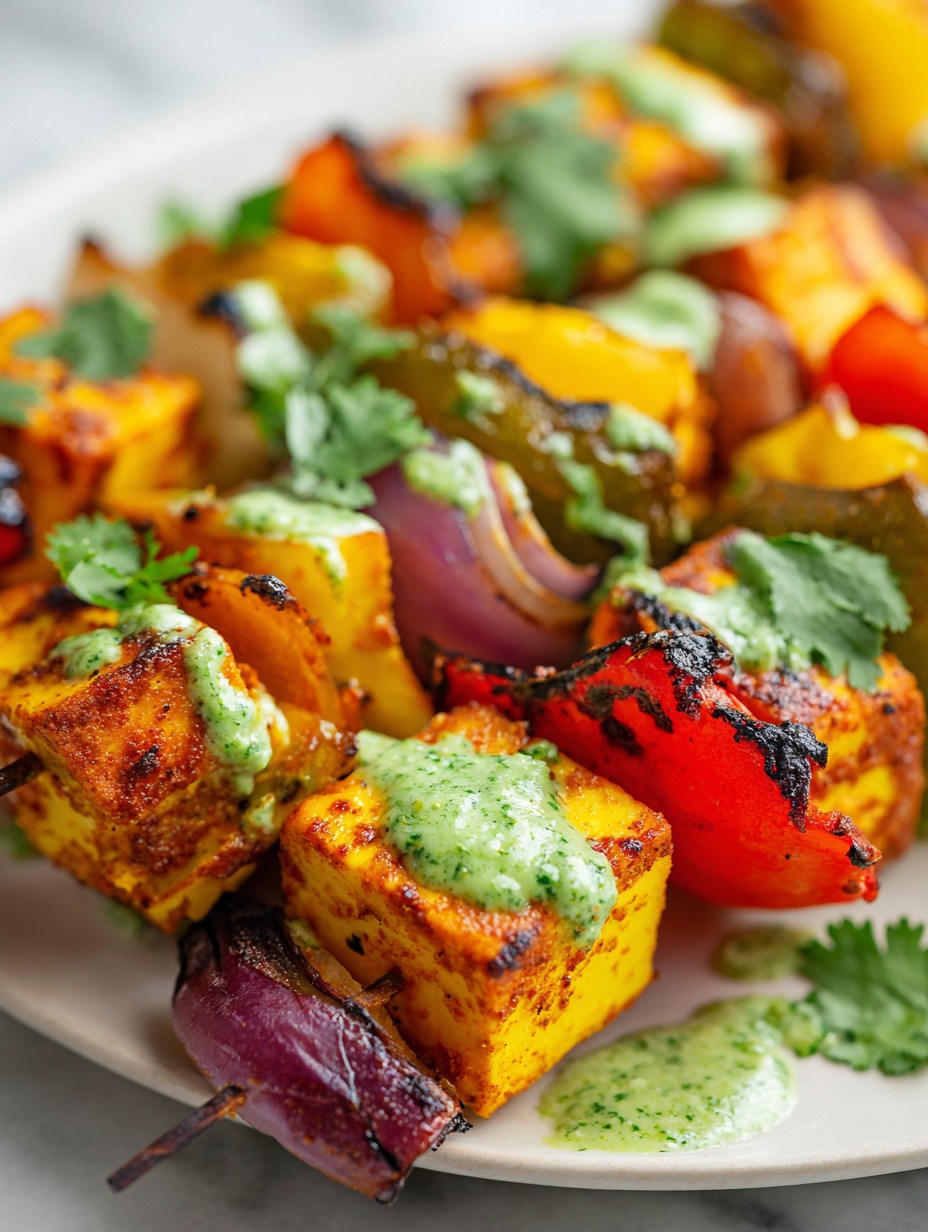
- Once done, remove from oven and let rest for 2–3 minutes. Sprinkle with fresh cilantro or mint if desired.
- Serve hot with lemon wedges or a side of green chutney. The paneer should be tender inside with a smoky, spicy crust.
Let the baked paneer rest for a couple of minutes. Serve straight from the oven, garnished with herbs. Pair with lemon wedges or mint chutney for a fresh contrast.
How to Know It’s Done
- Edges are golden with slight charring, indicating proper caramelization.
- Paneer feels firm but tender when gently pressed—avoid overcooking to prevent dryness.
- Smell should be fragrant with smoky spices, not burnt or raw.
Baked Paneer Tikka
Ingredients
Equipment
Method
- Preheat your oven to 200°C (392°F) and line a baking sheet with parchment paper or a silicone mat for easy cleanup.
- In a mixing bowl, whisk together the thick Greek yogurt, garam masala, turmeric, chili powder, cumin, lemon juice, and oil until smooth and fragrant.
- Gently toss the paneer cubes in the marinade, ensuring each piece is well coated. Let sit for at least 15 minutes to absorb all those spicy flavors.
- Thread the marinated paneer cubes onto soaked skewers, leaving small gaps between each piece for even baking and smoky edges.
- Arrange the skewers on the prepared baking sheet, spacing them out to allow hot air circulation for even browning.
- Bake in the middle rack for about 20–25 minutes, turning the skewers halfway through to promote uniform golden edges and slight charring.
- Switch the oven to broil and cook for an additional 3–5 minutes, watching closely to achieve a smoky, slightly charred look without burning.
- Remove the skewers from the oven and let rest for a couple of minutes. Garnish with chopped cilantro or mint if desired and serve hot with lemon wedges or chutney.
Pro tips for perfect baked paneer tikka
- Use high heat for the oven to get a good smoky char without drying out the paneer.
- Marinate the paneer for at least 15 minutes to ensure deep spice penetration and flavor.
- Turn the skewers halfway through baking for even browning and a consistently smoky crust.
- Broil for the last 3–5 minutes, watching carefully to achieve a slight charring without burning.
- Let the baked paneer rest for 2 minutes to allow flavors to settle and prevent crumbling.
- If the marinade seems thin, stir in a teaspoon of gram flour for better coating and a crisp exterior.
- Use a kitchen brush to lightly baste the paneer with oil or leftover marinade during baking for extra gloss and flavor.
Common mistakes and how to fix them
- FORGOT to soak wooden skewers → soak for at least 30 minutes before threading paneer.
- DUMPED marinade too early → let paneer marinate for at least 15 minutes for flavor absorption.
- OVER-TORCHED in broil → watch closely, 5-minute finish to prevent burning.
- UNDER-COOKED edges → bake until edges are golden and slightly charred, about 20–25 minutes.
Quick fixes and pantry swaps
- When sauce is too thin, splash a teaspoon of cornstarch slurry to thicken quickly.
- If paneer sticks to the pan, patch with a little water and use a spatula to loosen.
- Splash a little lemon juice to brighten flavors if the marinade feels flat.
- When skewers burn, shield with foil and reduce oven temperature to prevent charring.
- Dumped too much marinade? Rescue with a quick brush of oil before baking for better crust.
Prep, store, and reheat tips
- Marinate the paneer a day ahead to let flavors deepen—store covered in the fridge for up to 24 hours, smell should be tangy and spice-rich.
- Assemble the skewers a few hours before baking—keep covered in the fridge, paneer stays firm, marinade develops a richer aroma.
- Store leftover baked paneer in an airtight container in the fridge for up to 3 days; it’ll lose some of its smoky freshness but remains tasty.
- Reheat in the oven at 180°C (356°F) for 8–10 minutes until warmed through and slightly crispy on the edges—expect a smoky, fragrant aroma reignite.
- For best texture, avoid freezing leftovers, as paneer can become rubbery. Reheat only once to keep it tender and flavorful.
Top questions about baked paneer tikka
1. How does baked paneer tikka compare to grilled?
Baked paneer tikka is less smoky than grilled but still develops a nice char and tender interior. The oven’s dry heat crisps the edges, creating a smoky flavor without the need for a grill or tandoor.
2. Can I prepare the marinade in advance?
Yes, you can marinate the paneer a day ahead in the fridge. Just cover it tightly, and it’ll absorb more flavors overnight, making the final dish more vibrant and spicy.
3. What type of paneer works best?
Use thick, fresh paneer for the best texture. If it’s too soft or rubbery, the marinade won’t penetrate well, and the baked edges might not crisp up properly.
4. How do I prevent skewers from burning?
Pre-soaking wooden skewers for at least 30 minutes prevents burning. Metal skewers don’t need soaking but can get hot—handle carefully when turning.
5. What oven temperature is best?
Bake at 200°C (392°F) for 20-25 minutes, then switch to broil for 3-5 minutes. Look for golden edges with slight charring—this indicates smoky, caramelized flavor.
6. How do I prevent it from drying out?
If the paneer turns out dry, reduce baking time or brush with a little oil before baking. For a juicier bite, don’t overcook and let it rest briefly after baking.
7. Are there good dairy-free options?
You can substitute Greek yogurt with coconut or almond yogurt for dairy-free options. The flavor will be slightly different, but it still holds the marinade well.
8. How long should I marinate the paneer?
Avoid over-marinating—15-30 minutes is enough for flavor. Longer marination can make the paneer soggy or overly tangy.
9. How can I boost smokiness?
Use smoked paprika or a pinch of chipotle powder to deepen smoky flavor if you want extra depth without a grill.
10. How should I serve leftovers?
Serve immediately with lemon wedges or mint chutney. The warm, smoky, spicy paneer is best enjoyed fresh but can be stored in the fridge for a couple of days.
This baked paneer tikka reminds me that simple ingredients can deliver deep, smoky comfort without the fuss. It’s perfect for cozy nights or when I need a quick veggie fix that still feels indulgent. Honestly, I keep coming back to it because it’s honest, straightforward, and always hits the spot.
There’s something about the way it caramelizes and the aroma that fills the kitchen—like a little secret I keep in my back pocket. No matter the season, it makes me feel grounded and satisfied, especially when paired with fresh herbs or a squeeze of lemon. It’s a dish that always feels right, simple yet deeply satisfying.
At Salt Strategist, we believe food is more than just nourishment; it’s a story, a memory, and an experience meant to be shared. Our blog is dedicated to exploring the art of cooking with a focus on everyday meals, kitchen tips, and inspiring recipes that bring people closer together around the table.
Our Story
Salt Strategist was founded by Emily Carter, a passionate home cook and culinary storyteller from Portland, Oregon. Growing up in a family that valued Sunday dinners and homemade meals, Emily discovered early on that food has the power to connect hearts and cultures.
Her vision for Salt Strategist is simple: to make cooking approachable, exciting, and rewarding for everyone. Whether you are a seasoned chef or just starting your cooking journey, this blog is here to inspire confidence in the kitchen with easy-to-follow recipes, clever cooking strategies, and flavour-packed ideas.