
These baked veggie nuggets started as a way to get more greens into my kids without the usual battle. But somewhere along the way, I discovered that a secret smoky ingredient—smoked paprika—gives them an unexpected depth that adults can’t resist either. It’s like a little reminder that vegetables can be exciting, not just healthy.
Baking instead of frying keeps the texture light and crispy without the greasy aftermath. The process feels honest—nothing fancy, just chopping, mixing, and baking until the edges turn golden and crackly. It’s a simple trick that turns everyday vegetables into a snack that’s both satisfying and a little bit surprising.
Focusing on making veggie nuggets that are not just healthy but also irresistibly crispy on the outside, with a secret ingredient that adds an unexpected smoky depth.
The story behind this recipe
- This recipe came about one rainy afternoon when I was trying to find a way to make veggie snacks more appealing to my kids. I wanted something that felt like comfort food but still kept that wholesome punch. The secret was in mixing in a little smoked paprika—suddenly, it wasn’t just another veggie dish, it felt like a treat.
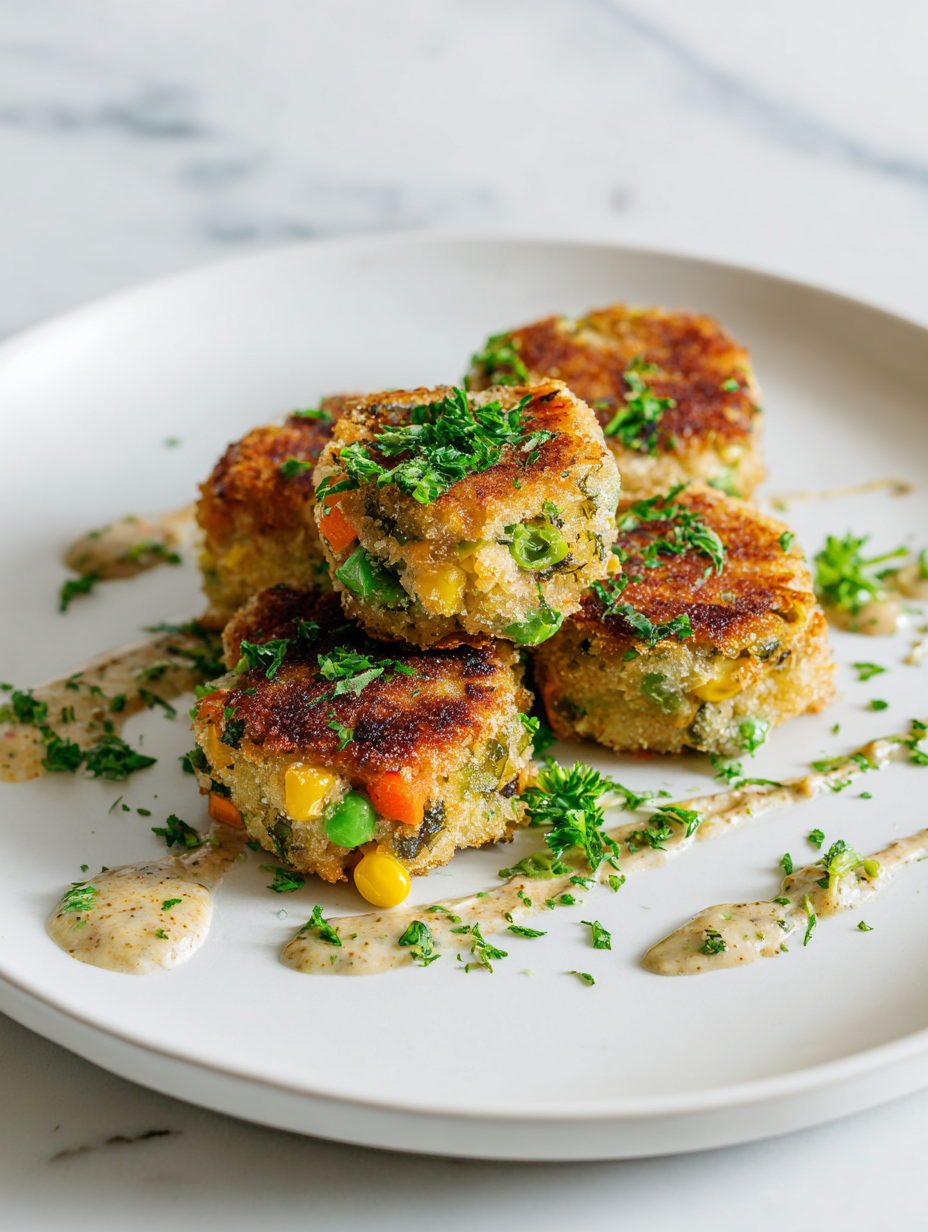
- I remember the first batch coming out of the oven, crispy and golden, with that smoky aroma filling the kitchen. My kids’ eyes lit up, and I realized I had stumbled on something worth sharing. Now, these nuggets are more than a snack—they’re a little reminder that health can be fun, even if you’re not a kid anymore.
- heading: The story behind this recipe
Ingredient breakdown
- Cauliflower: I love how it gets tender yet firm, offering a subtle nutty flavor. Swap with broccoli if you want a more pronounced crunch.
- Breadcrumbs: I prefer panko for extra crispness, but regular breadcrumbs work fine—just expect a slightly softer coating.
- Egg: It binds everything together and gives a shiny crust, but for a vegan version, try flaxseed meal mixed with water—still keeps the nuggets cohesive.
- Smoked paprika: This is my secret weapon for that smoky depth; skip or reduce if you prefer a milder flavor or want a milder spice profile.
- Cheese (optional): I add a sprinkle of grated Parmesan for umami, but nutritional yeast is a good dairy-free alternative that adds a cheesy punch.
- Carrots or zucchini: I often include them for moisture and color, but sweet potatoes work beautifully if you want a sweeter touch and richer flavor.
- Olive oil spray: It helps get that golden, crispy exterior—use sparingly but don’t skip it; it’s the magic touch for oven-baked crunch.
Spotlight on key ingredients
Cauliflower:
- I love how it gets tender yet firm, offering a subtle nutty flavor. Swap with broccoli if you want a more pronounced crunch.
- Breadcrumbs: I prefer panko for extra crispness, but regular breadcrumbs work fine—just expect a slightly softer coating.
- Egg: It binds everything together and gives a shiny crust, but for a vegan version, try flaxseed meal mixed with water—still keeps the nuggets cohesive.
Smoked paprika:
- This is my secret weapon for that smoky depth; skip or reduce if you prefer a milder flavor or want a milder spice profile.
- Olive oil spray: It helps get that golden, crispy exterior—use sparingly but don’t skip it; it’s the magic touch for oven-baked crunch.
Notes for ingredient swaps
- Vegetables: I often use sweet potatoes or butternut squash for a sweeter, creamier bite. Swap them in for a different flavor profile.
- Breadcrumbs: Panko gives that extra crunch, but if you only have regular breadcrumbs, they’ll soften a bit, still good.
- Egg: For a vegan twist, try flaxseed mixed with water—slightly denser but still binds well.
- Smoked paprika: If you want milder, paprika works, but chipotle powder adds a smoky kick in a different direction.
- Cheese: Parmesan adds umami, but nutritional yeast gives that cheesy flavor without dairy, and it’s more subtle.
- Oil spray: Use avocado oil spray for a milder flavor; olive oil spray adds a fruity note—just use sparingly.
- Herbs & spices: Fresh parsley or thyme can brighten it up, but dried herbs are more concentrated—use half as much.
Equipment & Tools
- Baking sheet: To bake the nuggets evenly in the oven.
- Parchment paper: Prevent sticking and make cleanup easier.
- Food processor or blender: Quickly chop or pulse vegetables into fine pieces.
- Mixing bowl: Combine ingredients thoroughly.
- Small bowl: Hold the breadcrumb coating.
- Spatula: Mix ingredients and shape nuggets.
Step-by-step guide to veggie nuggets
- Equipment & tools: Line a baking sheet with parchment paper, a food processor or blender for chopping, a mixing bowl, a small bowl for coating, and a spatula for mixing.
- Preheat your oven to 200°C (392°F). Ensure your rack is in the middle.
- Prepare vegetables: Finely chop 2 cups of cauliflower, zucchini, or carrots until small and uniform. Use a food processor for quicker prep.
- Cook vegetables lightly: Steam or microwave until just tender, about 3-4 minutes. Let cool slightly.
- Mash or pulse vegetables: In a food processor, pulse until finely minced but not pureed. You want some texture.
- Mix base ingredients: In a bowl, combine vegetables, 1 cup breadcrumbs, 1 beaten egg, 1 tsp smoked paprika, and a pinch of salt. Stir until well mixed.
- Form nuggets: Scoop about 1-2 tablespoons of mixture, shape into small, compact nuggets or patties. Place on prepared baking sheet.
- Prepare coating: In a small bowl, spread remaining breadcrumbs or panko. Lightly spray nuggets with olive oil or brush gently.
- Bake: Place in oven, bake for 18-20 mins. Turn once halfway through, until nuggets are golden and crispy around edges.
- Check for doneness: Nuggets should be firm, golden, and smell smoky with a slight crackle. They should hold shape when gently pressed.
- Rest & serve: Let cool for 2-3 mins on the baking sheet. Serve warm, with your favorite dipping sauce.
Let the nuggets rest for 2 minutes on the baking sheet. Serve immediately with dips or on their own, crispy and smoky. If not eating right away, store in an airtight container for up to 2 days; reheat in a 180°C (356°F) oven until crisp again, about 5 minutes.
How to Know It’s Done
- Nuggets are golden and crispy around the edges.
- They hold their shape when pressed gently.
- Smoky aroma and crackling sound indicate perfect baking.
Smoky Veggie Nuggets
Ingredients
Equipment
Method
- Line a baking sheet with parchment paper and prepare your tools: a food processor or blender, a mixing bowl, and a small bowl for coating.
- Finely chop or pulse the cauliflower and optional vegetables until they're small and uniform, about 3-4 minutes in the food processor. The mixture should resemble coarse crumbs.
- Steam or microwave the chopped vegetables just until tender, about 3-4 minutes, then let them cool slightly to handle comfortably.
- Transfer the cooled vegetables to a bowl and pulse a few more times to finely mince, leaving some texture for a hearty bite.
- In a large mixing bowl, combine the minced vegetables with breadcrumbs, smoked paprika, and beaten egg (or flaxseed mixture). Mix thoroughly until all ingredients are evenly incorporated and the mixture feels cohesive.
- Chill the mixture in the fridge for about 10 minutes; this helps it firm up and makes shaping easier.
- Preheat your oven to 200°C (392°F). Scoop about 1-2 tablespoons of mixture, then gently shape into small, compact nuggets or patties with your hands. Place them evenly spaced on the prepared baking sheet.
- Spread the remaining breadcrumbs in the small bowl. Lightly spray each nugget with olive oil spray to help achieve a crispy exterior.
- Bake the nuggets in the oven for about 18-20 minutes, flipping them gently halfway through. They should turn golden brown and develop a crackly, crispy crust with a smoky aroma filling the kitchen.
- Remove the nuggets from the oven once they’re crisp and golden, and let them rest for 2-3 minutes on the baking sheet. This helps set their shape and enhances their crunch.
- Serve the smoky veggie nuggets warm, with your favorite dipping sauces. They’re crispy on the outside, tender inside, with a smoky depth that makes them a fun, healthy snack or meal.
Pro tips for perfect veggie nuggets
- Bolded mini-head: Use a light hand with oil spray for an even, crispy coating without greasiness.
- Bolded mini-head: Chill the mixture slightly before shaping to prevent sticking and make handling easier.
- Bolded mini-head: Ensure vegetables are finely minced for a uniform crumbly texture that holds together well.
- Bolded mini-head: Bake at a consistent 200°C (392°F) for even crispness, and turn once halfway through.
- Bolded mini-head: Use panko breadcrumbs for extra crunch, pressing them gently onto the nuggets before baking.
- Bolded mini-head: Rest the nuggets for 2-3 minutes after baking; it helps set the shape and enhances crunch.
- Bolded mini-head: For a smoky flavor, incorporate smoked paprika into the mixture and keep an eye on the edges to avoid over-browning.
Common mistakes and how to fix them
- FORGOT to preheat the oven → Always preheat to ensure even baking and crisp edges.
- DUMPED too much oil → Use sparingly; excess oil makes nuggets greasy, not crispy.
- OVER-TORCHED edges → Reduce baking time or lower temperature if edges burn quickly.
- MISSED the resting step → Rest nuggets 2 mins for better texture and to set their shape.
Quick fixes and pantry swaps
- When nuggets stick, splash a little more oil and gently loosen with a spatula.
- When mixture feels too wet, add more breadcrumbs until it holds shape.
- If nuggets turn too dark, shield with foil and lower oven temperature slightly.
- When in doubt, do a quick fry test in hot oil for a crispy shortcut.
- Splash a touch of lemon juice if flavors need brightening after baking.
Prep, store, and reheat tips
- Prep the vegetable mixture ahead: Finely chop or pulse vegetables and refrigerate in an airtight container for up to 24 hours; they stay fresh and easy to scoop later.
- Assemble nuggets in advance: Shape into nuggets and place on a baking sheet, then cover and refrigerate for up to 12 hours before baking; the cold will firm them up for easier handling.
- Shelf life: Store baked nuggets in an airtight container in the fridge for up to 2 days; they gradually lose crispness but remain tasty with reheating.
- Reheating: Bake at 180°C (356°F) for 5-7 minutes until crispy and warmed through, or reheat in a toaster oven; expect aroma and a slight crunch return, though not quite as fresh.
Top questions about veggie nuggets
1. Can I use frozen vegetables for this recipe?
Use fresh or frozen veggies, but make sure they are well-drained and chopped finely for a smooth mixture.
2. How can I make these vegan?
Yes, replace eggs with flaxseed meal mixed with water for a vegan version that still binds well.
3. What oven temperature is best?
Bake at 200°C (392°F) for about 18-20 minutes, flipping halfway, until golden and crispy.
4. How do I boost the smoky taste?
Add a pinch more smoked paprika or a dash of smoked chipotle for extra smoky flavor, if desired.
5. Can I use different breadcrumbs?
Use panko breadcrumbs for extra crunch; regular breadcrumbs will soften slightly but still work well.
6. Should I let them cool before serving?
Let the baked nuggets rest for 2-3 minutes on the baking sheet to set their shape and enhance crunch.
7. How long do leftovers last?
Store leftovers in an airtight container in the fridge for up to 2 days; reheat in the oven for best crispness.
8. My mixture is too sticky, what do I do?
If the mixture is too wet, add more breadcrumbs until it feels firm enough to shape easily.
9. They are over-browning, how to fix?
If nuggets burn easily, lower the oven temp slightly or shield with foil during baking.
10. Can I add herbs or spices?
For extra flavor, mix in chopped herbs like parsley or thyme before shaping the nuggets.
These veggie nuggets are a reminder that simplicity often yields the most satisfying bites. The smoky aroma and crispy edges make them hard to resist, especially fresh out of the oven. They’re perfect for whenever you need a quick, wholesome snack that doesn’t compromise on flavor.
Sharing this recipe feels like sharing a little secret—something that turns everyday vegetables into a bit of a treat. Whether for a busy weeknight or a casual get-together, I find them equally comforting and surprisingly versatile. Sometimes, the simplest dishes leave the biggest impression.
At Salt Strategist, we believe food is more than just nourishment; it’s a story, a memory, and an experience meant to be shared. Our blog is dedicated to exploring the art of cooking with a focus on everyday meals, kitchen tips, and inspiring recipes that bring people closer together around the table.
Our Story
Salt Strategist was founded by Emily Carter, a passionate home cook and culinary storyteller from Portland, Oregon. Growing up in a family that valued Sunday dinners and homemade meals, Emily discovered early on that food has the power to connect hearts and cultures.
Her vision for Salt Strategist is simple: to make cooking approachable, exciting, and rewarding for everyone. Whether you are a seasoned chef or just starting your cooking journey, this blog is here to inspire confidence in the kitchen with easy-to-follow recipes, clever cooking strategies, and flavour-packed ideas.