Category: Appetizers

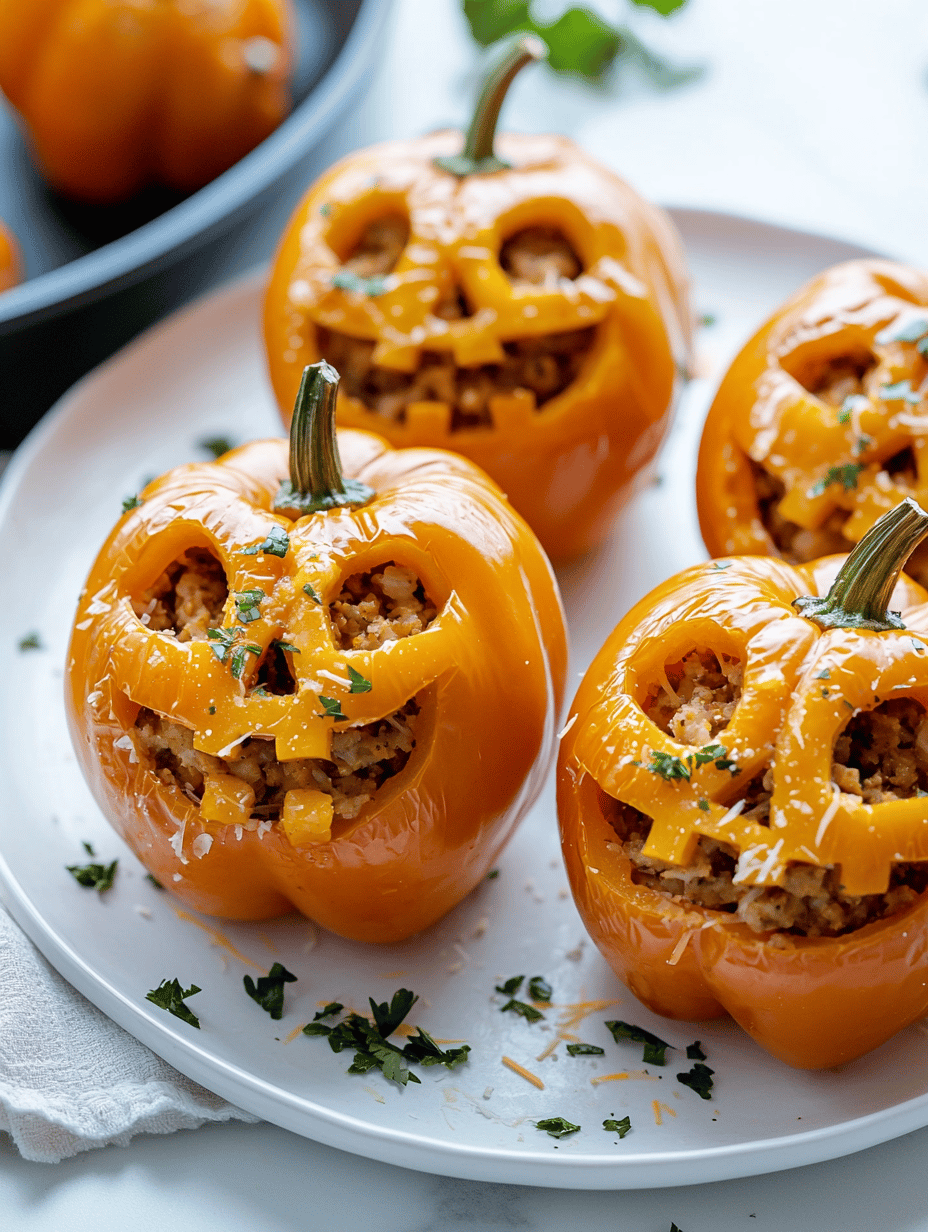
  • Halloween Jack-o’-Lantern Stuffed Bell Peppers: A Spooky Feast

    Halloween Jack-o’-Lantern Stuffed Bell Peppers: A Spooky Feast

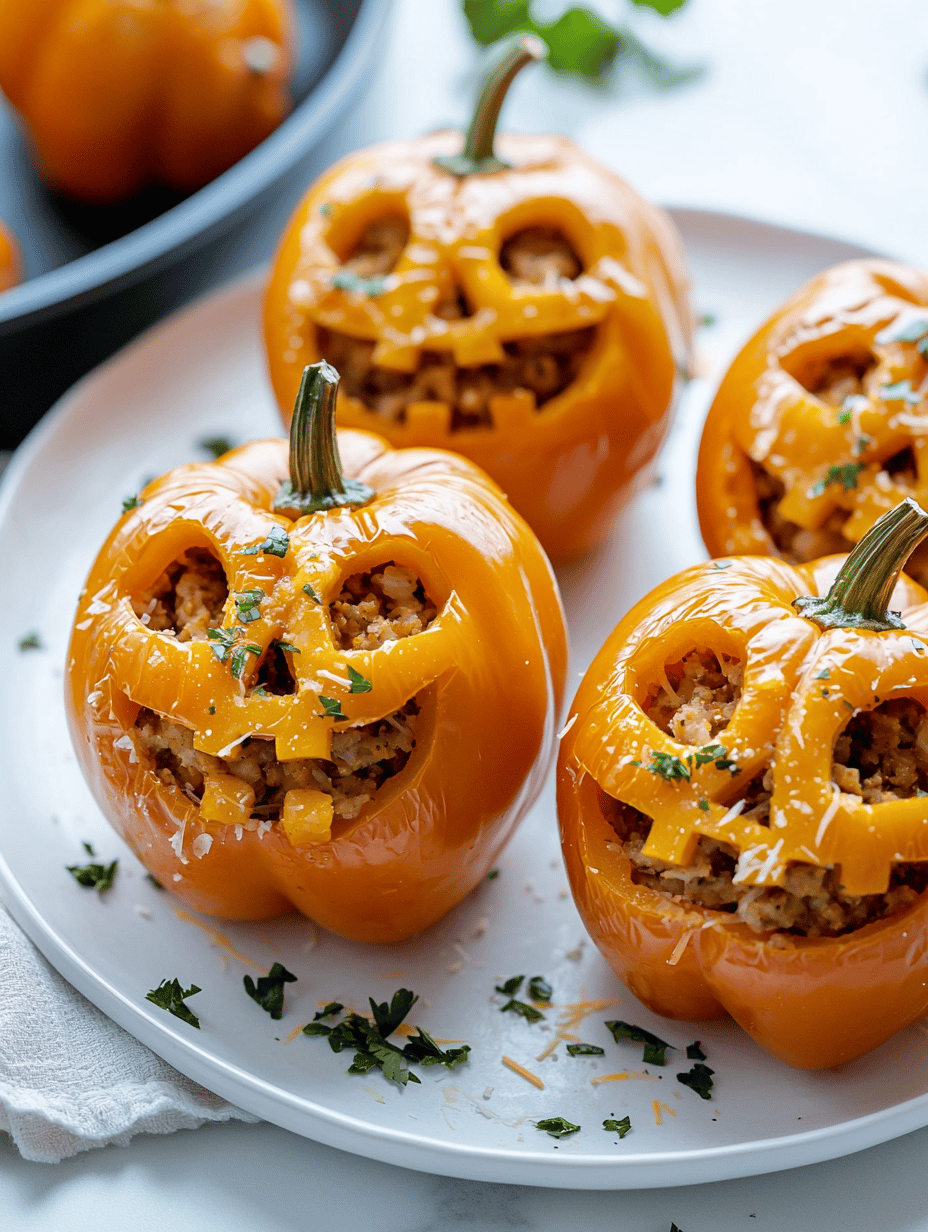
    Every October, I look forward to transforming ordinary vegetables into spooky centerpieces that delight kids and adults alike. These Halloween Stuffed Bell Pepper Jack-o’-Lanterns turn bright peppers into grinning grins, filled with savory goodness that warms the soul amid chilly fall nights. It you love a little edible art woven with comfort food, this recipe will surprise you.

    The joy of carving is tempered with flavor here, as each pepper is hollowed out with purpose and filled with a richly seasoned mixture. The smell of melting cheese and roasting peppers fills the house, teasing everyone tummy rumbles. It turns a simple dinner into a mini Halloween party for your taste buds and your decor.

    Halloween Stuffed Bell Pepper Jack-o’-Lanterns

    This dish involves hollowing out colorful bell peppers and carving them into jack-o’-lantern faces. Each pepper is filled with a savory mixture, topped with cheese, and baked until tender and bubbly. The final presentation resembles glowing pumpkin lanterns with a warm, cheesy interior.
    Prep Time 15 minutes
    Cook Time 30 minutes
    Total Time 45 minutes
    Servings: 4
    Course: Main Course
    Cuisine: American
    Calories: 250

    Ingredients
      

    • 4 large bell peppers assorted colors for visual effect
    • 1 cup cooked rice can use leftover rice
    • 1/2 cup shredded cheese cheddar, Monterey Jack, or a mix
    • 1 small onion finely chopped
    • 2 cloves garlic minced
    • 1 teaspoon paprika for flavor and color
    • 1 tablespoon olive oil
    • to taste salt and pepper

    Equipment

    • Kitchen knife
    • Spoon
    • Baking sheet
    • Aluminum Foil

    Method
     

    1. Preheat your oven to 375°F (190°C). Arrange a baking sheet with foil for easy cleanup.
    2. Wash the bell peppers thoroughly and cut off the tops to create lids. Use a spoon to carefully hollow out the seeds and membranes, creating a smooth cavity inside. Set aside the tops for later use or decorative purposes.
    3. Chop the onion and mince the garlic, then heat olive oil in a skillet over medium heat. Sauté the onion and garlic until translucent and fragrant, about 2-3 minutes.
    4. Add the cooked rice, paprika, salt, and pepper to the skillet. Stir well and cook for another 2 minutes, allowing the flavors to meld and the mixture to heat through.
    5. Remove the skillet from heat and mix in half of the shredded cheese until evenly combined. This forms your stuffing filling.
    6. Use a spoon to fill each hollowed bell pepper with the prepared rice mixture, pressing gently to pack the filling in.
    7. Place the stuffed peppers upright on the prepared baking sheet. Top each with the remaining shredded cheese for a melty, cheesy lid.
    8. Bake in the preheated oven for about 30 minutes, until the peppers are tender and slightly charred at the edges, and the cheese is bubbling and golden.
    9. Optional: Use a small paring knife to carve faces into the peppers to resemble jack-o’-lanterns for a festive Halloween look before serving.
    10. Once finished, carefully transfer the peppers to a serving platter or individual plates. Serve hot and enjoy the cheesy, flavorful filling paired with the roasted pepper exterior.

    Notes

    Feel free to customize the filling with cooked ground meat or vegetables. Carving faces is optional but adds a fun Halloween touch!

    This Halloween dish turns a simple dinner into a festive masterpiece that sparks conversations and smiles. The mix of savory stuffing and playful carving makes it an instant hit and a satisfying meal on a chilly night. Watching the peppers glow with melted cheese is a small, joyful ritual that plays well with seasonal nostalgia.

    As the season shifts and new decorations creep into every corner, this recipe reminds us that fun can be simple and tastes memorable. The process of creating these edible Jack-o’-Lanterns connects tradition with creativity, making every bite a celebration of the season. Happy carving and feasting to all who try this cheerful, flavorful trick-or-treat.

  • Spooky Fun: The Irresistible Halloween Spider Cheese Ball

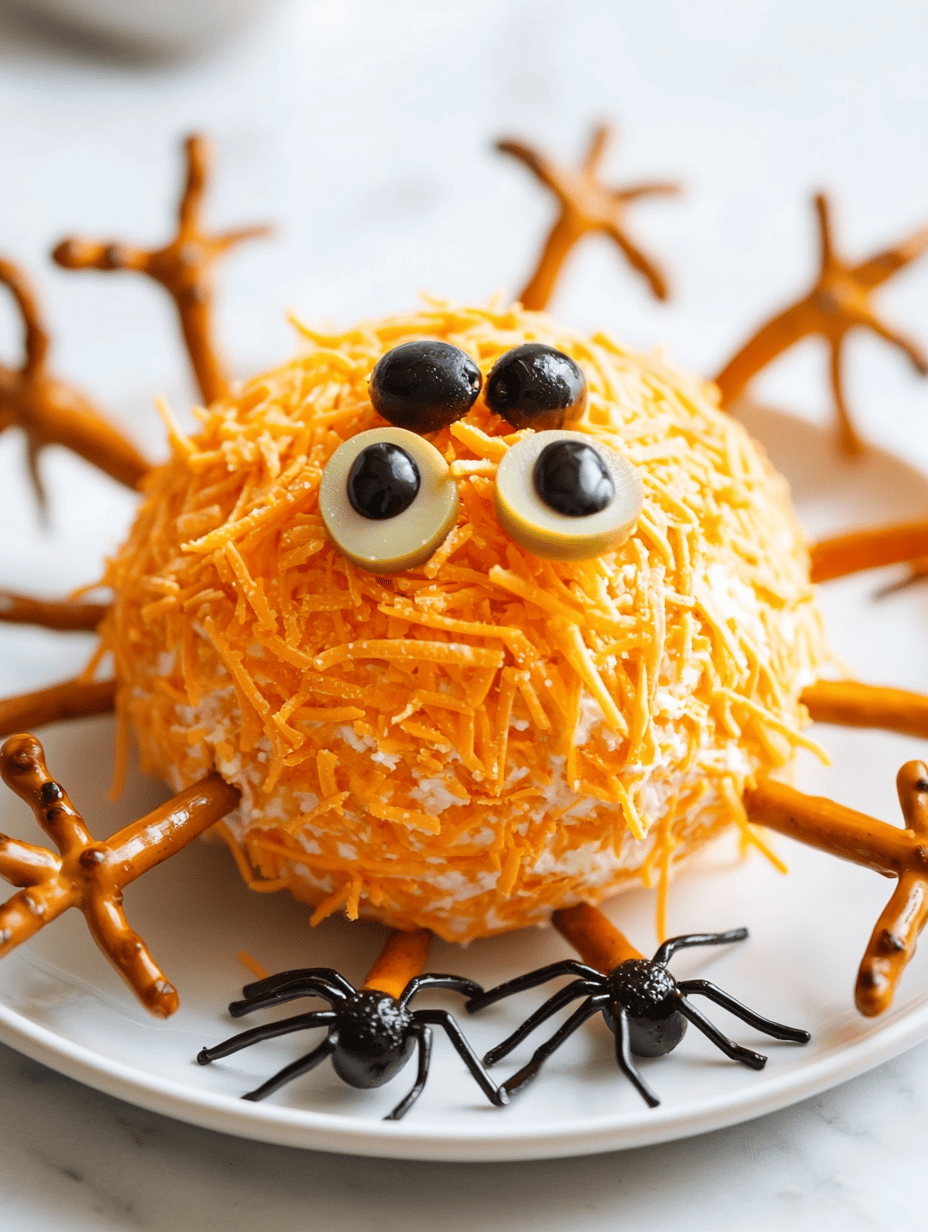
    Spooky Fun: The Irresistible Halloween Spider Cheese Ball

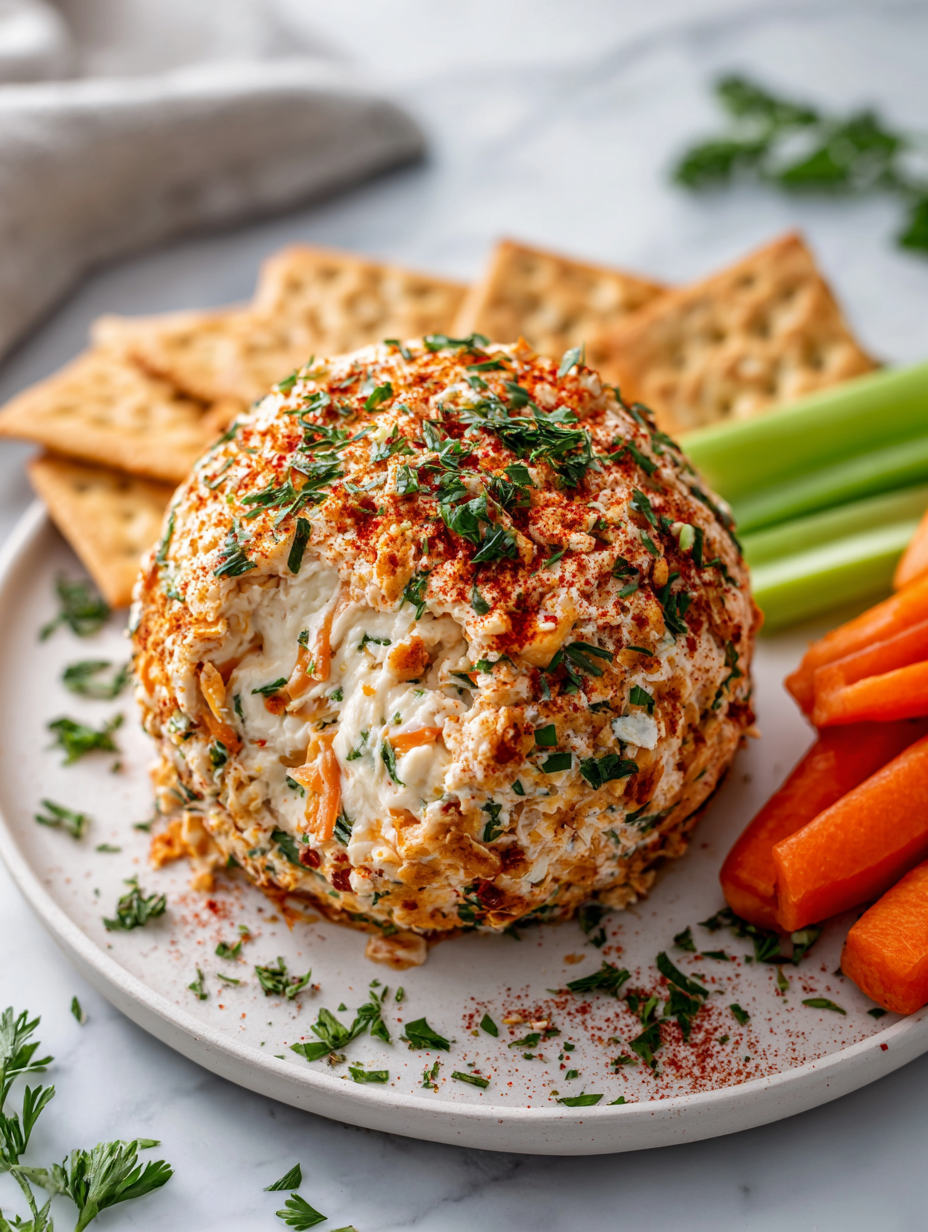
    Mixing a bit of chaos with cheeseball charm, the Halloween Spider Cheese Ball transforms a simple appetizer into a festive centerpiece. Its gleaming, gooey spider legs cast an eerie shadow, perfect for any spooky gathering. The surprise? A creamy, tangy core that melts in your mouth with each bite.

    What makes this recipe truly stand out is its interactive nature—guests can pick and choose which creepy legs to munch on first. It’s a playful way to introduce flavor with a dash of Halloween mischief. Plus, it’s surprisingly easy to prepare, making it a perfect project for last-minute festive fun.

    Halloween Spider Cheese Ball

    The Halloween Spider Cheese Ball is a creamy, tangy cheese spread shaped into a ball with decorative, edible spider legs made from pretzel sticks or similar ingredients. The cheese ball has a smooth, firm texture that can be easily sliced or served with accompaniments, while the spider legs add a playful, spooky touch to the presentation.
    Prep Time 20 minutes
    Total Time 20 minutes
    Servings: 8
    Course: Main Course
    Cuisine: American
    Calories: 180

    Ingredients
      

    • 8 oz Cream cheese softened
    • 1 cup Shredded cheddar cheese
    • 2 tbsp Fresh chopped chives optional for flavor
    • 1/2 tsp Garlic powder
    • 1/2 tsp Paprika
    • to taste Salt and pepper
    • 10 pretzel sticks Pretzel sticks or black olives for spider legs
    • additional Optional toppings chopped nuts, chopped herbs, or sliced vegetables

    Equipment

    • Mixing bowl
    • Plastic wrap
    • Serving Platter
    • Large spoon or spatula
    • Knife

    Method
     

    1. In a mixing bowl, combine softened cream cheese, shredded cheddar, chopped chives, garlic powder, paprika, salt, and pepper. Stir until well blended and smooth, with no lumps remaining.
    2. Transfer the cheese mixture onto a piece of plastic wrap. Shape it into a firm, round ball by folding the wrap over and pressing gently. Refrigerate for at least 15 minutes to help it hold its shape.
    3. Unwrap the cheese ball carefully and place it onto a serving platter. Use a spatula or the back of a spoon to smooth out the surface and create an even, rounded appearance.
    4. Line up pretzel sticks or black olives on one side of the cheese ball, attaching them with a small amount of soft cheese if needed, to form spider legs radiating outward. Spread them evenly and press lightly to secure.
    5. Optionally, add chopped nuts, herbs, or sliced vegetables on top or around the cheese ball for extra flavor and visual interest.
    6. Serve the Halloween Spider Cheese Ball with crackers, sliced baguette, or fresh vegetables for dipping and snacking. Enjoy the spooky, creamy centerpiece!

    This cheese ball isn’t just a treat; it’s a conversation starter. Its visual impact and irresistible texture make it the star of any Halloween table. As you watch friends break into smiles and giggles over those spooky legs, you’ll feel the delight of creating something both delicious and delightfully scary.

    Enjoy this recipe as a clever way to celebrate the season, blending comfort food with creative Halloween flair. It’s a small gesture that turns ordinary ingredients into a memorable experience. Happy haunting—and snacking!

  • Spooktacular Bat-Shaped Guacamole & Chips for Halloween

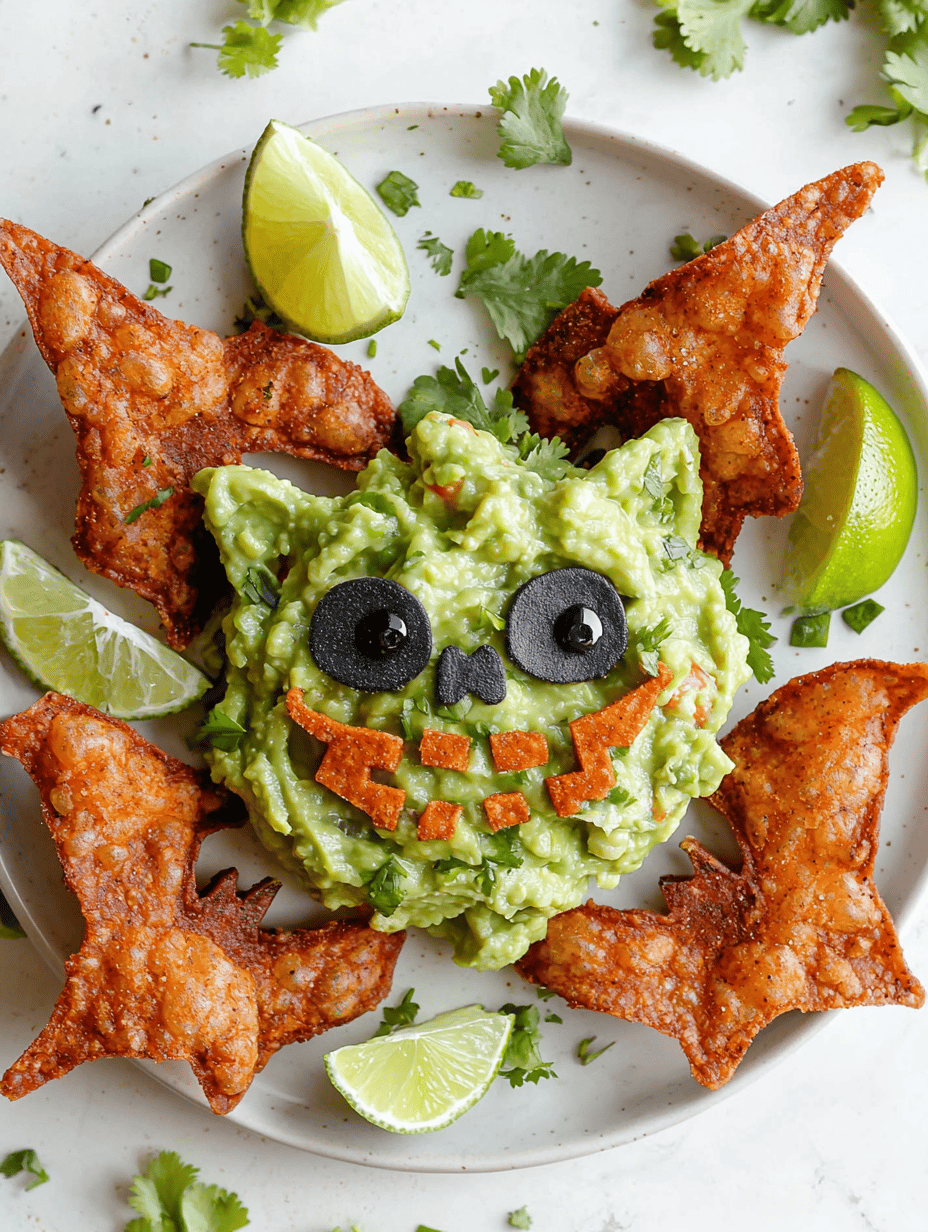
    Spooktacular Bat-Shaped Guacamole & Chips for Halloween

    As the calendar flips to October, the thrill of Halloween is in the air—especially when you get to combine culinary creativity with a dash of spooky fun. This year, Im taking a playful twist on the classic guacamole by shaping it into adorable bats, complete with wings of crispy tortilla chips. Its a fantastic way to turn a simple snack into the highlight of your gathering.

    What makes this recipe uniquely charming is not just the look but the way it sparks nostalgia for childhood Halloween parties, mixed with a bit of chaos in the kitchen. Imagine the smell of fresh avocados, lime, and garlic blending seamlessly with warm tortilla chips crunching—such sensory delights make every bite a celebration. Plus, its effortless to assemble, giving you more time to enjoy the spooky season with loved ones.

    Halloween Bat-Shaped Guacamole with Crispy Tortilla Wings

    This dish features a creamy avocado-based guacamole shaped into bats, garnished with outstretched wings made from crispy tortilla chips. The final presentation showcases the smooth, green guacamole contrasting with crunchy chips, creating a playful and festive snack perfect for Halloween gatherings.
    Prep Time 15 minutes
    Cook Time 10 minutes
    Total Time 25 minutes
    Servings: 4
    Course: Main Course
    Cuisine: American
    Calories: 180

    Ingredients
      

    • 3 ripe avocados large and soft
    • 1 lime lime juiced
    • 1 clove garlic minced
    • 0.5 teaspoon salt
    • 1 pinch black pepper optional, for spice
    • 4 small tortilla chips cut into wing shapes

    Equipment

    • Mixing bowl
    • Small spoon or piping bag
    • Knife
    • Serving plate or platter

    Method
     

    1. Cut the avocados in half, remove the pits, and scoop the flesh into a mixing bowl.
    2. Add freshly squeezed lime juice, minced garlic, salt, and black pepper to the avocado.
    3. Use a fork or potato masher to mash everything together until smooth and creamy, with a few small chunks for texture.
    4. Transfer the guacamole into a piping bag or simply use a small spoon for shaping.
    5. On a clean plate, pipe the guacamole into a bat shape, creating two wings with a small rounded body in the center.
    6. Take the tortilla chips and cut or break them into wing-shaped pieces—thin, elongated shards that will serve as the bat’s wings and outstretched arms.
    7. Arrange the wing-shaped tortilla chips around the guacamole to mimic bat wings stretching outward.
    8. Optional: add small dots of guacamole or black food-safe marker for eyes on the bat shape to enhance the spooky effect.
    9. Serve immediately on a festive platter, allowing the guacamole to stay fresh and the chips crispy.

    Notes

    For easier shaping, chill the guacamole slightly before piping. Get creative with the sizes and shapes of tortilla chips to mimic different bat wings or add additional spooky decorations.

    This bat-shaped guacamole and chip platter is more than just a snack; it’s a fun creative project that gets everyone involved. Its perfect for those last-minute parties or when you want a little Halloween sparkle without much fuss. Just a few simple ingredients and a sprinkle of imagination turn ordinary ingredients into something memorable.

    Embracing the playful spirit of Halloween, this dish adds a touch of whimsical charm to your table. Its a reminder that food can be both delicious and delightfully goofy. So, gather your ingredients, carve out some fun, and celebrate the season with a touch of spooky flair on your plate.

  • Spooktacular Ghost Veggie Platter: A Fun Halloween Centerpiece

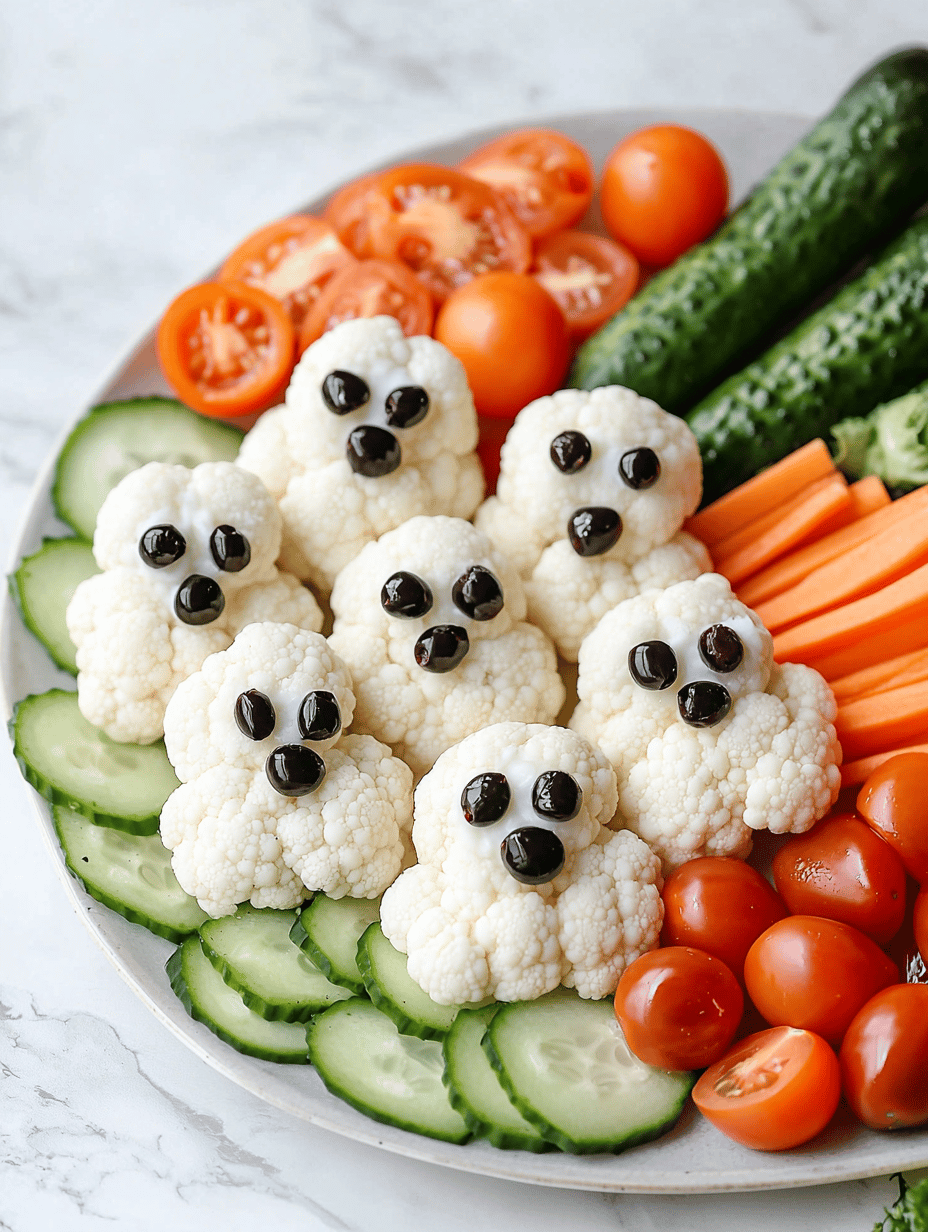
    Spooktacular Ghost Veggie Platter: A Fun Halloween Centerpiece

    Halloween is the perfect time to unleash your creative culinary side, and what better way than with a veggie platter that doubles as a playful ghost ensemble? This project is my secret weapon for turning simple raw vegetables into a whimsical, eye-catching centerpiece that kids and adults alike will adore. It’s a delightful surprise that transforms snack time into a spooky celebration.

    The best part? It’s easy to assemble with everyday ingredients, and you don’t need professional skills. Just a little bit of your imagination and some basic kitchen supplies. Plus, the fact that it’s healthy makes it a win in my book, especially when Halloween candies threaten to take over the table. This ghostly veggie display is guaranteed to bring a dash of fun and a splash of color to your spooky gathering.

    Spooky Ghost Veggie Platter

    This veggie platter features crisp raw vegetables arranged to resemble playful ghost figures, making it a fun and healthy centerpiece for Halloween gatherings. The main ingredients include sliced cucumbers, carrots, bell peppers, and celery, decorated with cheese or other edible details to create the ghostly faces. The final appearance is colorful, whimsical, and adds a festive, spooky touch to any table.
    Prep Time 20 minutes
    Total Time 20 minutes
    Servings: 8
    Course: Main Course
    Cuisine: American
    Calories: 50

    Ingredients
      

    • 2 large cucumbers sliced into rounds
    • 2 large carrots cut into sticks or rounds
    • 2 bell peppers bell peppers preferably different colors, sliced into strips
    • 2 stalks celery cut into sticks
    • 1 cup cream cheese or shredded cheese for ghost faces and decoration
    • to taste black olives or blueberries for eyes
    • optional herbs or spices for flavoring cheese

    Equipment

    • Cutting board
    • Chef’s knife
    • Serving Platter
    • Small spoon or piping bag

    Method
     

    1. Arrange the sliced cucumbers on the serving platter to form the base of each ghost, leaving space between them.
    2. Use small spoon or piping bag to place a dollop of cream cheese or shredded cheese on top of each cucumber slice, shaping it into a rounded ghost head.
    3. Insert or press small slices of black olives or blueberries into the cheese to create the ghost’s eyes.
    4. Arrange carrot sticks, bell pepper strips, and celery sticks around or behind the cucumber ghosts to resemble their flowing ‘halloween’ costumes or additional spooky elements.
    5. Optional: Add herbs or spices on the cheese for extra flavor or decorative touches.
    6. Serve immediately to ensure the vegetables stay crisp and the cheese remains fresh, creating a playful and spooky veggie display.

    Notes

    Feel free to customize the ghost faces with different edible decorations like slices of radish or cherry tomatoes for added variety.
    Creating a Halloween Ghost Veggie Platter is more than just preparing a snack; it’s about embracing the holiday’s playful spirit. It’s a way to invite a little chaos and whimsy into your kitchen, making a simple vegetable tray a memorable part of your celebration.

    As the evening winds down, I love seeing everyone’s reactions to the ghostly figures—some with wide eyes, others with giggles. It’s these little moments that make Halloween special. This platter not only adds a touch of spooky charm but also keeps the festivities feeling fresh and fun.

  • Spooky & Sleek: Halloween Eyeball Caprese Bites That Wow

    Spooky & Sleek: Halloween Eyeball Caprese Bites That Wow

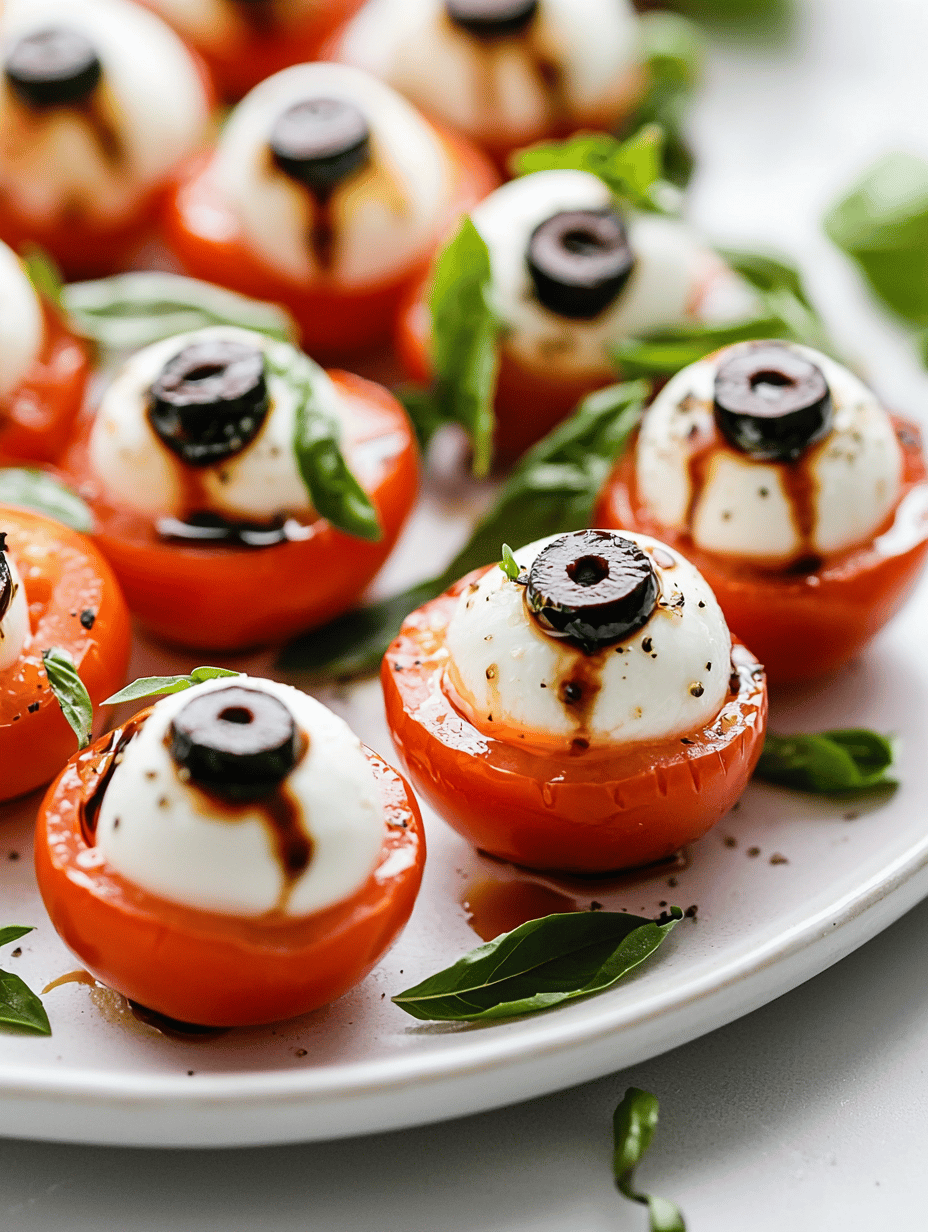
    Step aside traditional hors d’oeuvres—these Halloween Eyeball Caprese Bites bring a dash of macabre charm to your spooky table. Each bite looks like a tiny eyeball, with the fresh mozzarella and cherry tomato creating a startlingly realistic effect. Perfect for adding a bit of chaos and fun to your haunted feast.

    Crafting these bites is surprisingly easy, yet they look impressively creepy. The contrast of the creamy mozzarella and the vibrant red tomato makes every bite pop. Plus, the basil garnish adds a fresh, slightly bitter note that balances the mild cheese. These are sure to spark conversation and be a hit among guests.

    ## WHY I LOVE THIS RECIPE?
    – It’s quirky and perfect for kids and adults alike.
    – The combination of flavors is simple but memorable.
    – Creating these eyeballs adds a fun chaos to my kitchen during Halloween.
    – I love how these bites transform a classic appetizer into something eerie and delightful.
    – They bring nostalgia for childhood costume parties with a spooky twist.

    ## AVOID MY DISASTER (You’re Welcome)
    – FORGOT the basil! I ended up with sad, flavorless eyes. Always add fresh basil.
    – DUMPED the mozzarella balls! They rolled everywhere, causing chaos. Use a small spoon next time.
    – OVER‑TORCHED the cherry tomatoes! They burst and looked less eyeball-like. Keep a close eye on them.
    – MISSED the glue! I used dry toothpicks instead of soaked ones. Soaking keeps them flexible.

    ## QUICK FIXES THAT SAVE YOUR DAY
    – Splash a tiny bit of olive oil for a glossy, moist look.
    – Patch with a dab of cream cheese if an eyeball cracks.
    – Shield with plastic wrap to preserve the spooky effect.
    – When in doubt, sprinkle a little cracked black pepper for added eeriness.
    – If the mozzarella melts too much, refrigerate for five minutes before serving.

    Creating these Halloween Eyeball Caprese Bites gives your party a playful, spooky edge that’s both fun and festive. This simple, eye-catching appetizer embodies the spirit of the season. Plus, it’s a reminder that even the creepiest dishes can be delicious.

    Nothing beats the burst of fresh basil and creamy mozzarella as they`re paired with the tart cherry tomatoes. These bites are perfect for hefty parties or intimate gatherings, turning your table into a creepy, colorful spectacle. Enjoy making these spooky treats and watch as everyone marvels at your mad culinary skills.

    Halloween Eyeball Caprese Bites

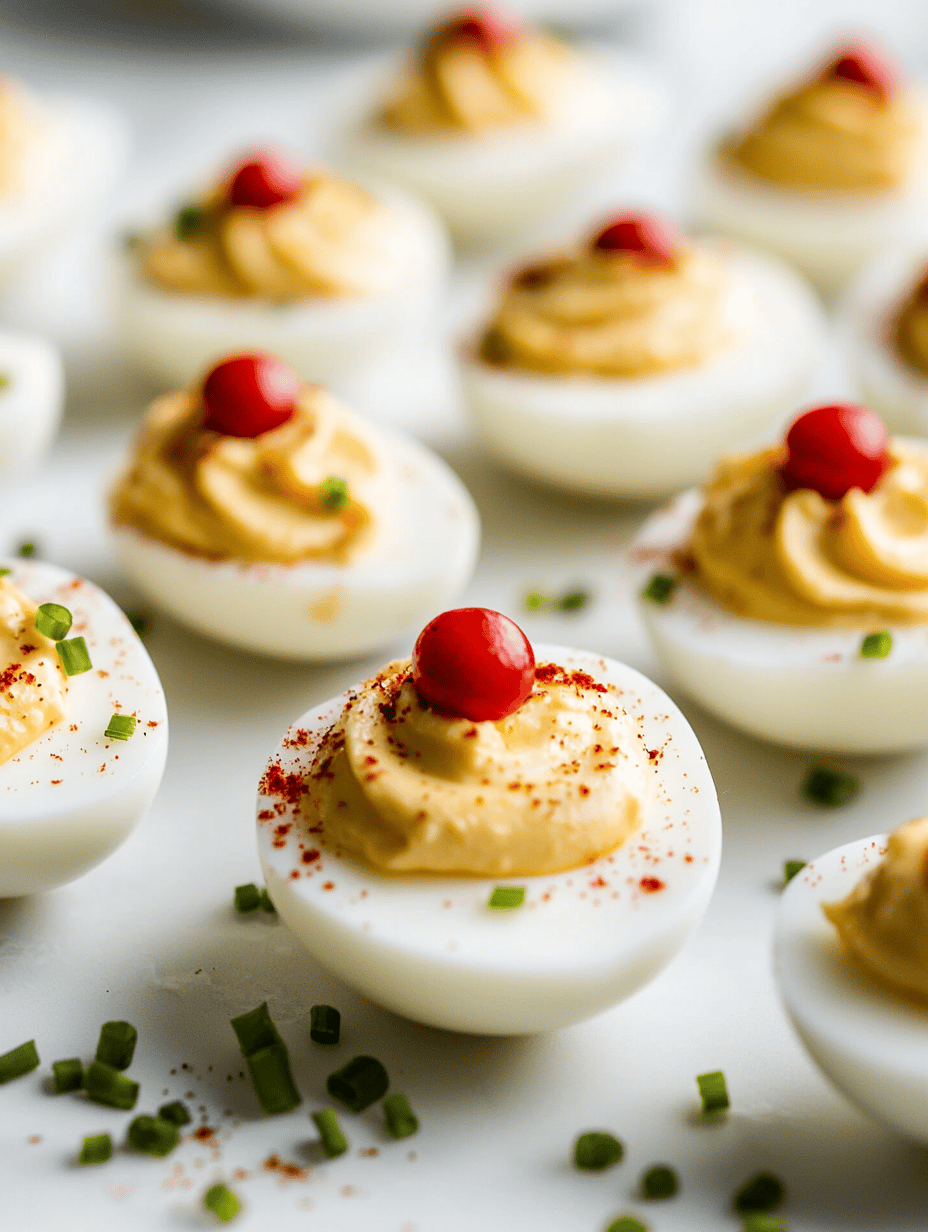
    These Halloween Eyeball Caprese Bites are bite-sized appetizers featuring fresh mozzarella balls topped with cherry tomato halves, creating a spooky eyeball appearance. They are assembled by stacking and garnishing the ingredients to resemble creepy little eyes, finished with basil for a pop of color. The final presentation is a fun and eerie display perfect for Halloween parties.
    Prep Time 15 minutes
    Total Time 15 minutes
    Servings: 8
    Course: Main Course
    Cuisine: Halloween
    Calories: 85

    Ingredients
      

    • 16 pieces fresh mozzarella balls preferably small-sized
    • 8 pieces cherry tomatoes halved for eyeball pupils
    • 16 leaves fresh basil small leaves for garnish
    • 2 tablespoons olive oil for drizzling
    • to taste salt and freshly ground black pepper for seasoning

    Equipment

    • Small spoon
    • Toothpicks or small skewers
    • Knife
    • Cutting board

    Method
     

    1. Start by preparing all your ingredients: halve the cherry tomatoes and set aside, keep the mozzarella balls whole, and wash the basil leaves.
    2. Place a small mozzarella ball on your plate or serving tray.
    3. Using a small spoon, gently scoop a halved cherry tomato and place it on top of the mozzarella to resemble an eyeball’s iris.
    4. Thread a toothpick or small skewer through the center of the mozzarella and cherry tomato, securing them together.
    5. Repeat these steps for all your mozzarella and tomato pieces, creating a spooky eye effect.
    6. Garnish each eyeball with a basil leaf, placing it at the very top to resemble eye lashes or a creepy eyelid.
    7. Drizzle a little olive oil over the assembled eyeballs for shine and flavor. Season with salt and pepper to taste.
    8. Arrange your spooky eyeball bites on a tray and keep them chilled until ready to serve.
    9. When ready to serve, place them on your Halloween table and enjoy the creepy, fresh flavor of these fun appetizers.

    Notes

    To make the eyes extra realistic, slightly flatten the mozzarella balls before assembling, and use small toothpicks for easy handling. For a more dramatic effect, add a tiny dab of black sesame seed or olive for the pupil if desired.
    As the night winds down, these eyeball bites serve as a delightful reminder of the fun chaos of Halloween. Their creepy yet charming appearance is a hit no matter the age of your guests. Plus, they are quick to prepare, which means more time for ghost stories or costume picture ops.

    This recipe is more than just a festive snack; it’s a chance to unleash your creative side. Transforming simple ingredients into eerie edible art adds an extra layer of excitement to your holiday. Enjoy the magic and madness of Halloween, one eyeball at a time.

  • Spooktacular Halloween Mummy Meatballs: A Nostalgic Twist for Your Party

    Spooktacular Halloween Mummy Meatballs: A Nostalgic Twist for Your Party

    Halloween is the perfect time to embrace playful, creepy foods that bring a nostalgic smile. These mummy meatballs are not only adorable but also packed with comforting flavors that remind me of childhood dinners. The way the stringy mozzarella peeks through the crispy bacon wrappings makes every bite a fun surprise.

    Making these meatballs is like a mini craft project, but the end results are totally worth the chaotic kitchen clean-up. The savory aroma of seasoned meat mingling with the smoky scent of bacon filling the house is a small celebration itself. Perfect for kids and adults alike, they turn ordinary ingredients into a festive, memorable feast.

    Let’s dive into the magic of turning simple ingredients into spooky, cute little mummies that are as delicious as they are charming.

    Halloween Mummy Meatballs

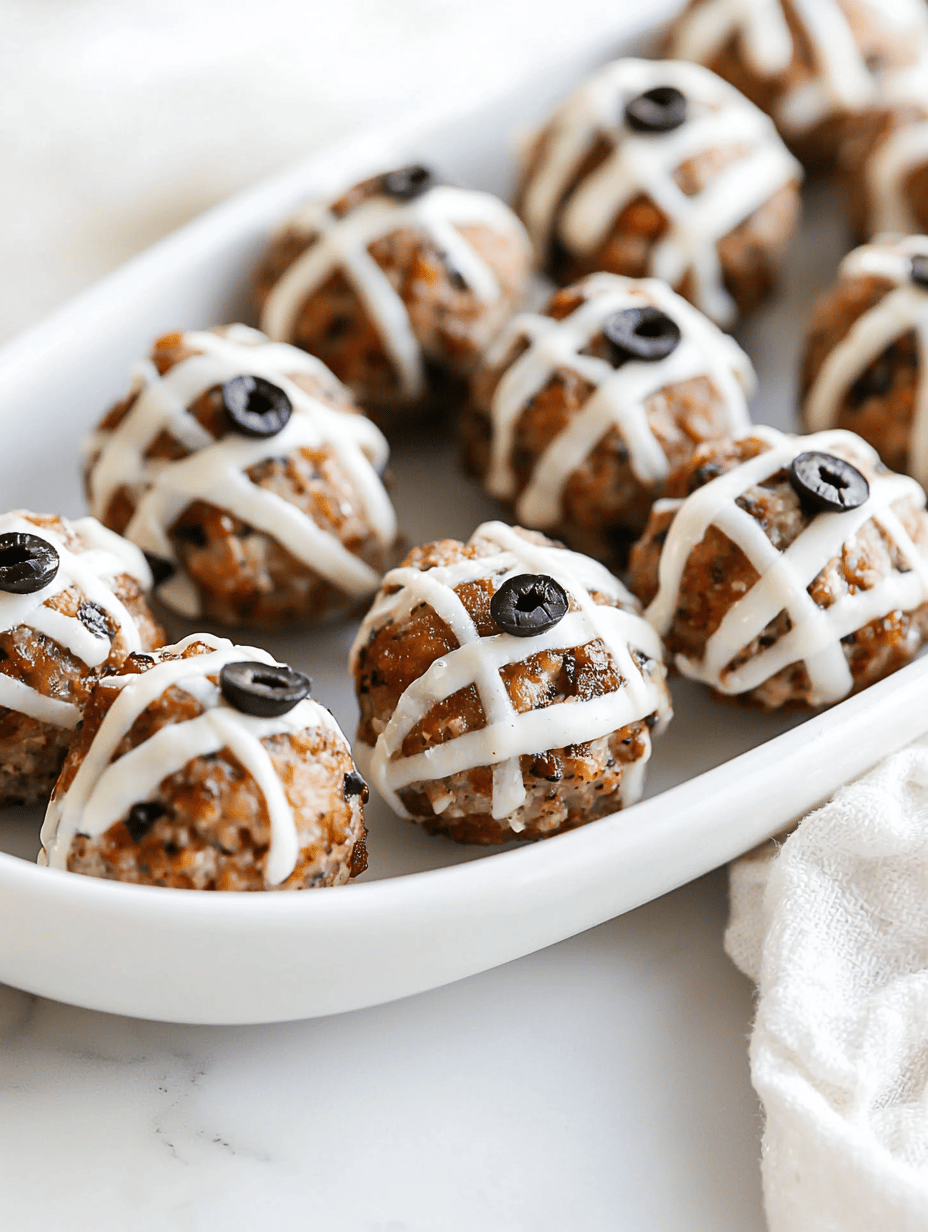
    These mummy meatballs are bite-sized portions of seasoned ground meat wrapped in crispy bacon strips, topped with melted mozzarella to resemble mummies. The dish involves baking and assembling techniques that create a playful, creepy appearance with a tender, flavorful interior and crispy exterior. The final result is a fun, spooky appetizer or main that combines savory textures and visual appeal.
    Prep Time 20 minutes
    Cook Time 30 minutes
    Total Time 50 minutes
    Servings: 4
    Course: Main Course
    Cuisine: American
    Calories: 250

    Ingredients
      

    • 1.5 pounds ground beef preferably 80/20 fat ratio
    • 1 small onion finely minced
    • 2 cloves garlic minced
    • 1/2 cup bread crumbs for binding
    • 1 teaspoon salt
    • 1/2 teaspoon black pepper
    • 8 slices bacon cut in half lengthwise
    • 8 slices mozzarella cheese cut into small rectangles
    • additional olive oil for brushing

    Equipment

    • Baking sheet
    • Cooling rack
    • Meatball scoop or spoon
    • Knife
    • Baking parchment

    Method
     

    1. Preheat your oven to 400°F (200°C). Line a baking sheet with parchment paper and place a cooling rack on top.
    2. Combine the ground beef, minced onion, garlic, bread crumbs, salt, and pepper in a large bowl. Mix gently until evenly incorporated.
    3. Use a meatball scoop or your hands to shape the mixture into small, uniform meatballs about 1 to 1.5 inches in diameter. Place them on the prepared rack.
    4. Wrap each meatball with a half slice of bacon, overlapping slightly to secure. Place the wrapped meatballs on the rack, seam side down.
    5. Brush the bacon-wrapped meatballs lightly with olive oil for extra crispiness. Bake in the preheated oven until the bacon is crispy and the meat is cooked through, about 25-30 minutes.
    6. Remove the meatballs from the oven and let them rest for a few minutes so the juices settle. Carefully transfer them to a serving platter.
    7. Insert a small rectangle of mozzarella into the top of each meatball, pressing gently to let it melt slightly and resemble a mummy’s bandages.
    8. Optional: Use thin strips of cooked bacon or cheese to add ‘mummy wrap’ effects, or arrange mozzarella so it looks like bandages.
    9. Serve the mummy meatballs warm, enjoying the crispy bacon exterior and cheesy interior that reveal the fun, mummy-like appearance with each bite.

    Notes

    Feel free to add small edible googly eyes with bits of olive or black sesame seeds for extra spookiness.
    These mummy meatballs are more than just a Halloween snack; they’re a celebration of fun, flavor, and nostalgia. Sharing them with loved ones turns a simple get-together into a memorable party. Plus, they make a striking centerpiece for your spooky spread.

    Enjoy the process of assembling these little creatures, and revel in the delighted reactions they inspire. As the season shifts and falls into full swing, these bites of joy are just what the occasion calls for. Keep the spirits high and the flavors bold—happy haunting.

  • Spooky Mummy Hot Dogs: A Halloween Snack with a Twist

    Spooky Mummy Hot Dogs: A Halloween Snack with a Twist

    Halloween is the perfect time to embrace the creepy and fun side of cooking. These mummy hot dogs transform an everyday snack into a spooky centerpiece that kids will love. The aroma of grilled buns and sizzling sausages instantly sparks Halloween cheer in my kitchen.

    But what makes this recipe stand out is the playful chaos it invites. Wrapping each hot dog like a mummy, with bits of stringy cheese and olives for eyes, adds a silly, spooky flair. It’s a perfect project for a family-friendly Halloween gathering or a spooky Netflix snack session.

    WHY I LOVE THIS RECIPE?

    • I get to blend nostalgia with creative chaos in the kitchen.
    • The surprise element of seeing faces emerge from the wrapping cheers everyone up.
    • The smell of roasted hot dogs and baked dough is simply irresistible.
    • It’s a fun, messy activity that turns into a tasty masterpiece.
    • Quick to prepare, it’s ideal for last-minute Halloween plans.

    AVOID MY DISASTER (You’re Welcome)

    • FORGOT to preheat the oven? The dough was cold and didn’t puff. Warm the dough first!
    • DUMPED ketchup or mustard on the eyes? Use tiny olives instead, less mess.
    • OVER‑TORCHED the cheese? Keep a close eye at 375°F. Shorter bake time helps.
    • MISSED the sticking of wrapping? Wet the edges slightly to seal better.

    QUICK FIXES THAT SAVE YOUR DAY

    • When dough sticks, splash a little water to loosen it.
    • Patch torn dough with extra strips of bread leftover from cutting shapes.
    • Shield from over-browning by tenting with foil early on—crisp is best.
    • Use a spray of oil for a shiny, golden crust—smells divine.
    • When in doubt, swap out cheese for shredded mozzarella for meltiness.

    Halloween Mummy Hot Dogs

    This dish features hot dogs wrapped in strips of dough to resemble mummies, baked until golden and crispy. Small pieces of cheese and olives serve as eyes, giving a spooky, fun appearance. The final result is a savory, slightly crunchy snack with a playful, mummy-themed presentation.
    Prep Time 15 minutes
    Cook Time 15 minutes
    Total Time 30 minutes
    Servings: 4
    Course: Main Course
    Cuisine: American
    Calories: 250

    Ingredients
      

    • 4 pieces hot dogs beef or chicken
    • 1 pack crescent roll dough or rolled pizza dough
    • small pieces cheddar cheese cut into tiny triangles for eyes
    • small pieces black olives pitted, sliced for eyes

    Equipment

    • Baking sheet
    • Parchment paper
    • Sharp knife
    • Small spoon or tweezers for eyes

    Method
     

    1. Preheat your oven to 375°F (190°C) and line a baking sheet with parchment paper.
    2. Unroll the crescent dough and gently press together the perforations to form a solid sheet.
    3. Slice the dough into strips about 1/2 inch wide; these will be the mummy wrappings.
    4. Place each hot dog on the baking sheet. Take a strip of dough and wrap it loosely around a hot dog, overlapping slightly as you go. Cover about three-quarters of the hot dog lengthwise, leaving one end free.
    5. Repeat the wrapping with remaining hot dogs, ensuring they’re all evenly covered with strips of dough.
    6. Place small slices of cheddar cheese on the wrapped hot dogs to serve as eyes, and top each with a small black olive slice for pupil.
    7. Bake in the preheated oven for about 12-15 minutes, or until the dough is golden brown and crispy, and the hot dogs are heated through.
    8. Remove from oven and let cool slightly before transferring to a serving platter. Enjoy warm, with any additional condiments if desired.

    Notes

    For a quick fix, you can use shredded cheese and whole black olives instead of slices. Keep an eye on the baking time to prevent over-browning.

    These mummy hot dogs give Halloween snacks a whimsical twist with plausible edibility. Their appeal isn’t just in their look but in the way they invite chaos and creativity. Savoring each bite fills the room with a nostalgic, spooky magic that’s hard to replicate.

    As the season shifts and pumpkins glow, these snacks remind us that simple ingredients can turn into memorable moments. They’re perfect for sharing thrill and laughter with loved ones—part of what makes October so special.