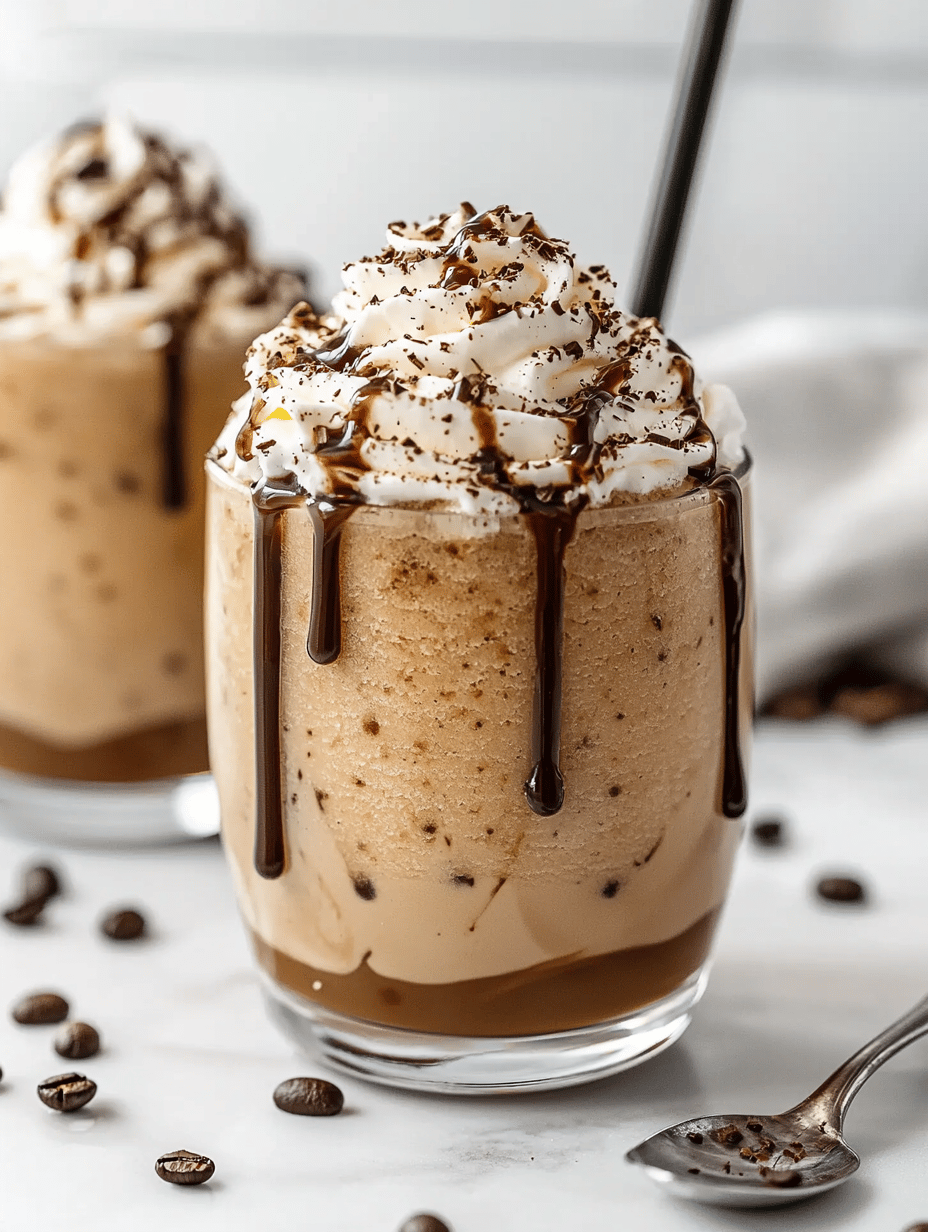
Category: Beverages

  • Spooky Splash: Halloween Monster Mash Punch That Vanishes in Seconds

    Spooky Splash: Halloween Monster Mash Punch That Vanishes in Seconds

    As Halloween approaches, I find myself craving more than just candy and costumes. I love creating themed drinks that stir up the chaos and nostalgia of haunted nights. This Monster Mash Punch is a chaos of colors and flavors, guaranteed to be the centerpiece that disappears quicker than you can say “trick or treat.”

    What makes this punch truly special is its playful messiness—think bright green, gory red, and bubbling purple all in one glass. It’s perfect for those who want a drink that’s as visually shocking as it is delicious. Plus, it’s super easy to whip up with just a few pantry staples and a splash of imagination.

    Monster Mash Punch

    Monster Mash Punch is a colorful, themed beverage featuring layered and bubbling fruit juices that create a visually shocking effect. It combines bright green, red, and purple liquids, often with added carbonation or effervescent elements, resulting in a fizzy, playful drink with a chaotic appearance. The final presentation is vibrant, bubbly, and eye-catching, perfect for Halloween festivities.
    Prep Time 10 minutes
    Cook Time 5 minutes
    Total Time 15 minutes
    Servings: 8
    Course: Main Course
    Cuisine: Halloween
    Calories: 120

    Ingredients
      

    • 4 cups white grape juice chilled
    • 2 cups lime flavored soda or lemon-lime soda chilled
    • 1 cup wild berry fruit punch chilled, optional for color
    • 1 cup blue curaçao syrup for color and flavor
    • 1 cup crushed ice optional, for chilling
    • splash carbonated water or club soda to add fizz

    Equipment

    • Large pitcher or punch bowl
    • Measuring cups and spoons
    • Mixing spoon
    • Glass stirring sticks or straws

    Method
     

    1. Pour the white grape juice into a large punch bowl, creating a bright, transparent base.
    2. Add the lemon-lime soda slowly to the grape juice, watching for gentle bubbling and mixing until combined. This adds a bubbly, frothy texture and a refreshing aroma.
    3. Stir in the wild berry fruit punch to introduce a vibrant red hue and enhance the fruity flavor profile. Mix gently to avoid losing too much carbonation.
    4. Drizzle the blue curaçao syrup into the mixture, creating swirling patches of electric blue and green that resemble gory or glowing effects. Use a spoon or pour slowly for visual effect.
    5. Fill the punch bowl with crushed ice to keep the drink chilled and add a frosty, bubbling effect as the ice begins to melt slightly into the mixture.
    6. Just before serving, add a splash of carbonated water or club soda to achieve extra fizz and lively bubbles bursting throughout the punch.
    7. Stir the punch gently with a long spoon or stirring stick, causing the different colors and bubbles to swirl and bubble wildly, creating a chaotically gory look.
    8. Serve the punch in clear glasses or cups with straws or stirring sticks, allowing the colorful layers and bubbling effects to be visible and fun.
    9. Enjoy immediately to experience the full bubbly, chaotic spectacle of this vibrant Halloween-themed drink.
    This Halloween punch isn’t just a drink; it’s a celebration in a glass. It brings out the kid in all of us, with its wiggly, shimmering effect and crazy colors. Plus, it’s a hilarious way to keep the party lively and a little chaotic.

    As the night winds down, this punch will leave a trail of delighted screams and sticky fingers. It’s loud, bright, and a little gross—just like Halloween should be. Cheers to creating spooky memories, one gulp at a time.

  • Enchanted Poison Apple Martini: A Spooky Sip for Halloween

    Enchanted Poison Apple Martini: A Spooky Sip for Halloween

    Halloween is the perfect time to indulge in cocktails that look as mysterious as they taste. The Poison Apple Martini transforms a classic apple flavor into something darker, more alluring. Its vibrant green hue and eerie glow make it a conversation starter at any haunted gathering.

    What makes this recipe stand out is the touch of chaos it adds to your bar cart. A splash of sourness, a hint of sweetness, and a hint of green shimmer combine for a drink that’s as fun to make as it is to sip. It’s a mixture of nostalgia and playful artistry, ideal for spooky season.

    WHY I LOVE THIS RECIPE?

    • FIND joy in turning simple ingredients into a potion that sparks conversation.
    • REVEL in the chaos of adding unexpected touches like glow-in-the-dark liqueur.
    • REMEMBER those childhood apple treats with a grown-up twist.
    • PRIDE in creating a stunning, spooky cocktail in just minutes.
    • RELIEF knowing everyone will be impressed and delighted with this creepy concoction.

    Poison Apple Martini

    The Poison Apple Martini is a vibrant green cocktail with an eerie glow, featuring bright apple flavor combined with a splash of sourness and shimmer. It is prepared by mixing and shaking ingredients until well-chilled, resulting in a smooth, visually striking drink with a glossy, alluring appearance.
    Prep Time 5 minutes
    Total Time 5 minutes
    Servings: 2
    Course: Main Course
    Cuisine: bAr
    Calories: 180

    Ingredients
      

    • 3 oz vodka chilled
    • 1 oz green apple liqueur for vibrant color and flavor
    • 0.5 oz lemon juice freshly squeezed
    • 0.5 oz simple syrup adjust for sweetness
    • 0.2 oz glow-in-the-dark tonic optional for eerie glow
    • a pinch edible shimmer or glitter for shimmer effect

    Equipment

    • Cocktail shaker
    • Strainer
    • Martini glasses

    Method
     

    1. Add the vodka, green apple liqueur, lemon juice, simple syrup, and glow-in-the-dark tonic (if using) into a cocktail shaker.
    2. Fill the shaker with ice until it’s about three-quarters full and seal tightly.
    3. Shake vigorously for about 15 seconds until the mixture is well chilled and the shaker feels icy and slightly frosted.
    4. Strain the mixture into chilled martini glasses, ensuring a smooth, clear pour that highlights the vivid green hue.
    5. Sprinkle a pinch of edible shimmer or glitter on top of each drink for a magical, glowing effect.
    6. Serve immediately to enjoy the chilling, shimmering allure of this spooky cocktail.

    Notes

    Use glow-in-the-dark tonic and edible shimmer for a striking visual effect perfect for Halloween parties. Adjust sweetness with more or less simple syrup as desired.

    Creating the Poison Apple Martini is a fun challenge that elevates your Halloween party. Its striking appearance and bold flavors make it a memorable centerpiece. Plus, the easy steps mean you can whip up a batch without breaking a sweat.

    As the night deepens and the candles flicker, this cocktail adds a layer of enchantment to your festivities. Sipping on its shimmering, tangy essence makes the evening feel truly magical — a perfect way to celebrate the spooky season with friends.

  • Refreshing Mango Slushie: A Cool Breeze for Hot Days

    Refreshing Mango Slushie: A Cool Breeze for Hot Days

    When the summer heat is relentless, I turn to an unusual approach to beat the sweltering days — a mango slushie with a twist. This recipe isn’t your typical icy beverage; it’s a vibrant, luscious blend that sparks nostalgia and joy with every sip. The secret lies in the perfectly ripe mangoes and a dash of unexpected flavor that transforms an everyday drink into something extraordinary.

    Imagine biting into a tropical paradise, the aroma of sweet mangoes filling the air as you sip on something that’s both cool and intensely flavorful. I love experimenting with textures and slight spice accents to give this slushie a chaotic, delicious edge. It’s a simple pleasure, yet it turns ordinary summer afternoons into mini celebrations.

    Mango Slushie with a Twist

    This mango slushie is a chilled, vibrant beverage made by blending ripe mangoes with ice and flavorings until smooth and frosty. The final texture is thick, icy, and velvety, showcasing the bright, sweet aroma of tropical mangoes with an optional spicy or zesty accent for added depth.
    Prep Time 10 minutes
    Total Time 10 minutes
    Servings: 2
    Course: Main Course
    Cuisine: Tropical
    Calories: 150

    Ingredients
      

    • 2 cups ripe mango chunks peeled and pitted
    • 1 cup ice cubes
    • 1 tablespoon honey or agave syrup optional, for added sweetness
    • 1/2 teaspoon chili powder or cayenne pepper for a spicy kick, optional
    • 1 teaspoon lime juice freshly squeezed, adds brightness

    Equipment

    • Blender
    • Knife
    • Cutting board

    Method
     

    1. Place the mango chunks, ice cubes, honey (if using), chili powder, and lime juice into the blender basket for a vibrant mix of flavors and textures.
    2. Secure the lid firmly and blend on high speed until the mixture is smooth, thick, and icy, with no visible chunks.
    3. Stop the blender occasionally to scrape down the sides with a spatula, ensuring everything blends evenly and achieving an ultra-smooth consistency.
    4. Taste the slushie and add more lime juice or honey if desired, then blend briefly to incorporate the flavors.
    5. Pour the chilled mango slushie into glasses, allowing the icy texture to spill over the edges for a refreshing presentation.
    6. Garnish with a small wedge of lime or a pinch of chili powder on top for an extra burst of flavor and visual appeal.

    This mango slushie is more than a thirst quencher; it’s a little escape in a glass, perfect for lazy weekends or quick gatherings. As the season shifts, having a recipe like this keeps things lively and fresh. It’s vibrant, easy, and endlessly customizable — a true summer staple.

    Enjoy the burst of tropical sweetness and the cooling sensation that makes every sip memorable. No matter how hectic the day, this slushie offers a moment of pure, colorful refreshment. A simple reminder that sometimes, the most delightful inventions require just ripe mangoes and a blender.

  • Enchanted Darkness: The Halloween Black Magic Margarita

    Enchanted Darkness: The Halloween Black Magic Margarita

    Imagine stirring a cocktail that looks straight out of a wizard’s spellbook. The Black Magic Margarita combines the mysterious allure of midnight with the zest of citrus and a hint of smoky intrigue. It’s not just a drink; it’s an experience that transforms your Halloween celebration into an enchanted ritual.

    Every sip feels like a secret unwrapped, with a dark, velvety hue that screams Halloween. Plus, its easy-to-make nature pairs perfectly with eerie costumes and ghostly gatherings. It’s the kind of concoction that sparks conversations and raises eyebrows.

    WHY I LOVE THIS RECIPE?

    • The deep black color adds an instant wow factor to any party setup.
    • The balancing act of citrus and smoky tequila feels both nostalgic and daring.
    • This recipe invites creativity—add glow-in-the-dark garnish for extra spookiness.
    • Perfect for those who crave a cocktail that’s as mysterious as the night sky.

    AVOID MY DISASTER (You’re Welcome)

    • FORGOT to really shake the cocktail? It’ll be flat and dull. Shake it vigorously! The shimmer comes from proper blending.
    • DUMPED too much black food coloring? The drink turned bitter. Start with a drop, taste, then add.
    • OVER-TORCHED the rim with cinnamon? A burnt smell will haunt you. Use a gentle torch flame instead.
    • REACHED for cheap tequila? It’ll ruin the vibe. Use a good quality blanco for smooth magic.

    QUICK FIXES THAT SAVE YOUR DAY

    • When the drink tastes bland, splash in a fresh squeeze of lime for zing.
    • Patch a cloudy appearance by adding a tiny splash of simple syrup, then stir well.
    • Shield the drink from dilution—serve immediately or over ice to keep the magic vibrant.
    • If the black hue fades, add a few drops of food coloring. It’s quick and trusty.
    • Spritz rim with lemon juice before dipping in black salt for an extra flavorful edge. Smells divine.

    Black Magic Margarita

    The Black Magic Margarita is a dark, velvety cocktail crafted by shaking smoky tequila with citrus juice and black food coloring, resulting in a striking black hue and smooth texture. The drink combines zesty, smoky, and mysterious flavors, making it visually impressive and perfect for Halloween festivities.
    Prep Time 10 minutes
    Total Time 10 minutes
    Servings: 2
    Course: Main Course
    Cuisine: cocktail
    Calories: 220

    Ingredients
      

    • 3 oz blanco tequila quality brand recommended
    • 1 oz lime juice freshly squeezed preferred
    • 0.5 oz triple sec orange liqueur
    • 2 drops black food coloring start with less and add more if needed
    • ice cubes ice for shaking and chilling

    Equipment

    • Cocktail shaker
    • Measuring jigger
    • Strainer
    • Lime wedge or lemon wedge

    Method
     

    1. Fill the cocktail shaker with a handful of ice cubes to chill it down.
    2. Add the tequila, fresh lime juice, and triple sec into the shaker using a measuring jigger for accuracy.
    3. Drop in two small droplets of black food coloring—this is enough to give the drink its dark hue without overpowering the flavor.
    4. Secure the lid tightly on the shaker and shake vigorously for about 15 seconds until the mixture is well chilled, the color is uniform, and you hear a satisfying rattle.
    5. Strain the mixture into a chilled glass to remove ice shards and achieve a smooth, velvety surface.
    6. Garnish with a lime or lemon wedge on the rim or float a twist of citrus peel for an extra touch of color and aroma.
    7. Serve immediately, showcasing its deep black color and inviting aroma, ready to impress for Halloween or a spooky night.
    As the night falls and pumpkin candles flicker, this Black Magic Margarita becomes more than just a cocktail. It’s your potion for an unforgettable Halloween gathering, where mystery and merriment collide. The rich, dark hues mirror the secrets the night holds.

    Whether you’re hosting a spooky soirée or just craving something extraordinary, this drink lends a touch of enchantment. Enjoy the eerie glow and smoky whispers in every sip, making your celebration truly memorable.

  • Tropical Chill: The Pineapple Slushie That Transforms Summers

    Tropical Chill: The Pineapple Slushie That Transforms Summers

    Imagine slicing into a ripe pineapple and having that sweet, tangy aroma fill your kitchen. Now, blend it with ice and a touch of coconut milk for a drink that’s both refreshing and unexpectedly complex. This pineapple slushie isn’t just a cool down; it’s a nostalgic trip back to childhood summers and tropical getaways.

    What makes this recipe special isn’t just the flavor but its surprising versatility. It’s perfect for hot afternoons, casual brunches, or even as a playful weekend treat. Plus, you only need a handful of ingredients and a blender to whip it up in minutes. It’s a little burst of sunshine in a glass, ready whenever you need a lift.

    Pineapple Coconut Slushie

    This pineapple coconut slushie is a chilled beverage made by blending ripe pineapple chunks with ice and coconut milk until smooth. It has a vibrant, frosty texture with a bright yellow color and a slightly creamy consistency. The drink offers a refreshing balance of sweet, tangy, and tropical flavors, ideal for hot days or casual gatherings.
    Prep Time 5 minutes
    Total Time 5 minutes
    Servings: 2
    Course: Main Course
    Cuisine: Tropical
    Calories: 150

    Ingredients
      

    • 2 cups ripe pineapple chunks fresh or frozen
    • 1.5 cups ice cubes adjust for desired thickness
    • 1 cup coconut milk full-fat for creaminess

    Equipment

    • Blender
    • Measuring Cup

    Method
     

    1. Place the pineapple chunks, ice cubes, and coconut milk into the blender. Ensure all ingredients are evenly distributed for smooth blending.
    2. Secure the lid on the blender tightly and start blending on low speed, gradually increasing to high until the mixture is smooth and frosty. You should see the ice break down into tiny shards and the mixture become thick and creamy.
    3. Stop the blender and check the consistency. If the slushie is too thick, add a splash more coconut milk and blend briefly to combine.
    4. Pour the frosty mixture into glasses, filling them almost to the top. Notice the vibrant yellow color and inviting aroma.
    5. Serve immediately with a pineapple wedge or a sprig of mint if desired. The slushie should be cold, thick, and slightly melty around the edges, perfect for sipping.

    This pineapple slushie is more than a drink; it’s a mini escape to the tropics whenever the craving hits. Its bright, lively flavor can brighten any day and cool you from the inside out. As summer approaches, this simple recipe will become a staple in your warm-weather rotation.

    Keep a bag of frozen pineapple chunks in your freezer, and you’ll always have the key ingredient on hand. It’s a quick, cheerful way to beat the heat and bring a little sunshine into your home. Cheers to simple, joyful sips that remind us where happiness really comes from.

  • Chill Out with Creamy Milkshake Slushies: A Forgotten Summer Escape

    Chill Out with Creamy Milkshake Slushies: A Forgotten Summer Escape

    Imagine a scorching summer day suddenly cooled by a frosty treat that’s both nostalgic and surprisingly sophisticated. A milkshake slushie could be your secret weapon against the heat—thick, creamy, with a whisper of icy crunch. It’s more than a drink; it’s a small frozen rebellion, defying the relentless summer sun with every chilled sip.

    Crafting this frozen delight turns a simple milkshake into an adventure in texture and temperature. The secret lies in a clever freezing technique that turns your favorite flavors into a refreshingly slushy masterpiece. It’s a game of patience, precision, and just enough sweet chaos to make each sip an experience worth savoring.

    As everyone rushes toward ice-cold beverages, this milkshake slushie offers a comforting twist with a blast of cold nostalgia. Whether you’re hosting a backyard party or just craving a quick cool-down, this recipe promises a perfectly balanced icy treat every time.

    Milkshake Slushie

    This milkshake slushie is a refreshing frozen treat made by blending milk, ice, and flavorings into a thick, icy mixture with a creamy texture. It features a slightly granular, icy crunch and smoothness that resembles a cross between a milkshake and a slushie. The preparation involves blending and freezing techniques to achieve a perfect frozen consistency suitable for hot days.
    Prep Time 10 minutes
    Total Time 20 minutes
    Servings: 2
    Course: Main Course
    Cuisine: American
    Calories: 350

    Ingredients
      

    • 2 cups vanilla ice cream cold, slightly softened for blending
    • 1 1/2 cups milk preferably chilled
    • 1 cup ice cubes crushed or whole
    • 2 tablespoons sugar syrup or adjust to taste
    • 1/2 teaspoon vanilla extract

    Equipment

    • Blender
    • Freezer

    Method
     

    1. Combine the vanilla ice cream, chilled milk, ice cubes, sugar syrup, and vanilla extract in a blender.
    2. Blend on high speed for about 30-40 seconds until the mixture becomes thick, frosty, and slightly granular with visible ice particles.
    3. Stop blending and check the texture; if it’s too thick, add a splash more milk and blend briefly to loosen.
    4. Pour the blended mixture into glasses, which should be frosty and slightly slushy at the surface.
    5. Optionally, garnish with a swirl of whipped cream, a cherry, or a drizzle of chocolate syrup for extra flair.
    6. Serve immediately with a straw or spoon to enjoy the icy, creamy texture.

    Notes

    For an extra frosty experience, freeze the glasses briefly before pouring. Adjust sweetness as desired, adding more sugar syrup for a sweeter treat or less for a milder flavor.

    Now that you’ve mastered the art of the milkshake slushie, the only limit is your imagination. Play with flavors, add sprinkles, or even swirl in fruit preserves for extra flair. Each batch is a frozen canvas waiting for your creative touch.

    Remember, the key to a smooth, scoopable slushie lies in careful timing and patience. After a quick freeze, a gentle stir can transform your ordinary milkshake into a frosty masterpiece. It’s a refreshing escape that keeps summer spirits high, one chilled sip at a time.

  • Chill Out with a Frozen Margarita Slushie: The Unlikely Cooler

    Chill Out with a Frozen Margarita Slushie: The Unlikely Cooler

    Imagine a summer evening where the air is thick with heat and the old tricks don’t cut it anymore. That’s when I turn to my secret weapon: the frozen margarita slushie. It’s the unexpected hero in my freezer, offering a cool, tangy escape that feels like a mini vacation in every sip.

    What makes this recipe stand out is its simplicity and the wild, carefree textures. No fancy machine needed—just a few ingredients, a blender, and a little patience. It’s perfect for those moments when the craving hits fast and hard, and traditional cocktails feel like too much fuss.

    Frozen Margarita Slushie

    This frozen margarita slushie is a refreshing, tangy beverage made by blending tequila, lime juice, orange liqueur, and ice until smooth and slushy. It has a bright, icy texture and a vibrant, citrusy appearance, perfect for warm weather refreshment.
    Prep Time 10 minutes
    Total Time 10 minutes
    Servings: 2
    Course: Main Course
    Cuisine: Mexican
    Calories: 150

    Ingredients
      

    • 1 cup ice cubes
    • 1.5 oz tequila preferably blanco
    • 1 oz orange liqueur such as Triple Sec or Cointreau
    • 0.75 oz fresh lime juice about one lime
    • 0.5 oz simple syrup optional, adjust sweetness to taste

    Equipment

    • Blender
    • Measuring cups and spoons

    Method
     

    1. Add the ice cubes to your blender, filling it about halfway to ensure a good slushie consistency.
    2. Pour in the tequila, orange liqueur, and freshly squeezed lime juice over the ice.
    3. If you like extra sweetness, add the simple syrup now to balance the tartness of the lime.
    4. Blend everything on high speed until the mixture is thick, smooth, and resembles a slushie, about 30-45 seconds.
    5. Stop the blender and check the texture; it should be icy yet creamy. If needed, add a few more ice cubes and blend briefly again.
    6. Pour the frozen margarita slushie into chilled glasses and garnish with lime wedges or a salted rim if desired.

    This frozen margarita slushie is more than just a drink; it’s an experience of refreshment that can be whipped up in minutes. Whether you’re cooling down after a backyard party or just need a break from the mundane, it’s there to rescue your day with vibrant flavors and a crunchy texture.

    Embrace the chaos of a spontaneous cocktail that melts perfectly on the tongue. The next time the heat gets unbearable, grab your blender, and let this icy delight do all the work. Cheers to simple, frosty joys that instantly lift your spirits.

  • Spooky Scarlet Sips: The Haunted Bloody Mary

    Spooky Scarlet Sips: The Haunted Bloody Mary

    Every Halloween, I crave a cocktail with a bit of wicked flair. This Bloody Mary isn’t just any brunch favorite; it’s a gory, eye-catching brew that’s perfect for the season. The red hue and the spooky garnish turn your drink into a mischievous masterpiece that sparks conversation.

    What makes this Bloody Mary truly haunting is the way it balances chill with chaos. The savory tomato base, the sharp dash of horseradish, and the ominous splash of dark liquor create a symphony of flavors that feel just right for a spooky night. It’s more than a drink; it’s a costume party for your taste buds.

    Spooky Bloody Mary

    A vibrant, savory cocktail featuring a tomato-based mixture with horseradish and dark liquor, garnished with spooky accents for a Halloween-themed presentation. The drink has a thick, smooth texture with a bright red hue, resembling gory potion perfection. It combines bold flavors with a visually striking appearance suited for festive gatherings.
    Prep Time 10 minutes
    Total Time 10 minutes
    Servings: 1
    Course: Main Course
    Cuisine: Halloween
    Calories: 120

    Ingredients
      

    • 4 oz tomato juice preferably chilled
    • 1 oz vodka or dark rum for a richer flavor
    • 0.5 oz horseradish freshly grated if possible
    • dash Worcestershire sauce
    • dash Tabasco sauce adjust for heat preference
    • pinch black pepper
    • to taste celery salt
    • Ice cubes as needed for chilling

    Equipment

    • Cocktail shaker
    • Stirring spoon
    • Tall glass

    Method
     

    1. Pour the tomato juice into a cocktail shaker and add the vodka, horseradish, Worcestershire, Tabasco, black pepper, and a pinch of celery salt.
    2. Add a handful of ice cubes to the shaker to chill the mixture thoroughly.
    3. Secure the lid on the shaker and shake vigorously for about 15 seconds until the mixture is well combined and chilled.
    4. Remove the lid and strain the cocktail into a tall glass filled with fresh ice, leaving out any excess ice from the shaker.
    5. Garnish the drink with spooky accents like a celery stalk, olive, or a cherry to enhance the Halloween theme.
    6. Serve immediately and enjoy this gory, flavorful Bloody Mary with its bright red hue and spooky presentation.

    Notes

    Adjust the spice levels with Tabasco and horseradish to suit your taste. For a more dramatic look, add a plastic eye or a fictional eyeball as garnish.

    Mixing up this Halloween Bloody Mary is a delightful ritual that adds a splash of fun to any ghoulish gathering. The vibrant color and daring presentation make it stand out among typical fall cocktails. It’s a drink that invites storytelling and laughter around every sip.

    As the season unfolds, this eerie cocktail is a reminder to enjoy the small, spooky details that make Halloween special. Whether you’re hosting friends or just indulging in a solo spooky fest, this recipe brings a little chaos and a lot of charm to your holiday. Cheers to a hauntingly good time!

  • Chill Out with a Nostalgic Kool Aid Slushie

    Chill Out with a Nostalgic Kool Aid Slushie

    Exploring childhood memories with a twist, this Kool Aid slushie takes you on a sensory journey. The vibrant color and tangy aroma awaken a sense of playful chaos, reminiscent of sunny afternoons and carefree moments. It’s perfect for beating the heat and reliving those sweet, simple joys.

    Imagine pouring icy, flavored sugar water into a blender, the crackling sound as it crushes into perfect shards of refreshment. The bold, fruity scent fills the kitchen, inviting everyone to join in. This recipe transforms a regular hot day into a burst of colorful nostalgia, with just a few pantry staples and a blender.

    ### WHY I LOVE THIS RECIPE?
    – It revives childhood memories with every sip.
    – The bright colors lift any dreary day.
    – Simple ingredients make it an easy, satisfying treat.
    – It’s chaos in a cup, in the best way.
    – Perfect for spontaneous get-togethers or solo escapes.

    Kool Aid Slushie

    A refreshing frozen beverage made by blending flavored Kool Aid with ice to create a vibrant, icy treat. The mixture results in a slushy texture with bold color and tangy aroma, ideal for hot days and nostalgic moments.
    Prep Time 5 minutes
    Total Time 5 minutes
    Servings: 4
    Course: Main Course
    Cuisine: International
    Calories: 120

    Ingredients
      

    • 1 packet Kool Aid powder flavor of choice, e.g., cherry or lemon-lime
    • 2 cups ice cubes or crushed ice
    • 1 cup cold water to dissolve the Kool Aid and blend with ice

    Equipment

    • Blender
    • Measuring cups and spoons

    Method
     

    1. Pour the Kool Aid powder into a blender.
    2. Add the water to the blender, ensuring the powder dissolves slightly before blending.
    3. Put the ice cubes into the blender, filling it up to the top.
    4. Secure the lid and blend on high speed until the mixture is slushy, vibrant, and finely crushed, about 30-40 seconds.
    5. Stop the blender and check the consistency; it should resemble a thick, icy soup with bright color.
    6. Pour the Kool Aid slushie into glasses, allowing the colorful ice to scoop easily.
    7. Serve immediately with lots of ice shards and enjoy the tangy, icy refreshment.

    Notes

    For variation, try different Kool Aid flavors or add a splash of lemon juice for extra zing.
    This Kool Aid slushie isn’t just a treat—it’s a moment suspended in time, wrapped in vibrant color. It’s perfect for summer gatherings or a quick, joyful escape on a hot afternoon.

    Plus, it’s so easy to tweak: swap flavors, add a splash of lemon, or even mix in some fresh fruit. The simplicity and cheerful hue make it a recipe to keep in your back pocket all season long. Sometimes, the best ideas are just a handful of ingredients and a blender away.

  • The Hidden Art of Iced Tea Slushies: A Chilly Twist You Never Knew

    The Hidden Art of Iced Tea Slushies: A Chilly Twist You Never Knew

    [object Object]

    Classic French Onion Soup

    French onion soup is a warm, hearty dish featuring caramelized onions simmered in beef broth, topped with toasted slices of baguette and melted cheese. The soup develops a rich, sweet flavor through slow cooking of onions, resulting in a thick, flavorful broth with a satisfying, cheesy crust on top.
    Prep Time 15 minutes
    Cook Time 45 minutes
    Total Time 1 hour
    Servings: 4
    Course: Main Course
    Cuisine: French
    Calories: 320

    Ingredients
      

    • 4 large yellow onions thinly sliced
    • 2 tablespoons unsalted butter
    • 1 teaspoon salt
    • 1/2 teaspoon fresh thyme optional
    • 1 cup dry white wine or extra beef broth
    • 6 cups beef broth or vegetable broth for a vegetarian version
    • 8 slices French baguette sliced and toasted
    • 1 1/2 cups grated Gruyère cheese
    • black pepper to taste

    Equipment

    • Large Soup Pot
    • Saute pan
    • Baking sheet
    • Oven-safe Bowls or Ramekins

    Method
     

    1. Slice the onions thinly and prepare all ingredients for quick assembly.
    2. Melt the butter in a large soup pot over medium heat. Add the sliced onions and sprinkle with salt. Cook, stirring occasionally, until the onions become soft and begin to turn golden, about 10-15 minutes.
    3. Reduce the heat to low and continue to cook the onions, stirring frequently, until they are deeply caramelized and rich in color, about 30 minutes. The onions will smell sweet and look dark golden brown.
    4. Pour in the white wine or extra broth to deglaze the pan, scraping up any browned bits from the bottom. Let simmer until the liquid reduces slightly, about 5 minutes.
    5. Add the beef broth and thyme to the pot. Bring the mixture to a gentle simmer and cook uncovered for 15-20 minutes, allowing the flavors to meld and the soup to thicken slightly.
    6. While the soup simmers, toast the baguette slices until golden and crispy.
    7. Preheat your oven’s broiler. Ladle the hot soup into oven-safe bowls or ramekins.
    8. Place a toasted baguette slice on top of each bowl of soup, then generously sprinkle grated Gruyère cheese over the bread and around the edges.
    9. Transfer the bowls under the broiler and cook until the cheese is bubbling and golden brown, about 2-3 minutes. Keep a close eye to prevent burning.
    10. Remove the bowls from the oven carefully, season with freshly ground black pepper, and serve hot, enjoying the crispy, cheesy top with the flavorful broth beneath.

    Notes

    Caramelizing the onions slowly is key to developing their sweetness and depth of flavor. Feel free to add a splash of sherry for extra richness or top with fresh herbs for garnish.

    This iced tea slushie isn’t just a drink; it’s a small adventure every time you make it. It captures that fleeting moment of summer freshness, frozen in time and flavor. Whether you’re hosting friends or craving a solo escape, this recipe turns ordinary tea into a frosty masterpiece.

    As the seasons shift and temperatures climb, having a quick, icy delight on hand becomes priceless. It’s the kind of treat that cools more than just your body—it refreshes your spirit too, stirring up memories while creating new ones in every sip.