Cheese balls might seem like a simple appetizer, but I’ve found that adding unexpected herbs and spices can turn this childhood classic into something a bit more refined. It’s the kind of snack that feels cozy yet sophisticated, perfect for when you want to impress without fussing too much.
I first started playing with this idea during a casual get-together, tossing in a pinch of smoked paprika and fresh dill. The aroma alone changed the game — smoky, herbal, a little tangy. It’s a reminder that comfort food can also surprise and delight the senses.
Making these cheese balls from scratch feels honest, a little chaotic, but incredibly satisfying. Once you get the hang of it, you’ll see how a simple mix of cheese and herbs can become a memorable, crowd-pleasing bite with just a few tweaks.
Focusing on the nostalgic comfort of cheese balls with a twist: incorporating unexpected herbs and spices to elevate a childhood favorite into a sophisticated snack.
Nostalgic bites with a spicy twist
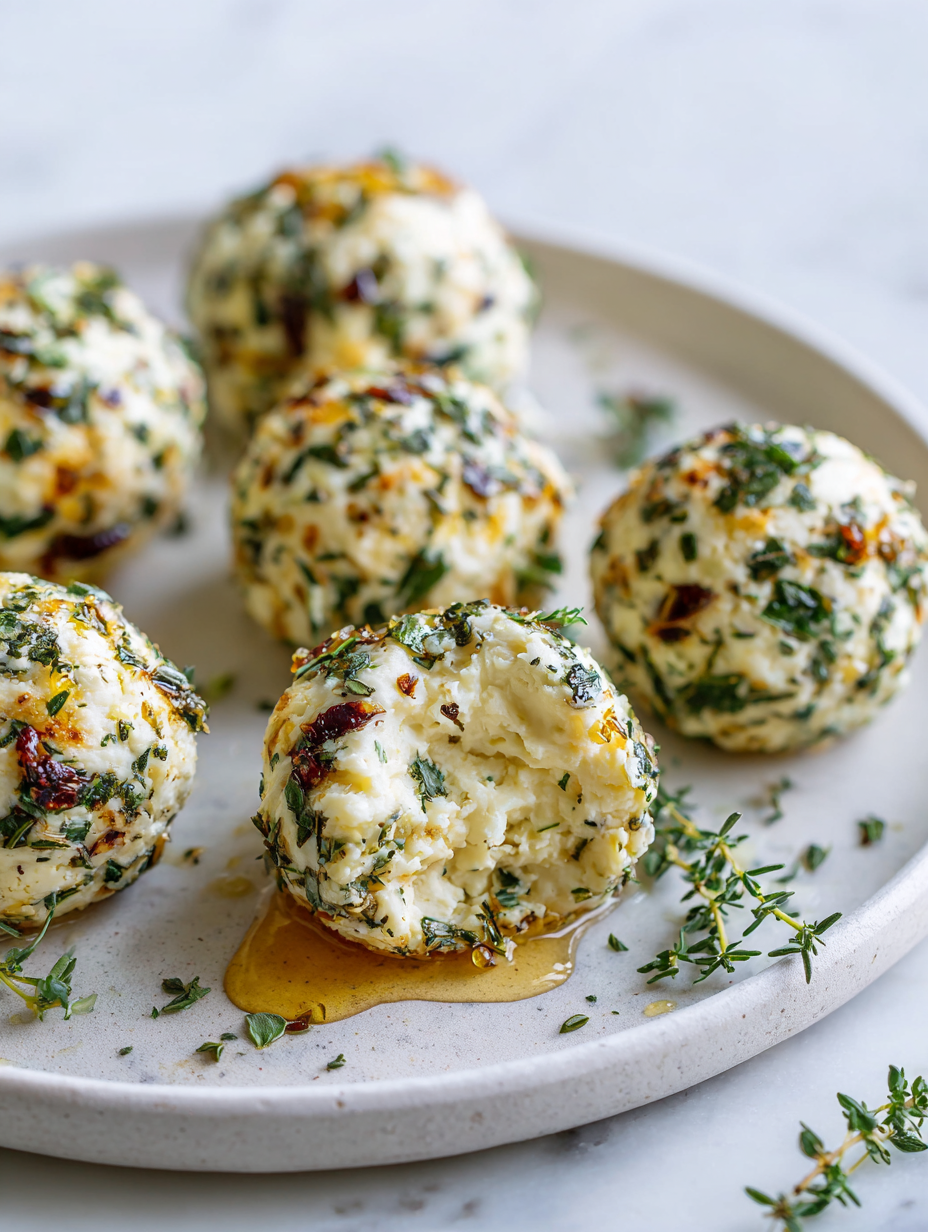
- These cheese balls remind me of lazy Sunday afternoons in my childhood, the smell of sharp cheddar and crispy edges filling the kitchen.
- The chaos of mixing and shaping the cheese into perfect spheres always feels like a small victory, even if they’re a little uneven.
- I love how a pinch of smoked paprika or fresh herbs can turn a simple snack into a conversation starter at parties.
- There’s a pride in making something from scratch that’s been passed down or improvised in my own kitchen, especially when it turns out delicious.
- Every time I make these, I’m reminded that comfort food doesn’t have to be boring — it can surprise and excite with just a few tweaks.
The story behind this recipe
- This recipe for cheese balls came from a day when I was rummaging through my old recipe box, looking for something quick and nostalgic. I remembered how my grandma used to whip up similar snacks, but with her own secret herbs and a pinch of chaos in the kitchen. That memory stuck with me, especially the way the cheese smelled warm and inviting, just waiting to be rolled into perfect spheres.
- One afternoon, I decided to play with that memory—adding my own twist of fresh herbs and a dash of spice. The process felt messy but honest, and the smell of melting cheese mingling with herbs made me realize how food can carry stories and comfort in every bite.
- heading: Personal connection to cheese balls
Cheese Ball Trivia
- Cheese balls gained popularity in mid-20th-century America as a party snack due to their portability and shareability.
- Early recipes often used processed cheese, but modern takes embrace artisanal cheeses for richer flavor.
- The shape of cheese balls makes them ideal for nostalgic holiday parties, especially during the 1950s and 60s.
- Adding herbs and spices to cheese balls became a way to personalize and elevate this casual appetizer.
Key ingredients and tips
- Cream cheese: I love how soft and luscious it becomes, giving the balls a rich, creamy texture. You can swap in mascarpone for a milder, silkier bite, but watch out—less tang, more smoothness.
- Cheddar cheese: Sharp cheddar adds that iconic flavor and melts beautifully, creating a slightly oozy center. Try Gruyère if you want a nuttier, more complex taste that still melts well.
- Herbs: Fresh parsley and chives brighten the palate with a grassy, herbal note. Dried herbs are okay in a pinch, but fresh really wakes up the flavor and aroma.
- Spices: Smoked paprika gives a subtle smoky depth, while a pinch of cayenne adds warmth. Feel free to experiment with cumin or cumin seeds for a different smoky kick.
- Breadcrumbs: They help shape and firm the cheese mixture. Panko gives a crispier exterior once fried, but regular breadcrumbs work fine if you’re after a softer bite.
- Egg: Acts as a binder to hold everything together. If you’re vegan, a flax egg can work—just be aware it might alter the texture slightly.
- Oil: For frying, a neutral oil like vegetable or canola keeps the balls crispy without interfering with flavor. Keep an eye on the temperature—around 180°C/350°F is perfect for golden crunch.
Spotlight on key ingredients
Cheese (Cream cheese & Cheddar):
- Cream cheese: I love how soft and luscious it becomes, giving the balls a rich, creamy texture. You can swap in mascarpone for a milder, silkier bite, but watch out—less tang, more smoothness.
- Cheddar cheese: Sharp cheddar adds that iconic flavor and melts beautifully, creating a slightly oozy center. Try Gruyère if you want a nuttier, more complex taste that still melts well.
- Herbs: Fresh parsley and chives brighten the palate with a grassy, herbal note. Dried herbs are okay in a pinch, but fresh really wakes up the flavor and aroma.
Spices, Breadcrumbs & Oil:
- Spices: Smoked paprika gives a subtle smoky depth, while a pinch of cayenne adds warmth. Feel free to experiment with cumin or cumin seeds for a different smoky kick.
- Breadcrumbs: They help shape and firm the cheese mixture. Panko gives a crispier exterior once fried, but regular breadcrumbs work fine if you’re after a softer bite.
- Oil: For frying, a neutral oil like vegetable or canola keeps the balls crispy without interfering with flavor. Keep an eye on the temperature—around 180°C/350°F is perfect for golden crunch.
Notes for ingredient swaps
- Dairy-Free: Coconut cream or cashew cheese can replace cream cheese, but expect a slightly different richness and a hint of sweetness.
- Cheese Options: Swap in Gruyère or Monterey Jack for a milder, meltier experience. Blue cheese adds a sharp, tangy punch if you like bold flavors.
- Herbs: Fresh basil or tarragon can elevate the aroma with a different herbal note—dried herbs are okay in a pinch but less vibrant.
- Spices: Smoked paprika is key for depth, but chipotle powder gives a smoky kick and a deeper red hue. Cumin adds earthy warmth.
- Breadcrumbs: Use gluten-free Panko or crushed nuts like pecans for crunch and flavor variation. Fine crumbs help shape better.
- Egg: For vegan, try a flaxseed or chia seed slurry—will change the binding texture slightly but still workable.
- Oil: Canola or vegetable oil works well. For a healthier or more flavorful option, try avocado oil or even clarified butter for frying.
Equipment & Tools
- Mixing bowl: To combine and mix the cheese, herbs, and spices smoothly.
- Baking sheet with parchment: To hold the formed cheese balls and prevent sticking.
- Small bowls: For coating ingredients and for rolling the cheese balls.
- Frying pan or deep pot: To fry the cheese balls until crispy and golden.
- Slotted spoon: To safely lift out fried balls and drain excess oil.
Step-by-step guide to Cheese Balls
- Gather all equipment: mixing bowl, baking sheet, small bowls for coating, and a fork. Preheat your oven to 180°C (350°F).
- In a large bowl, combine 8 oz cream cheese, 1 cup grated sharp cheddar, 2 tbsp chopped fresh parsley, and 1 tbsp chopped chives. Mix until smooth and well blended, about 2-3 minutes.
- Add 1/2 tsp smoked paprika, 1/4 tsp cayenne, and a pinch of salt and pepper. Stir to incorporate evenly. Adjust spices to taste if desired.
- Scoop about 1 tbsp of the cheese mixture and roll gently between your palms into a ball about 2.5 cm (1 inch) diameter. Place on the baking sheet lined with parchment paper. Continue until all mixture is used, roughly 12-15 balls.
- Prepare a small bowl with 1/2 cup breadcrumbs. Roll each cheese ball in breadcrumbs, pressing lightly to adhere. For extra crunch, use Panko breadcrumbs.
- Heat 2-3 inches of oil in a deep frying pan or pot to 180°C (350°F). Carefully fry cheese balls in batches, about 2-3 minutes each, until golden and crispy. If they crackle loudly or turn dark too fast, lower heat slightly.
- Remove with a slotted spoon and drain on paper towels. Let rest for 2 minutes to firm up before serving.
Let the cheese balls rest on paper towels for 2 minutes to set. Serve warm or at room temperature, with a sprinkle of fresh herbs or a dipping sauce of your choice.
How to Know It’s Done
- Golden brown exterior with a slight crackle when fried.
- Center should feel soft but hold shape when gently pressed.
- A quick knife test: insert into a ball—center should be warm, not molten.
Herb-Infused Cheese Balls
Ingredients
Equipment
Method
- In a large mixing bowl, combine the softened cream cheese, shredded cheddar, chopped parsley, and chives. Mix with a fork or spatula until smooth and evenly blended, with a creamy, uniform texture.
- Add smoked paprika, cayenne pepper, a pinch of salt, and pepper to the cheese mixture. Stir thoroughly to distribute the spices evenly, filling the air with an inviting aroma of smoky herbs.
- Scoop about 1 tablespoon of the cheese mixture and gently roll it between your palms to form a small, smooth sphere. Place the shaped cheese ball on a parchment-lined baking sheet. Repeat until all the mixture is used, aiming for 12-15 evenly sized balls.
- Place the breadcrumbs in a small bowl. Roll each cheese ball gently in the breadcrumbs, pressing lightly to ensure an even coating. This step creates a crispy crust once fried.
- Pour vegetable oil into a deep frying pan or pot, enough to submerge the cheese balls. Heat the oil over medium-high heat until it reaches approximately 180°C (350°F), or until a small piece of bread sizzles and turns golden within seconds.
- Carefully lower the cheese balls into the hot oil in batches, making sure not to overcrowd the pan. Fry for about 2-3 minutes, turning gently with a slotted spoon, until the exterior is golden brown and crispy, and the cheese inside is warm and melty.
- Using a slotted spoon, transfer the fried cheese balls onto paper towels to drain excess oil. Let them rest for about 2 minutes to set and avoid burning your palate.
- Arrange the cheese balls on a serving platter. Serve warm, garnished with extra chopped herbs if desired, and enjoy their crispy exterior and gooey interior in every bite.
Pro tips for perfect cheese balls
- Chill the mixture: Cold ingredients help shape firm, cohesive cheese balls. Chill for 15-20 minutes before rolling.
- Use wet hands: Keep your palms slightly damp to prevent sticking and achieve smooth, round spheres.
- Fry in batches: Avoid overcrowding the pan to ensure even heat and crispiness. Work in small groups for best results.
- Monitor oil temperature: Keep it around 180°C (350°F). Too hot and the exterior burns; too cold and they’ll be greasy.
- Drain well: Rest fried cheese balls on paper towels to soak up excess oil. This keeps them crispy and not greasy.
- Serve immediately: Cheese balls are best warm—crispy outside, gooey inside. Reheat in oven at 180°C (350°F) for 5-7 minutes if needed.
- Adjust spices: Taste the cheese mixture before shaping. Add more herbs or spices if you crave a bolder flavor.
Common Cheese Balls Mistakes
- FORGOT to adjust heat → cheese may burn or not brown evenly.
- DUMPED ingredients too quickly → mix gently to avoid overworking the cheese.
- OVER-TORCHED oil → lower heat to prevent burning and achieve crispy exterior.
- MISSED resting time → allow cheese balls to set for better shape and texture.
Quick Fixes & Pantry Swaps
- When oil shimmers, splash a tiny drop of water to test for readiness.
- If cheese mixture feels too sticky, dip hands in cold water before shaping.
- Splash a little vinegar or lemon juice if cheese balls are too bland in flavor.
- Patch cracked cheese balls with a dab of extra cheese mixture and gently reshape.
- Shield overbrowned cheese balls with a piece of foil and lower heat slightly.
Prep, store, and reheat tips
- You can prepare the cheese mixture a day in advance; keep it covered in the fridge to let flavors meld and develop. The mixture becomes even more flavorful overnight, with herbs and spices intensifying slightly.
- Shape the cheese balls and refrigerate them uncovered for up to 2 hours before frying. This helps them firm up, making frying easier and preventing them from spreading too much in hot oil.
- Stored in an airtight container in the fridge, fried cheese balls are best enjoyed within 24 hours for optimal crispness and flavor. They tend to lose crunch and become a bit softer after that.
- Reheat in a 180°C (350°F) oven for 5-7 minutes. The exterior will crisp up again, and the inside will stay warm and gooey. Avoid microwaving, as it makes them soggy and loses the crispy exterior.
Top questions about Cheese Balls
1. Should I use softened or cold cream cheese?
Use softened cream cheese for easy mixing and a smooth texture. Cold cheese can be stubborn to blend.
2. How do I know when the oil is hot enough?
Fry the cheese balls in hot oil at around 180°C (350°F) until golden and crispy, about 2-3 minutes.
3. What if my mixture is too sticky to shape?
If the cheese mixture feels too sticky, refrigerate it for 15-20 minutes before shaping to make it easier.
4. Can I bake instead of fry the cheese balls?
Yes, you can bake them at 180°C (350°F) for 10-12 minutes until golden, but frying gives the best crunch.
5. Can I make cheese balls in advance?
You can prepare the mixture a day ahead, cover, and refrigerate overnight for more flavor development.
6. How should I reheat leftover cheese balls?
Reheat in a 180°C (350°F) oven for 5-7 minutes until crispy and hot inside. Avoid microwaving to keep crispness.
7. Can I substitute breadcrumbs with something else?
Use Panko breadcrumbs for extra crunch, or substitute with crushed nuts for a different texture and flavor.
8. Which herbs are best for cheese balls?
Fresh herbs like parsley and chives brighten the flavor and aroma. Dried herbs work but are less vibrant.
9. How do I customize the flavor of my cheese balls?
Adjust spices to taste, adding more paprika or cayenne for heat, or herbs for freshness. Taste before frying.
10. Why did my cheese balls crack in the oil?
If your cheese balls crack open during frying, lower the heat slightly and ensure the mixture is well chilled.
These cheese balls are more than just a nostalgic snack; they’re a reminder that simple ingredients can surprise with the right touch of spice and a crispy exterior. Making them from scratch feels honest, a little chaotic, but always worth it when you hear that satisfying crackle in the oil.
They’re perfect for casual get-togethers or cozy nights when you need something warm and familiar, but elevated. Once you get the hang of frying these until golden, they become a comforting, irresistible treat that’s hard to put down.

Hi, I’m Emily Carter, the creator and recipe developer behind Salt Strategist. I’m so happy you’re here. This blog is where my love for flavor, creativity, and thoughtful cooking comes together in one beautiful, ever evolving space.


