Roasting red peppers until they’re smoky and tender unlocks a secret sweetness that’s almost candy-like. It’s a simple trick that transforms this humble vegetable into a rich, flavorful vessel for cheesy goodness. I love the way the caramelized sugars bring out a surprising depth, balancing the sharpness of the cheese inside.
This recipe isn’t just about cheese and peppers — it’s about playing with textures and flavors. The peppers become soft, almost jammy, while the cheese melts into a gooey, irresistible filling. It’s one of those dishes that feels like a small celebration, perfect for a cozy night or a casual get-together.
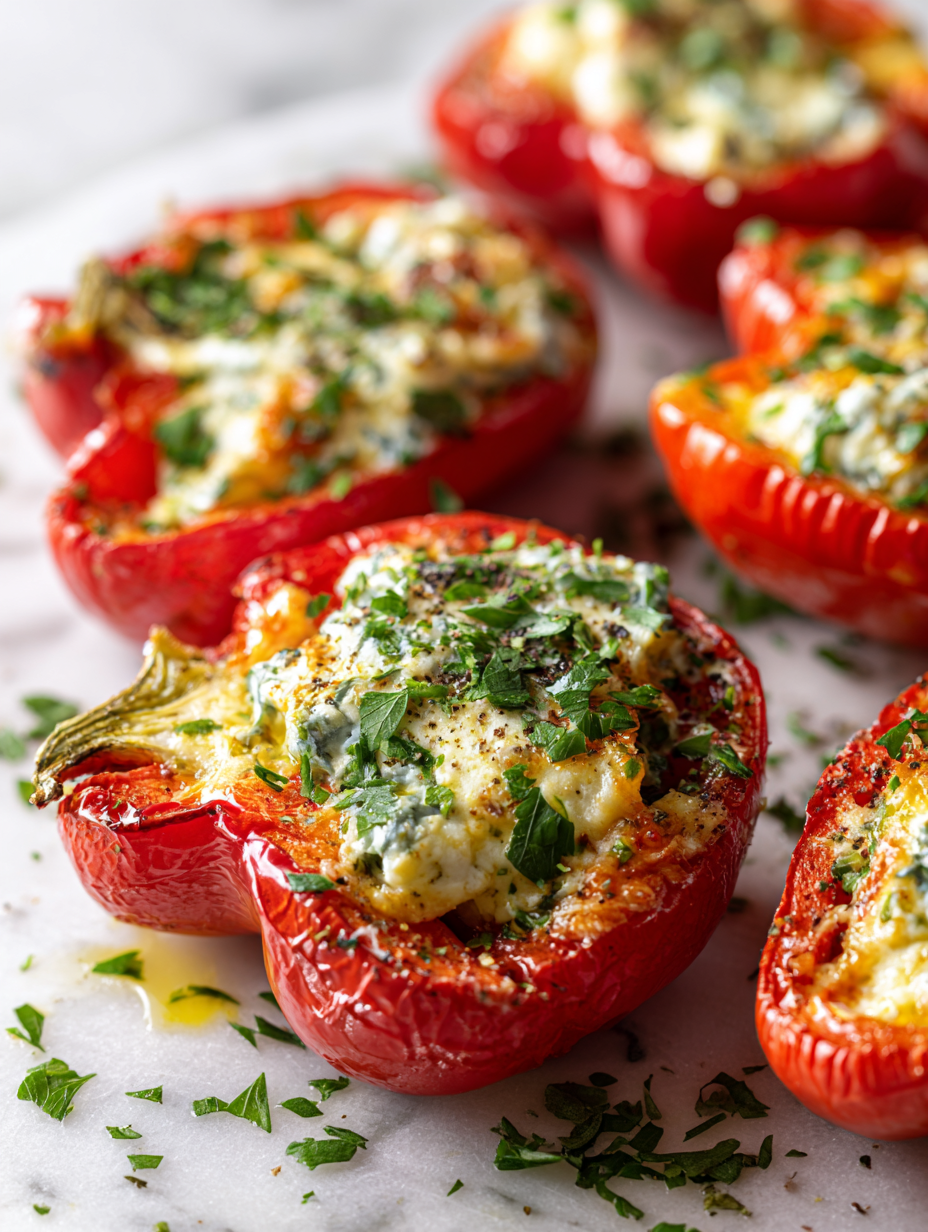
Focusing on the unexpected sweetness of roasted red peppers paired with sharp, creamy cheese, this recipe highlights how roasting transforms peppers into a smoky, tender vessel for cheese, making each bite a comforting yet surprising experience.
Sweet surprises in roasted peppers
- Finding roasted peppers sweet and smoky feels like discovering a secret ingredient.
- I’ve always loved how cheese can turn a simple veggie into something indulgent.
- There’s a quiet pride in pulling this dish together quickly on a busy weeknight.
- The way the melted cheese oozes out, it’s a messy, joyful moment every time.
- This recipe reminds me of family dinners — relaxed, cheesy, and full of flavor.
The story behind this recipe
This recipe started as a way to use up some leftover roasted peppers from a summer picnic. I wanted to stuff them with cheese, but not just any cheese—something sharp and creamy that could stand up to the smoky sweetness of the peppers. It’s a dish that’s grown into a little tradition in my kitchen, especially on nights when I crave something familiar yet a bit unexpected. The way the roasted peppers’ caramelized edges hold that melting cheese makes every bite feel like a small, cheesy celebration. It’s simple, honest, and somehow feels like comfort food with a twist.
Cheese Stuffed Peppers Trivia
- This dish has roots in Mediterranean villages where roasted peppers and cheese are staples of rustic cooking.
- Historically, stuffed peppers date back centuries, often filled with rice and herbs, but cheese-filled versions gained popularity in Southern Europe.
- The combination of smoky roasted peppers and melting cheese became a way to make humble ingredients feel special, especially during festive seasons.
Ingredient breakdown: key components
- Red bell peppers: I love how roasting brings out their sweet, smoky flavor—get them charred but not burnt, and their skin should blister beautifully, making peeling easier. Feel free to try yellow or orange peppers for a milder, sweeter note.
- Cheese: I prefer a sharp cheddar or a creamy mozzarella for melting. Their oozy texture and flavor contrast beautifully with the peppers’ sweetness. Don’t skimp on cheese—more gooeyness equals more indulgence.
- Garlic: Minced garlic adds a punch of aroma and flavor that wakes up the dish. Roast it slightly with the peppers for a mellow, nutty undertone, or add it fresh for a sharper bite.
- Herbs: Fresh basil or parsley brighten the filling with a fresh, herbal lift. Chopped and sprinkled just before serving keeps their vibrant flavor and color lively—don’t skip this step.
- Olive oil: Brushed on peppers before roasting, it helps them caramelize evenly, adding a subtle richness. Use good-quality extra virgin for that vibrant, fruity note—your peppers will thank you.
- Lemon juice: A squeeze right before serving adds a bright, tangy contrast to the smoky sweetness. A little zest can also amplify that fresh citrus burst, balancing the richness.
- Salt & pepper: Season generously but thoughtfully. Salt enhances sweetness and cheese flavor, while a crack of black pepper adds a subtle heat and complexity to each bite.
Spotlight on key ingredients
Red bell peppers:
- Their natural sweetness intensifies as they roast, turning smoky and tender. When blistered and soft, they’re perfect for stuffing.
- Cheese: Melts into a gooey, creamy layer that contrasts with the peppers’ sweet char. A sharp cheddar or mozzarella works best for stretch and flavor.
Cheese and herbs:
- Cheese: Its melting point and stretchiness define the dish’s texture. Aim for a cheese that melts smoothly and has a rich flavor—more cheese equals more ooze.
- Herbs: Fresh basil or parsley add a bright, herbal note that lifts the smoky, cheesy profile. Chop just before serving to keep their color and flavor vivid.
Notes for ingredient swaps
- Dairy-Free: Swap cheese for a blend of mashed avocado and nutritional yeast. It won’t melt like cheese, but adds creaminess and umami.
- Vegetarian: Use roasted mushrooms chopped finely instead of cheese for a savory, earthy stuffing that’s still rich.
- Vegan: Replace cheese with a firm tofu mash seasoned with lemon, garlic, and nutritional yeast. Keep it creamy and flavorful.
- Low-Sodium: Opt for low-sodium cheese or skip salt in the filling. The peppers’ natural sweetness still shines through.
- Spicy Kick: Mix in diced jalapeños or a dash of hot sauce to the cheese filling for a fiery twist.
- Herb Variations: Substitute basil or parsley with cilantro or chives for a different fresh flavor profile.
- Peppers: Try poblano or Hatch chiles for a smoky, slightly different flavor. Adjust roasting time accordingly.
Equipment & Tools
- Oven: To roast and bake the peppers evenly.
- Baking sheet with parchment or silicone mat: To hold peppers during roasting, preventing sticking.
- Sharp knife: To halve peppers and remove seeds cleanly.
- Mixing bowl: To combine cheese filling ingredients.
- Spoon or small spatula: For stuffing peppers with cheese.
- Large skillet or oven-proof dish: To cook and finish the peppers in the oven.
Step-by-step guide to cheese stuffed peppers
- Preheat your oven to 220°C (430°F). Line a baking sheet with parchment or a silicone mat. Prepare your peppers by washing and halving them lengthwise, removing seeds and membranes.
- Place peppers cut-side down on the baking sheet. Roast for 20-25 minutes, until skins blister and edges char slightly. Remove and let cool for 10 minutes, then peel off the skins if desired. Set aside.
- While peppers roast, prepare the cheese filling. In a bowl, mix grated cheese, minced garlic, chopped herbs, a squeeze of lemon juice, salt, and pepper. Adjust the cheese to achieve a creamy, scoopable consistency.
- Using a small spoon or your fingers, carefully stuff each pepper half with the cheese mixture. Don’t overfill—leave a little room for the cheese to melt and ooze out during baking.
- Preheat a large skillet or oven-proof dish over medium heat. Lightly brush the peppers with olive oil. Place stuffed peppers in the skillet, cheese side up, and cook for 3-4 minutes until the cheese begins to melt and turn golden.
- Transfer the skillet or dish to the oven. Bake at 180°C (355°F) for 10-12 minutes, until the cheese is bubbly and slightly browned on top. Keep an eye to prevent burning.
- Remove from oven, let rest for 5 minutes. Garnish with fresh herbs and a final drizzle of olive oil or lemon if desired. Serve warm, with a side salad or crusty bread.
Let the stuffed peppers rest for 5 minutes to settle. Garnish with fresh herbs and a final drizzle of olive oil or lemon juice. Serve warm, ideally with a side salad or crusty bread to soak up the cheesy goodness.
How to Know It’s Done
- Peppers: skins blistered and easily peelable, with a smoky aroma.
- Cheese: melted, golden, and bubbling without burning.
- Texture: peppers tender but not mushy, cheese oozy and slightly browned.
Cheese Stuffed Roasted Red Peppers
Ingredients
Equipment
Method
- Preheat your oven to 220°C (430°F) and line a baking sheet with parchment or a silicone mat. Wash the peppers, then cut each one in half lengthwise, removing seeds and membranes. Arrange them cut-side down on the prepared baking sheet.
- Roast the peppers for 20-25 minutes until the skins blister and turn slightly charred. You’ll smell a sweet, smoky aroma. Remove from the oven and let them cool for about 10 minutes, then peel off the skins if desired for a smoother look.
- While the peppers cool, prepare your cheese filling. In a mixing bowl, combine the shredded cheese, minced garlic, chopped herbs, a squeeze of lemon juice, and a pinch of salt and pepper. Stir until smooth and creamy, adjusting the seasoning to taste.
- Using a small spoon or spatula, carefully stuff each pepper half with the cheese mixture. Fill generously but avoid overstuffing to prevent spilling during baking.
- Brush the outside of the stuffed peppers lightly with olive oil to help them brown and develop a glossy finish. Place them on the skillet or oven-proof dish, cheese side up.
- Transfer the dish to the oven and bake for an additional 10-12 minutes until the cheese is bubbly, melted, and slightly golden on top. You’ll hear gentle bubbling and see a rich, gooey texture forming.
- Remove the peppers from the oven and let them rest for about 5 minutes. Garnish with freshly chopped herbs and a squeeze of lemon for bright flavor. Serve warm, enjoying the contrast of smoky, sweet peppers with the creamy, cheesy filling.
Notes
Tips & Tricks for Perfect Cheese Stuffed Peppers
- Use a high-quality, smoky paprika in your cheese filling to add depth and a subtle warmth.
- When roasting peppers, turn them occasionally to ensure even charring and easy peeling afterward.
- For extra oozy cheese, mix in a small handful of grated Parmesan—its saltiness enhances melting and flavor.
- If peppers release too much moisture, pat them dry before stuffing to prevent soggy bites.
- Broil the stuffed peppers for a minute or two at the end to get a golden, bubbly cheese top.
- Use a silicone brush to lightly oil the peppers before roasting; it helps achieve an even, glossy finish.
- When cooling after baking, place peppers on a wire rack instead of a plate—avoids sogginess and keeps the cheese crisp.
Common mistakes and how to fix them
- FORGOT to peel peppers → Peeling prevents skin burning and bitterness.
- DUMPED cheese directly → Stuff peppers carefully to avoid mess and uneven filling.
- OVER-TORCHED cheese → Keep an eye on cheese top to prevent burning or over-browning.
- MISSED resting time → Rest peppers 5 minutes to settle flavors and prevent spilling.
Quick fixes for cheese stuffed peppers
- When peppers are too charred, splash with a little water and cover to loosen skins.
- If cheese isn’t melting well, patch with a sprinkle of grated cheese and broil briefly.
- Dumped too much oil? Shield peppers with foil and bake longer to prevent sogginess.
- Over-torched cheese? Rescue by lowering oven temp and adding fresh cheese on top for a fresh melt.
- Pantry swap: use jarred roasted peppers if fresh peppers are unavailable—shimmering and smoky, just different.
Prep, store, and reheat tips
- Peppers can be roasted and peeled up to 2 days ahead; store in an airtight container in the fridge, keeping their smoky aroma intact.
- Prepare the cheese filling a day in advance; keep covered in the fridge. It will firm up slightly but remains scoopable and flavorful.
- Stuffed peppers can be assembled a few hours before baking; keep covered in the fridge to prevent drying out or flavor loss.
- Reheat leftovers in a 180°C (355°F) oven for about 10 minutes, until cheese is bubbly and peppers are heated through. Expect a slightly softer texture but still delicious.
- For best sensory results, serve within 3 days of making. The flavors deepen, and the peppers stay tender, with the cheese still gooey and smoky.
Top questions about cheese stuffed peppers
1. Why roast the peppers before stuffing?
Roasting peppers until they’re smoky and tender brings out a sweet, caramelized flavor that perfectly complements the cheesy stuffing. It’s a simple step that transforms the humble pepper into a rich, flavorful vessel.
2. What’s the best cheese for stuffing?
Use a sharp cheddar or mozzarella for melting. Their oozy texture and sharp flavor contrast beautifully with the sweet, smoky peppers. More cheese equals more gooeyness.
3. Can I use dried herbs instead of fresh?
Fresh herbs like basil or parsley add a bright, herbal note that lifts the dish. Chop just before stuffing to keep their flavor vibrant and color lively.
4. Can I make this dish in advance?
You can prepare the roasted peppers and cheese filling a day ahead. Store separately in airtight containers in the fridge, then assemble and bake when ready.
5. How do I know when it’s done?
Bake at 180°C (355°F) until the cheese is bubbly and slightly browned, about 10-12 minutes. Check the peppers are tender and cheese is gooey before removing.
6. What if the cheese doesn’t melt properly?
If the cheese isn’t melting well, broil for a minute or two to get a golden, bubbly top. Keep a close eye to prevent burning.
7. Can I use store-bought roasted peppers?
Use jarred roasted peppers if fresh ones aren’t available. They’re smoky and tender, though slightly softer and less charred than freshly roasted peppers.
8. How do I prevent soggy peppers?
To prevent sogginess, pat the peppers dry after roasting and peel. Also, avoid overfilling with cheese to prevent spilling during baking.
9. Can I add lemon juice?
Adding a splash of lemon juice right before serving brightens the richness of the cheese and enhances the smoky sweetness of the peppers.
10. What if the peppers are over-charred?
When peppers are too charred, cover them with a damp towel or splash with water and tent with foil to loosen skins and reduce bitterness.
This dish feels like a little triumph every time I make it, especially when the cheese stretches with that perfect ooze. The smoky sweetness of the roasted peppers paired with the sharp, melty cheese is a reminder that simple ingredients can surprise you. It’s one of those recipes I keep coming back to, especially when I want something cozy but not ordinary.
And honestly, sharing these peppers with friends or family makes the moment even sweeter. It’s not just about the flavor, but the small chaos of assembling and the warm, cheesy mess that follows. It’s a dish that feels like a little celebration, no matter the season.

Hi, I’m Emily Carter, the creator and recipe developer behind Salt Strategist. I’m so happy you’re here. This blog is where my love for flavor, creativity, and thoughtful cooking comes together in one beautiful, ever evolving space.


