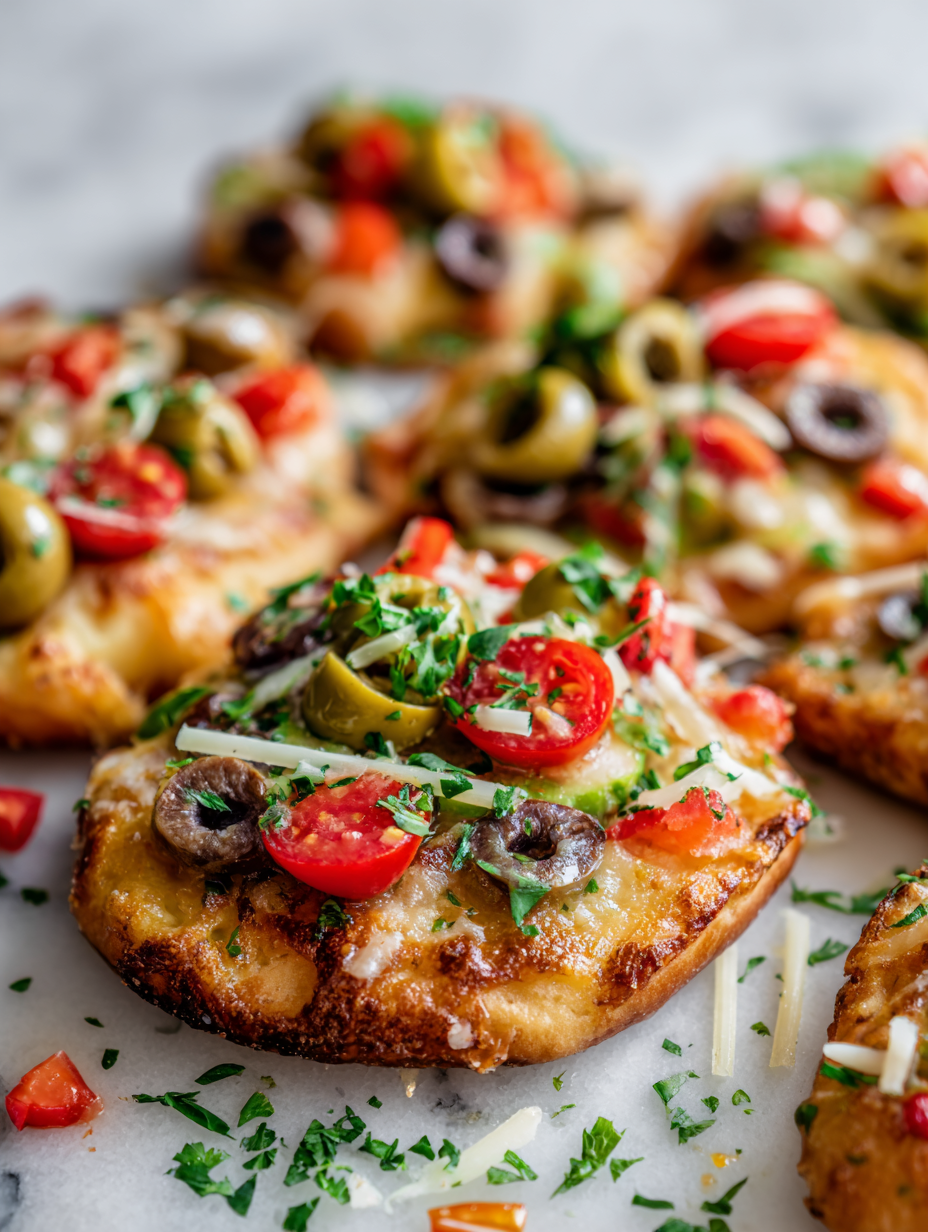
These mini flatbread bites are my go-to for laid-back gatherings. They’re simple to make, customizable, and just the right size for grazing without the fuss of full slices.
What I love most is how easily you can switch up toppings—herbs, cheeses, spicy spreads—whatever suits your mood or what’s in the fridge. They turn a casual snack into a little personal creation.
Baking these in small batches keeps everything fresh and warm, perfect for sharing or just sneaking a few myself when I need a quick, satisfying bite. They’re a reminder that sometimes, the simplest treats are the best.
Focusing on creating bite-sized flatbreads that are perfect for grazing, sharing, and adding a personal touch to snack time, emphasizing their casual, customizable nature.
Casual bites for spontaneous gatherings
- I love how these bites bring a sense of cozy chaos to my kitchen, especially when improvising with whatever cheese or herbs I have.
- There’s a small thrill in watching these mini flatbreads puff up and turn golden, filling the room with a warm, yeasty smell.
- Sharing these simple bites at parties always sparks a little joy—everyone loves customizing their own topping, no matter the age.
- Making these reminds me that sometimes, the best snacks are the ones you toss together quickly, with a little bit of love and a lot of flavor.
The inspiration behind these bites
- This recipe came about one rainy afternoon when I needed something quick, satisfying, and a little different from my usual snacks. I was rummaging through the fridge and saw some leftover flatbread dough, a smear of herbed cream cheese, and a handful of cherry tomatoes. Suddenly, it clicked—mini flatbread bites would be perfect for lazy grazing, and I could customize each one for whoever was around.
- I remember the first time I made these, I was surprised how something so simple could feel special—like tiny, edible canvases. Since then, they’ve become my go-to for spontaneous get-togethers or a quick solo treat. There’s a charm in how they come together—no fuss, just flavor, and a little bit of improvisation.
- heading
- story_type
Contextual origin and trivia
- Mini flatbread bites have roots in Middle Eastern bread traditions, where small, hand-held breads are often topped or stuffed for sharing.
- This snack style gained popularity in modern tapas and grazing menus, emphasizing casual, communal eating with customizable toppings.
- The concept of bite-sized flatbreads aligns with the trend of finger foods, making social eating more relaxed and interactive.
- Historically, small flatbreads were a way to make bread more portable and shareable, especially in communal or outdoor settings.
Ingredient breakdown: key components
- All-purpose flour: I use a standard unbleached flour, which gives the flatbread a good chew and a slightly nutty flavor. Swap with whole wheat for a nuttier taste and more fiber, but expect a denser texture.
- Yeast: I rely on active dry yeast for that gentle rise and airy texture. If you want to skip yeast, you can try a quick flatbread dough, but it won’t puff up quite the same.
- Olive oil: I love a fruity, slightly peppery extra virgin olive oil in the dough—adds richness and flavor. For a milder taste, use a light-taste oil or a neutral vegetable oil.
- Toppings: I’m fond of fresh mozzarella, cherry tomatoes, and basil—bright, juicy, and aromatic. You can swap in thinly sliced roasted veggies or spicy spreads for more complexity.
- Salt and herbs: The right pinch of sea salt wakes everything up. Fresh herbs like thyme or oregano add a vibrant punch—dried herbs work too but less lively.
- Water: Lukewarm water activates the yeast and helps the dough come together. If your water’s too hot, it’ll kill the yeast—lukewarm is perfect.
- Optional: sesame or poppy seeds on top—add a nutty crunch and visual pop, especially if you want a bit of texture.
Spotlight on key ingredients
Olive oil & yeast:
- Olive oil: I favor a fruity, peppery extra virgin that enriches the dough with a lush aroma and tender crumb. Swap with a neutral oil if you prefer a milder flavor, but don’t skip the richness.
- Yeast: Active dry yeast is my go-to for that airy puff and slightly chewy texture. If you’re in a rush, baking powder can work, but the bites won’t have the same lift or depth.
Notes for ingredient swaps
- Flour: I use unbleached all-purpose, but whole wheat adds nuttiness and fiber—expect a denser bite.
- Yeast: Active dry yeast gives a light rise. You can try baking powder for quicker flatbreads, but they won’t puff up as much.
- Olive oil: Extra virgin adds fruity richness; neutral oil like vegetable works if you prefer a milder flavor.
- Toppings: Fresh mozzarella is my go-to, but sliced soft cheeses or vegan options can work. Swap cherry tomatoes for roasted veggies for smoky depth.
- Herbs & seasonings: Fresh herbs like thyme brighten up the bites; dried herbs are fine but less lively. A pinch of chili flakes adds heat.
- Water: Lukewarm water activates yeast best. Hot water kills it, so keep it gentle to avoid flat, dense dough.
- Seeds: Sesame or poppy seeds add crunch and visual appeal—sprinkle before baking for a toasted finish.
Equipment & Tools
- Small mixing bowl: To activate yeast and mix dough ingredients.
- Rolling pin or glass jar: To roll out the dough into thin circles.
- Baking sheet: To bake the flatbreads evenly.
- Pastry brush: To brush the dough with olive oil for flavor and crispness.
Step-by-step guide to flatbread bites
- Equipment & Tools: Gather a small mixing bowl, a rolling pin or glass jar for shaping, a baking sheet, and a pastry brush for oil.
- Activate yeast: In the bowl, combine warm water (about 37°C/98°F) with a pinch of sugar and yeast. Let sit until frothy, about 5-7 minutes.
- Make dough: Add flour, salt, olive oil, and the activated yeast mixture to the bowl. Mix with a spoon until it begins to come together.
- Knead lightly: Turn out onto a floured surface and knead gently for 2-3 minutes until smooth. Cover and let rest for 10 minutes.
- Roll out: Divide dough into 8 small balls. Roll each into a thin circle, about 10 cm (4 inches) diameter.
- Preheat oven: Set to 220°C (430°F). Line baking sheet with parchment paper.
- Assemble bites: Place flatbreads on the sheet. Brush lightly with olive oil. Top with cheese, cherry tomatoes, herbs, or your choice.
- Bake: Bake for 8-10 minutes, until golden around the edges and toppings are bubbling. Watch for puffing and golden spots.
- Cool slightly: Remove from oven and let rest for 2 minutes. They’re best enjoyed warm but not hot enough to burn your mouth.
- Finish & serve: Transfer to a platter. Add a sprinkle of sea salt or fresh herbs if desired. Serve immediately.
Let the baked flatbreads rest for 2 minutes on the pan, then transfer to a plate. Serve warm, topped or plain, with a sprinkle of herbs or sea salt if desired.
How to Know It’s Done
- Golden, slightly puffed edges with a few bubbles or blisters.
- Cheese melted and slightly bubbly, toppings vibrant and cooked through.
- Flatbreads feel firm but tender when gently pressed, not doughy or soggy.
Mini Flatbread Bites
Ingredients
Equipment
Method
- In a small bowl, combine the warm water with a pinch of sugar and sprinkle the yeast over the top. Let it sit for 5-7 minutes until it becomes frothy and bubbly, signaling that the yeast is activated.
- In a large mixing bowl, whisk together the flour and salt. Make a well in the center and pour in the activated yeast mixture along with the olive oil.
- Stir with a spoon or dough scraper until the mixture begins to come together into a sticky dough, then knead gently in the bowl for about 2 minutes until smooth.
- Cover the bowl with a clean towel and let the dough rest for 10 minutes. This helps relax the gluten for easier rolling.
- Divide the dough into 8 equal pieces. Lightly flour your work surface and roll each piece into a thin circle about 10 centimeters in diameter, aiming for an even thickness.
- Preheat your oven to 220°C (430°F). Line a baking sheet with parchment paper to prevent sticking.
- Place the rolled-out flatbreads onto the prepared baking sheet. Use a pastry brush to lightly coat each with olive oil for added flavor and crunch.
- Top each flatbread with your preferred toppings—cheese, herbs, cherry tomatoes, or spreads—being careful not to overload to keep them crispy.
- Bake in the oven for 8-10 minutes, until the edges are golden, puffed slightly, and toppings are bubbling and fragrant.
- Remove the flatbreads from the oven and let them rest for 2 minutes. They should be crispy around the edges with a soft, airy interior.
- Serve these warm, bite-sized flatbread bites immediately, garnished with a sprinkle of herbs or sea salt if desired. They’re perfect for grazing and can be customized endlessly!
Notes
Tips for perfect flatbread bites
- Use a hot oven to get that quick, crispy edge—preheat thoroughly to 220°C (430°F).
- Roll the dough as thin as possible—this helps the bites crisp up evenly and avoids doughy centers.
- Brush with olive oil before baking—adds flavor and creates a golden, crunchy surface.
- Keep an eye on the edges—remove when they’re golden and bubbling, not burnt or dark brown.
- Use a light hand with toppings—too much can weigh down the flatbreads, preventing puffing and crisping.
- Rest baked bites briefly—let them sit for 2 minutes to settle and avoid burns from melted cheese.
- For extra crunch, sprinkle seeds on top before baking—poppy or sesame seeds toast beautifully and add visual appeal.
Common mistakes and how to fix them
- FORGOT to preheat oven → Preheat to 220°C (430°F) before baking.
- DUMPED dough too thick → Roll out evenly to avoid uneven baking or soggy spots.
- OVER-TORCHED edges → Watch closely, remove once golden and crisp, avoid burnt edges.
- MISSED resting time → Let dough rest 10 minutes for easier rolling and better texture.
Quick fixes and pantry swaps
- If dough sticks, splash a bit more flour and knead gently again.
- When flatbreads are soggy, increase oven temperature and bake a minute longer.
- Dumped toppings too wet? Pat dry with paper towels before baking for crispness.
- Over-baked edges? Shield with foil for a minute or two to prevent burning.
- When in doubt, rescue with a quick 5-second spray of water and restart oven for shimmer.
Prep, store, and reheat tips
- You can prepare the dough up to 24 hours ahead; keep it covered in the fridge, where it develops a slightly tangy flavor.
- Assemble toppings in advance and store in airtight containers; the fresh herbs and sliced veggies stay crisp for about 24 hours.
- Baked flatbreads are best enjoyed within 2 hours for optimal crispness; reheat in a 180°C (350°F) oven until warmed and crispy, about 5 minutes, watching for over-browning.
- Store leftovers in an airtight container at room temperature for up to 4 hours, or in the fridge for 1-2 days; reheating restores some crunch but texture may soften.
- Reheated bites may lose some crispness, but a quick blast in the oven or toaster oven brings back a good crunch, with a warm, fragrant aroma.
Top questions about mini flatbread bites
1. How do I cut the flatbreads without squishing them?
Use a sharp knife and let the flatbread cool slightly before slicing to avoid burns and mess.
2. What’s the right oven temperature for crisp bites?
Bake at 220°C (430°F) until edges are golden and toppings are bubbling, about 8-10 minutes.
3. My dough is sticky—what should I do?
If dough is too sticky, dust with a little more flour during rolling. For dry dough, add a splash of water.
4. Can I add toppings before or after baking?
Top with fresh herbs or seeds before baking for extra flavor and visual appeal.
5. How long do these bites stay fresh?
Store leftovers in an airtight container at room temp for up to 4 hours, or in fridge for 1-2 days.
6. How do I reheat leftover bites?
Reheat in the oven at 180°C (350°F) for about 5 minutes until warm and crispy again.
7. Can I substitute whole wheat flour?
Use whole wheat flour for a nuttier flavor and more fiber, but expect a denser texture.
8. How can I spice up the flatbread bites?
Add a pinch of chili flakes or smoked paprika to toppings for extra kick and smoky depth.
9. What kind of olive oil should I use?
Choose a good quality olive oil with fruity notes for richer flavor; neutral oils work too if you prefer milder taste.
10. How do I know when they’re perfectly baked?
Watch the oven closely—edges should be golden and bubbling, not burnt or dark brown.
These mini flatbread bites are a reminder that simple ingredients can create something truly satisfying. They come together quickly and feel like a little celebration of flavor and texture, perfect for an informal snack or spontaneous gathering.
Whenever I make these, I’m struck by how adaptable they are—each batch feels unique, just like a small, edible canvas. They’re a humble, honest way to bring friends and family together around a shared, delicious snack.

Hi, I’m Emily Carter, the creator and recipe developer behind Salt Strategist. I’m so happy you’re here. This blog is where my love for flavor, creativity, and thoughtful cooking comes together in one beautiful, ever evolving space.


