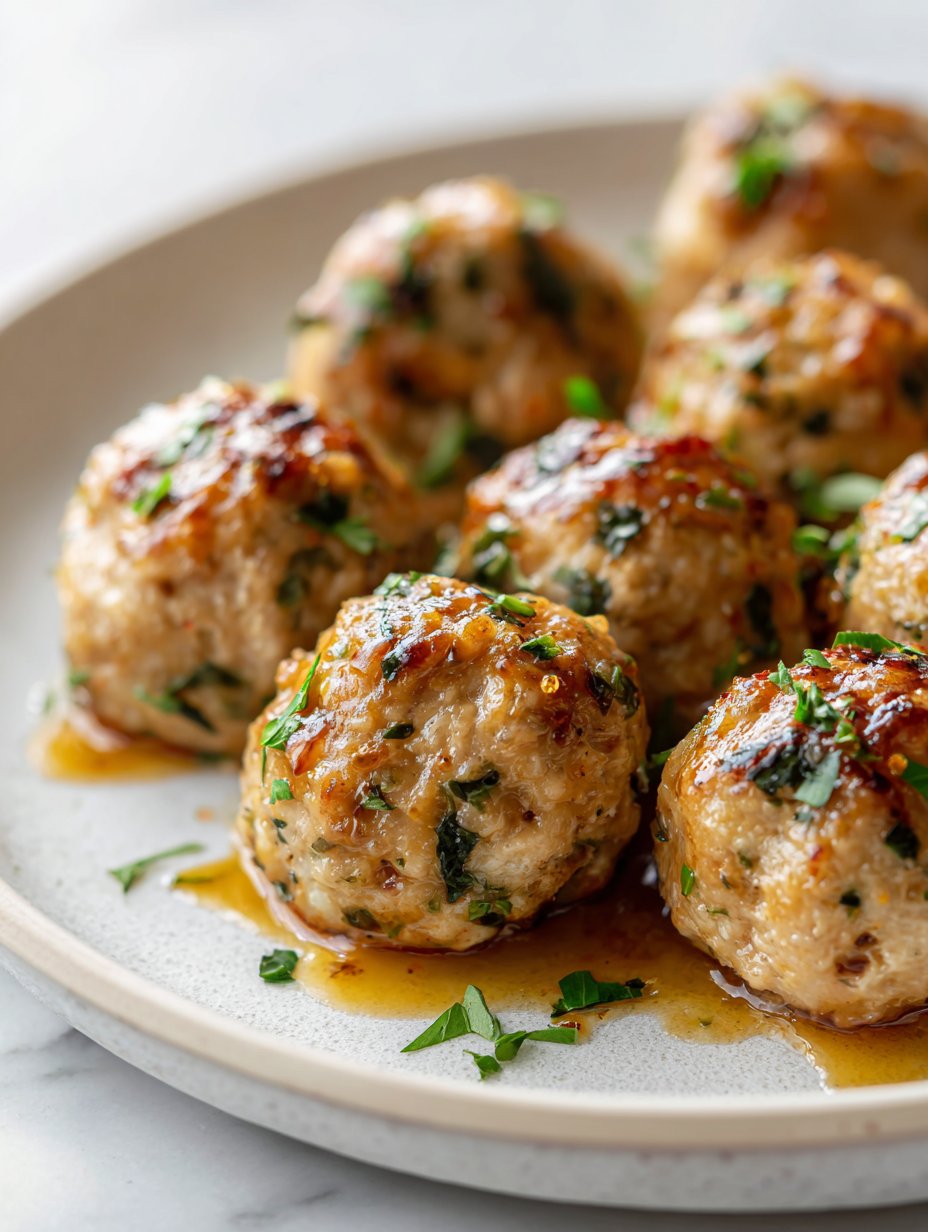
Blog

  • Halloween Jack-o’-Lantern Stuffed Bell Peppers: A Spooky Feast

    Halloween Jack-o’-Lantern Stuffed Bell Peppers: A Spooky Feast

    Every October, I look forward to transforming ordinary vegetables into spooky centerpieces that delight kids and adults alike. These Halloween Stuffed Bell Pepper Jack-o’-Lanterns turn bright peppers into grinning grins, filled with savory goodness that warms the soul amid chilly fall nights. It you love a little edible art woven with comfort food, this recipe will surprise you.

    The joy of carving is tempered with flavor here, as each pepper is hollowed out with purpose and filled with a richly seasoned mixture. The smell of melting cheese and roasting peppers fills the house, teasing everyone tummy rumbles. It turns a simple dinner into a mini Halloween party for your taste buds and your decor.

    Halloween Stuffed Bell Pepper Jack-o’-Lanterns

    This dish involves hollowing out colorful bell peppers and carving them into jack-o’-lantern faces. Each pepper is filled with a savory mixture, topped with cheese, and baked until tender and bubbly. The final presentation resembles glowing pumpkin lanterns with a warm, cheesy interior.
    Prep Time 15 minutes
    Cook Time 30 minutes
    Total Time 45 minutes
    Servings: 4
    Course: Main Course
    Cuisine: American
    Calories: 250

    Ingredients
      

    • 4 large bell peppers assorted colors for visual effect
    • 1 cup cooked rice can use leftover rice
    • 1/2 cup shredded cheese cheddar, Monterey Jack, or a mix
    • 1 small onion finely chopped
    • 2 cloves garlic minced
    • 1 teaspoon paprika for flavor and color
    • 1 tablespoon olive oil
    • to taste salt and pepper

    Equipment

    • Kitchen knife
    • Spoon
    • Baking sheet
    • Aluminum Foil

    Method
     

    1. Preheat your oven to 375°F (190°C). Arrange a baking sheet with foil for easy cleanup.
    2. Wash the bell peppers thoroughly and cut off the tops to create lids. Use a spoon to carefully hollow out the seeds and membranes, creating a smooth cavity inside. Set aside the tops for later use or decorative purposes.
    3. Chop the onion and mince the garlic, then heat olive oil in a skillet over medium heat. Sauté the onion and garlic until translucent and fragrant, about 2-3 minutes.
    4. Add the cooked rice, paprika, salt, and pepper to the skillet. Stir well and cook for another 2 minutes, allowing the flavors to meld and the mixture to heat through.
    5. Remove the skillet from heat and mix in half of the shredded cheese until evenly combined. This forms your stuffing filling.
    6. Use a spoon to fill each hollowed bell pepper with the prepared rice mixture, pressing gently to pack the filling in.
    7. Place the stuffed peppers upright on the prepared baking sheet. Top each with the remaining shredded cheese for a melty, cheesy lid.
    8. Bake in the preheated oven for about 30 minutes, until the peppers are tender and slightly charred at the edges, and the cheese is bubbling and golden.
    9. Optional: Use a small paring knife to carve faces into the peppers to resemble jack-o’-lanterns for a festive Halloween look before serving.
    10. Once finished, carefully transfer the peppers to a serving platter or individual plates. Serve hot and enjoy the cheesy, flavorful filling paired with the roasted pepper exterior.

    Notes

    Feel free to customize the filling with cooked ground meat or vegetables. Carving faces is optional but adds a fun Halloween touch!

    This Halloween dish turns a simple dinner into a festive masterpiece that sparks conversations and smiles. The mix of savory stuffing and playful carving makes it an instant hit and a satisfying meal on a chilly night. Watching the peppers glow with melted cheese is a small, joyful ritual that plays well with seasonal nostalgia.

    As the season shifts and new decorations creep into every corner, this recipe reminds us that fun can be simple and tastes memorable. The process of creating these edible Jack-o’-Lanterns connects tradition with creativity, making every bite a celebration of the season. Happy carving and feasting to all who try this cheerful, flavorful trick-or-treat.

  • Glow in the Dark Halloween Brain Jello Mold That Spooks and Delights

    Glow in the Dark Halloween Brain Jello Mold That Spooks and Delights

    Every October, I find myself captivated by the eerie allure of themed treats that turn the ordinary into the extraordinary. This year, I decided to craft something truly unsettling: a Halloween Brain Jello Mold that glows eerily in the dark, perfect for a spooky party. The process feels a bit like a mad scientist experiment, with bubbling colors and flickering lights that thrill both kids and adults.

    The best part? The gory-looking jello has a surprisingly smooth texture, almost silky, as it oozes from the mold. It’s not just about looks—this recipe brings back memories of childhood Halloween nights, filled with mischief and marvels. Plus, creating a glow-in-the-dark jello involves a quick trip to the pantry, making it as fun to prepare as it is to share.

    Halloween Brain Jello Mold

    This dish is a spooky gelatin dessert designed to resemble a human brain, achieved by layering and molding colored gelatin. The result is a smooth, silky-textured mold with a gory appearance, which glows eerily in the dark, making it perfect for Halloween parties.
    Prep Time 20 minutes
    Cook Time 10 minutes
    Total Time 30 minutes
    Servings: 8
    Course: Main Course
    Cuisine: Halloween
    Calories: 50

    Ingredients
      

    • 3 cups fruit juice or flavored liquid for the base gelatin layer
    • 3 tablespoons gelatin powder unflavored or flavored, depending on desired color
    • 0.5 cup cold water to bloom the gelatin
    • 1 cup white grape juice or flavored liquid for the gory-looking layer
    • 2 tablespoons gelatin powder for the darker, bloody layer
    • 2 tsp fluorescent or tonic water (optional, for glow effect) add to glow in the dark under blacklight

    Equipment

    • Mixing bowls
    • Saucepan
    • Silicone mold or gelatin mold
    • Whisk
    • Measuring cups and spoons
    • Small saucepan or microwave-safe bowl

    Method
     

    1. Pour 0.5 cup of cold water into a mixing bowl and sprinkle the gelatin powder over it. Let it sit for 5 minutes to bloom, until it looks gelled and slightly cloudy.
    2. Heat the fruit juice or flavored liquid in a saucepan over low heat until just simmering. Remove from heat and stir in the bloomed gelatin until completely dissolved.
    3. Pour the mixture into a silicone mold or gelatin mold, filling it about one-third full to create the core of the brain. Place in the refrigerator for 20 minutes until slightly firm.
    4. Meanwhile, prepare the darker, bloody layer by blooming the second gelatin powder with a little cold water. Heat the white grape juice until warm and stir in this gelatin until fully dissolved.
    5. Once the first layer is semi-set, gently pour the darker gelatin over the partially firm layer, carefully covering it without disturbing the shape. Return to the fridge for another 20 minutes to set completely.
    6. Prepare the glow-in-the-dark solution by mixing the gelatine with a small amount of warm water and adding the tonic or fluorescent water. Stir well and add to the remaining gelatin mixture if glow is desired.
    7. Once the previous layer is firm, pour the glowing gelatin mixture gently over the mold, filling it to the top. Place it in the refrigerator for at least 2 hours or until fully set and jiggle-ready.
    8. Carefully unmold the gelatin by gently pressing or warming the outside of the mold to loosen it. The finished sculpture should resemble a textured, brain-like form with layered colors and a smooth surface.
    9. Slice and serve chilled, ideally under blacklight to enhance the glowing effect and spooky appearance.

    Notes

    For an extra spooky effect, add edible blood syrup around the mold before serving.

    This brain jello isn’t just a feast for the eyes; it’s a small act of chaos that sparks joy during the spooky season. Its milky, slimy appearance combined with a tart, fruity flavor makes each bite feel like a moment of playful horror. When the lights go out and the glow begins, you’ll see everyone’s eyes light up with excitement and a little shiver.

    In the end, it’s about celebrating the thrill of Halloween with something delightfully creepy and surprisingly simple. Whether for a party centerpiece or a mischievous family treat, this mold promises memories of laughter, screams, and glowing grins. As you dip your spoon into that cold, shimmering surface, you’ll feel that festive magic in every wobble.

  • The Secret Science Behind the Perfect Blueberry Slushie

    The Secret Science Behind the Perfect Blueberry Slushie

    Ever wondered how to make a blueberry slushie that’s just the right amount of icy and bursting with flavor? I dove into the freezer aisle and experimented with frozen blueberries to find that magical balance. It’s not just about blending berries with ice; it’s about capturing a cooling burst of summer’s sweet chaos.

    This recipe lets you harness the natural sweetness of blueberries while creating a texture that’s refreshingly slushy, not icy or watered down. Perfect for hot days or when nostalgia calls for a cool bite, this drink refreshes and surprises in every sip.

    Blueberry Slushie

    A blueberry slushie is a chilled beverage made by blending frozen blueberries with ice to create a refreshing, icy-textured drink. The main ingredients are frozen blueberries, ice, and a touch of sweetener, resulting in a vibrant, purplish slush with a smooth, icy consistency. The final appearance is a vividly colored, semi-thick smoothie served cold and ready to sip.
    Prep Time 5 minutes
    Total Time 5 minutes
    Servings: 2
    Course: Main Course
    Cuisine: Generic
    Calories: 80

    Ingredients
      

    • 2 cups frozen blueberries prefrozen for best icy texture
    • 1 cup ice cubes preferably small pieces
    • 1-2 tablespoons honey or sugar to taste, optional
    • 1 cup water or fruit juice adjust for desired consistency

    Equipment

    • Blender
    • Measuring cups and spoons

    Method
     

    1. Place the frozen blueberries, ice cubes, sweetener, and water or juice into the blender.
    2. Secure the lid on the blender and start blending on a low speed, gradually increasing to high until the mixture is smooth and icy in texture, about 30-45 seconds.
    3. Check the consistency — it should be thick, slushy, and slightly frosty. If too thick, add a splash more water or juice and blend briefly again.
    4. Turn off the blender and inspect the color—vivid purple with a slightly frosty appearance on top.
    5. Pour the blueberry slushie into glasses, using a spoon to help distribute any remaining icy bits evenly.
    6. Serve immediately with a straw or spoon, enjoying the cool, extra-refreshing texture.

    Notes

    For a creamier texture, add a splash of yogurt or milk before blending.
    Making this blueberry slushie became a quick escape during my chaotic mornings. The vibrant color and the burst of fruity aroma instantly lift my spirits and remind me of childhood summers.

    It’s a simple, joyful recipe that’s easy to whip up in minutes, yet it feels like a tiny celebration each time. Whether you’re relaxing on a lazy afternoon or entertaining friends, this slushie is your go-to crowd-pleaser. Cheers to icy, berry goodness in every glass.

  • Spooky Sweetness: Halloween Pumpkin Cheesecake Bars

    Spooky Sweetness: Halloween Pumpkin Cheesecake Bars

    Every October, I hunt for a dessert that turns the spooky season into a celebration of comfort and chaos. These Halloween Pumpkin Cheesecake Bars are my latest obsession—an unusual twist that transforms classic pumpkin flavor with a mysterious, velvety finish. The moment I crack my first spoonful, I’m transported back to childhood Halloweens, where the air smelled of caramel and caramelized sugar crackles under my nails.

    What draws me to this recipe isn’t just the festive look but the way it balances richness with a hint of spice. The smooth cheesecake paired with a crumbly base is like a witch’s brew—mysterious yet familiar. Plus, the dark swirl of pumpkin and chocolate creates an eye-catching design that feels as fun to make as it is to eat.

    Halloween Pumpkin Cheesecake Bars

    These layered cheesecake bars feature a creamy pumpkin filling topped with a smooth chocolate swirl on a crunchy cookie crust. The dessert is baked until set, resulting in a velvety texture with an eye-catching marbled appearance. Perfect for festive occasions, they combine rich flavors with a slightly spiced bite.
    Prep Time 20 minutes
    Cook Time 40 minutes
    Total Time 1 hour
    Servings: 12
    Course: Main Course
    Cuisine: American
    Calories: 350

    Ingredients
      

    • 1 ½ cups graham cracker crumbs or digestive cookie crumbs
    • ½ cup unsalted butter melted
    • 16 oz cream cheese softened
    • 1 cup granulated sugar
    • 1 cup canned pumpkin not pie filling
    • 3 large eggs room temperature
    • 1 ½ teaspoons ground cinnamon or pumpkin pie spice
    • 1/2 teaspoon ground ginger
    • ½ cup semi-sweet chocolate chips melted

    Equipment

    • 8-inch baking pan
    • Mixing bowls

    Method
     

    1. Preheat your oven to 350°F (175°C). Mix the graham cracker crumbs with melted butter until evenly coated and press this mixture firmly into the bottom of your prepared baking pan to form the crust.
    2. In a large bowl, beat the softened cream cheese with granulated sugar until smooth and creamy, about 2-3 minutes. Add the canned pumpkin, eggs, cinnamon, ginger, and a pinch of salt, then mix until fully combined and the mixture is smooth.
    3. Pour the pumpkin cheesecake filling over the prepared crust, smoothing the top with a spatula. Gently dollop melted chocolate over the surface in a random pattern for a marbled effect.
    4. Use a toothpick or skewer to gently swirl the chocolate into the pumpkin filling, creating a marbled pattern. Place the pan in the oven and bake for 40-45 minutes, or until the edges are set and the center slightly jiggles.
    5. Remove the cheesecake from the oven and let it cool in the pan for about an hour. Then, transfer to the refrigerator and chill for at least 4 hours or overnight to fully set.
    6. Slice the chilled cheesecake into bars, revealing a beautiful marbled swirl on top. Serve cold, and enjoy the rich, velvety texture with a hint of spice and chocolate.

    Notes

    For an extra festive look, decorate with whipped cream or orange zest before serving.

    As fall’s chill settles in, these bars add a touch of sweet mischief to any gathering. Their striking appearance and flavors evoke a nostalgic yet festive spirit—perfect for October’s magic. I love how a simple slice of this dessert can transform a casual event into something memorable.

    Sharing this recipe feels like passing down a little piece of holiday cheer. Whether it’s for a spooky dinner or a harvest celebration, these bars are a delicious way to celebrate the season’s flavors. And honestly, I look forward to making them every year.

  • Monster Burgers: Halloween’s Cheesiest Chaos

    Monster Burgers: Halloween’s Cheesiest Chaos

    As the air gets crisp and the nights grow longer, Halloween calls for more than just candy—it’s the perfect moment to unleash your inner kid with something delightfully grotesque. These Halloween Monster Burgers transform ordinary patties into writhing, silly, monster faces that make the dinner table a mini haunted house. Each one is a little chaotic, a little spooky, and utterly fun to make with kids or your brave inner child.

    What I love most about this recipe is the creative chaos it invites. It’s all about using what’s in the fridge—cheddar for teeth, olives for eyes, and lettuce for wild hair. This isn’t about perfection; it’s about unleashing your playful side and sharing a few laughs over a messy, gooey burger. Plus, everyone will remember these monsters long after the candy stash is gone.

    WHY I LOVE THIS RECIPE?

    • It sparks my creativity and adds a dash of mess and magic to Halloween dinner prep.
    • Children’s laughter echoes as they mash their own monster faces.
    • It’s a fun way to sneak extra veggies with lettuce and toppings.
    • The kitchen fills with a cheesy, savory aroma that only the best comfort foods bring.
    • It keeps the chaos fun and the mood light, perfect for spooky, giggly nights.

    AVOID MY DISASTER (You’re Welcome)

    • FORGOT to pre-cook the patties; they turned soggy, lost their shape—patties need a quick sear first.
    • DUMPED too much cheese, it spilled over and clumped—measure for neatness and easier cleanup.
    • OVER‑TORCHED the buns, they now taste burnt—keep an eye on the oven, set a timer.
    • SKIPPED washing hands after handling olives—ended up smudging the monster faces—gloves or wash up next time.

    QUICK FIXES THAT SAVE YOUR DAY

    • When patties stick, splash cold water on your hands for easy shaping.
    • Patch torn buns with a dab of butter milk mixture before toasting.
    • Shield cheese from burning by adding it at the very end of oven baking.
    • When olives slip, use a toothpick or skewer to position eyes securely.
    • For a quick rescue, melt some extra cheese in the microwave and swirl it over the monsters for gooey effect. Smells rich and cheesy.

    Halloween Monster Burgers

    Halloween Monster Burgers are playful, creatively decorated burgers made by transforming cooked beef patties into silly monster faces. You use various toppings like cheese, olives, and lettuce to create eyes, teeth, and wild hair, resulting in a fun, chaotic presentation. The final dish has juicy, savory patties with colorful and textured toppings that resemble grotesque monsters.
    Prep Time 15 minutes
    Cook Time 10 minutes
    Total Time 25 minutes
    Servings: 4
    Course: Main Course
    Cuisine: American
    Calories: 650

    Ingredients
      

    • 1 pound ground beef for patties
    • 4 burger buns slider or regular size
    • 4 slices cheddar cheese for teeth and decorations
    • 1/2 cup black olives sliced for eyes
    • 1 head lettuce shredded for hair
    • 2 tablespoons mustard for monster mouths
    • 2 tablespoons ketchup for monster tongues and details
    • Salt and pepper to taste seasoning for beef

    Equipment

    • Grill or stovetop skillet
    • Baking sheet
    • Chef’s knife
    • Toothpicks or skewers
    • Spatula

    Method
     

    1. Preheat your grill or skillet over medium-high heat until hot, ready to sear the patties.
    2. Divide the ground beef into four equal portions and gently shape each into a thick, round patty. Season each patty generously with salt and pepper.
    3. Place the patties on the hot grill or skillet and cook for about 4-5 minutes per side until browned and cooked through. Sear until they develop a nice crust, then set aside.
    4. While the patties cook, prepare your toppings: shred the lettuce for wild hair, slice the olives for eyes, and cut cheddar slices into triangular teeth or other fun shapes.
    5. Toast the burger buns lightly until golden if desired, then set aside.
    6. Once the patties are cooked and rested briefly, place each on a bun bottom. Spoon a little ketchup and mustard on the top of the patty to create monster mouths and tongues.
    7. Decorate each burger face with cheese for teeth, olives for eyes, and shredded lettuce for wild hair. Use a toothpick or skewer to help position small toppings if needed.
    8. Cover each decorated patty with the top bun carefully, creating a playful, monstrous look on the side with the toppings showing.
    9. Serve immediately while the patties are warm and the toppings are fresh, ready for a fun Halloween meal.

    Notes

    Feel free to get creative with other toppings like cherry tomatoes, bell peppers, or extra cheese for more monster features.

    These Halloween Monster Burgers bring an imperfect, joyful chaos to the dinner table, just in time for fall festivities. Their messy, inventive faces make eating part of the entertainment, perfect for nights when the goal is fun, not finesse. Every bite is a reminder that a little chaos can add flavor to a favorite season.

    As the season dips into its spirited, spooky embrace, creating these monsters feels like a tribute to childhood’s wild imagination. They’re simple enough for a quick kitchen adventure but memorable enough to spark smiles long after the costumes come off. Sometimes, the best moments are those filled with mess, laughter, and a little bit of delicious madness.

  • The Surprising Nostalgic Charm of Rosé Wine Slushies

    The Surprising Nostalgic Charm of Rosé Wine Slushies

    Imagine a summer evening where the air feels sticky with anticipation, and your freezer is calling out for a little rebellious sweetness. That’s when I stumbled on the idea of turning rosé into a frosty, drinkable memory—something that surprises even seasoned wine lovers. It’s not just a frozen cocktail; it’s a nostalgic shout-out to lazy days and spontaneous outdoor gatherings.

    This recipe is different from the usual because it combines the elegance of rosé with the playful chaos of a slushie. You’ll be amazed how the cold temperature brings out fruity undertones that often hide behind a sipper’s glass. Perfect for those moments when you crave a treat that’s both cool and unexpectedly sophisticated.

    Frozen Rosé Slushie

    This frozen rosé slushie combines the elegance of chilled wine with a playful, icy texture. It is made by blending rosé with sweeteners and fruit, creating a refreshingly smooth and frosty beverage with a vibrant, semi-opaque appearance. The final dish is a slushy, ice-crystal-laden drink perfect for warm summer evenings.
    Prep Time 10 minutes
    Total Time 10 minutes
    Servings: 4
    Course: Main Course
    Cuisine: Western
    Calories: 135

    Ingredients
      

    • 750 ml rosé wine chilled
    • 2 tablespoons honey or simple syrup adjust to taste
    • 1 cup fresh berries strawberries, raspberries or blueberries
    • 1 tablespoon lemon juice optional, adds brightness

    Equipment

    • Freezer
    • Blender
    • Measuring cups and spoons

    Method
     

    1. Pour the chilled rosé into a shallow container and stir in honey or simple syrup until fully dissolved.
    2. Add the fresh berries and lemon juice to the mixture, then gently stir to combine, allowing the fruit to infuse some flavor.
    3. Place the container in the freezer and let it firm up for about 2-3 hours, stirring every 30 minutes to break up ice crystals and promote a smooth texture.
    4. Once the mixture is mostly frozen but still scoopable, transfer it to a blender.
    5. Blend the mixture until it reaches a smooth, slushy consistency, about 30 seconds to 1 minute.
    6. Pour the blended slushie into glasses, allowing any remaining ice crystals to settle slightly before serving.
    7. Garnish with additional berries or a lemon wedge if desired, then serve immediately for a refreshing, frosty treat.

    Notes

    Adjust sweetness and fruit choices to personal preference. For a thicker texture, freeze longer and blend again for a smoother finish.
    As the sun dips below the horizon, this rosé wine slushie becomes your best partner for unwinding. It’s an easy recipe that makes a statement without fuss, ideal for impromptu celebrations or quiet evenings. Sometimes, a simple glass of frozen wine is all you need to bring a little magic to your day.

    So, next time you spot a bottle of rosé, think twice before pouring a standard glass. Turn it into a slushie, turn your routine upside down, and enjoy a toast to the little surprises in life.

  • Chill Out with the Coffee Slushie: A Unexpected Summer Secret

    Chill Out with the Coffee Slushie: A Unexpected Summer Secret

    As someone who thrives on the aroma of freshly ground coffee beans, I found myself craving a cold twist when the summer heat hit. Instead of the usual brew, I decided to experiment with a frozen version that could keep me energized and cool at the same time. That’s how the coffee slushie was born, a blend of rich coffee flavor and icy refreshment.

    This recipe isn’t just about beating the heat; it’s about transforming your daily coffee ritual into a frozen escape. The best part? It’s so simple that you’ll want to make it all season long. Imagine biting into a chilly coffee cloud, with a hint of sweetness and a burst of caffeine—perfect for sunny afternoons or pre-dinner sips.

    From the texture that melts smoothly on your tongue to the invigorating aroma, this slushie delivers a sensory jolt. It’s more than a drink—it’s a moment of bliss that turns ordinary coffee into a cool adventure. Once you try it, you won’t want to go back to your regular cup again.

    Coffee Slushie

    A cold frozen beverage blending brewed coffee, milk, and sugar to create a smooth, icy texture with a rich coffee flavor. The mixture is blended until slushy and served chilled, offering a refreshing, caffeine-infused treat with a silky consistency.
    Prep Time 5 minutes
    Cook Time 10 minutes
    Total Time 15 minutes
    Servings: 2
    Course: Main Course
    Cuisine: Global
    Calories: 90

    Ingredients
      

    • 1 cup freshly brewed coffee cooled to room temperature
    • 1/2 cup milk any type you prefer
    • 2 tablespoons sugar adjust to taste
    • 2 cups ice cubes

    Equipment

    • Coffee maker or brewing method
    • Blender

    Method
     

    1. Brew a strong cup of coffee and let it cool to room temperature, ensuring it’s not steaming hot when added to the blender.
    2. Pour the cooled coffee into the blender, then add the milk and sugar. Blend briefly until the sugar dissolves and the mixture is combined smoothly.
    3. Add the ice cubes to the blender, then start blending on high speed. Continue until the ice is finely crushed and the mixture reaches a thick, slushy consistency.
    4. Check the texture; it should be cold, smooth, and scoopable, resembling a soft-serve consistency. If it’s too thick, add a splash more milk and blend briefly again.
    5. Pour the coffee slushie into chilled glasses, and if desired, garnish with a sprinkle of cocoa powder or a coffee bean for presentation.
    6. Serve immediately with a straw or spoon, enjoying the icy, caffeinated refreshment in every sip.

    This coffee slushie comes into its own during the hottest months, where cold beverages are a necessity rather than a luxury. It’s a simple joy that transforms your usual caffeine fix into an icy revolution, perfect for cooling down and escaping into a flavor-filled moment. The way the flavors intensify with each spoonful makes it a true treat that’s hard to forget.

    It’s a reminder that sometimes, the best ideas happen with just a little ice, some coffee, and a dash of curiosity. No matter your day or season, this frozen delight will slide right into your routine, offering a splash of refreshment whenever needed most.

  • Autumn’s Hidden Gem: Roasted Butternut Squash & Carrot Soup

    Autumn’s Hidden Gem: Roasted Butternut Squash & Carrot Soup

    As the leaves turn and a crispness fills the air, my culinary pursuits shift towards comforting, earthy flavors. Today, I decided to explore the underrated charm of butternut squash and carrots, roasted to deepen their natural sweetness. This soup isn’t just warming—it’s a celebration of seasonal produce, lightly touched by hints of caramelization that bring out their full richness.

    The process of roasting amplifies their flavors, transforming simple ingredients into something surprisingly complex. The gentle aroma of roasting squash mingling with sweet carrots creates a nostalgic sensory experience. It’s a humble yet luxurious dish perfect for cozy nights or a quick, satisfying lunch.

    Roasted Butternut Squash and Carrot Soup

    This soup is made by roasting chunks of butternut squash and carrots until caramelized and tender, then blending them into a smooth, velvety puree. The roasting process enhances their natural sweetness and creates a rich, hearty texture with a slightly charred flavor. The final dish has a warm orange hue and a creamy consistency, perfect for fall and winter comfort.
    Prep Time 15 minutes
    Cook Time 40 minutes
    Total Time 55 minutes
    Servings: 4
    Course: Main Course
    Cuisine: Seasonal
    Calories: 180

    Ingredients
      

    • 1 lb butternut squash peeled and cubed
    • 3 large carrots peeled and chopped
    • 2 tablespoons olive oil for roasting
    • 1 small onion diced
    • 2 cloves garlic minced
    • 4 cups vegetable broth
    • to taste salt and pepper
    • 1 tablespoon olive oil or butter for sautéing

    Equipment

    • Baking sheet
    • Blender or immersion blender

    Method
     

    1. Preheat your oven to 400°F (200°C). Spread the cubed butternut squash and chopped carrots evenly on a baking sheet. Drizzle with 2 tablespoons of olive oil and toss to coat well.
    2. Roast the vegetables in the oven for about 30-40 minutes, until they are soft and caramelized around the edges, and a fork slides in easily.
    3. While the vegetables are roasting, heat a tablespoon of olive oil or butter in a large pot over medium heat. Add the diced onion and sauté until translucent and fragrant, about 5 minutes.
    4. Add the minced garlic to the pot and cook for another minute until fragrant, stirring constantly so it doesn’t burn.
    5. Remove the roasted vegetables from the oven and add them to the pot with the sautéed onions and garlic.
    6. Pour in the vegetable broth and bring the mixture to a gentle simmer. Let it cook for 10 minutes to allow flavors to meld.
    7. Use an immersion blender or transfer the mixture carefully into a blender, then purée until smooth and creamy.
    8. Return the soup to the pot (if blended in a blender) and reheat gently. Season with salt and pepper to taste.
    9. Serve hot, garnished with a drizzle of olive oil or a sprinkle of herbs if desired.

    Notes

    For an extra layer of flavor, add a splash of cream or a dash of smoked paprika before serving.

    This roasted soup is a reminder of how the simplest ingredients can create something extraordinary with just a little oven time. It’s one of those recipes that feels almost meditative—a warm hug in a bowl that has roots in seasonal comfort.

    Whichever October or November day calls for a bit of warmth, this soup delivers. Its hearty texture and sweet, smoky undertones make it a versatile staple. No matter how busy life gets, this dish offers a moment of peace and hearty nourishment.

  • The Ultimate Vanilla Slushie: A Nostalgic Chill in Every Sip

    The Ultimate Vanilla Slushie: A Nostalgic Chill in Every Sip

    Imagine the scent of vanilla bean filling your kitchen, warm yet inviting, as you prepare to freeze a simple ingredient into a refreshing treat. But this isn’t just any slushie; it’s a vanilla marvel that transforms ordinary summer moments into memories. The secret lies in balancing the rich aroma of vanilla with a perfectly icy texture, giving each sip a delightful chill and a hint of nostalgia.

    What makes this vanilla slushie stand out is its versatility. It’s a dessert you can customize with a splash of your favorite milk, a drizzle of caramel, or even a sprinkle of cinnamon. Whether you’re seeking a quick cool-off or a gentle indulgence after a long day, this recipe promises refreshment with a comforting twist.

    Vanilla Bean Slushie

    This vanilla bean slushie is a frozen beverage made by blending vanilla extract, milk, and ice until smooth and icy. It has a refreshing, creamy texture with a pronounced vanilla aroma, garnished with optional toppings or mix-ins for customization.
    Prep Time 10 minutes
    Total Time 10 minutes
    Servings: 2
    Course: Main Course
    Cuisine: Dessert
    Calories: 150

    Ingredients
      

    • 1 teaspoon vanilla extract preferably pure vanilla bean extract
    • 1 cup milk dairy or plant-based
    • 2 cups ice cubes adjust for desired thickness
    • 2 tbsp sugar optional, for added sweetness

    Equipment

    • Blender
    • Measuring cups and spoons

    Method
     

    1. Add the milk, vanilla extract, sugar (if using), and ice cubes into your blender.
    2. Secure the lid and blend on high speed until the mixture is smooth and icy, about 30-45 seconds. You should see a frosty, velvety texture forming.
    3. Pause briefly to check the consistency. If it’s too thick, add a splash more milk and pulse again. If too thin, add a few more ice cubes and blend briefly.
    4. Once the mixture is well blended with a uniform, slushy appearance, pour it into glasses.
    5. Optionally, garnish with a vanilla bean pod, sprinkles, or a drizzle of caramel for extra flavor and visual appeal.
    6. Serve immediately with a straw or spoon, enjoying the cold, creamy vanilla flavor.

    Notes

    For a richer flavor, replace part of the milk with heavy cream or add a splash of flavored syrup.

    In a world full of flashy desserts, this vanilla slushie proves that simple ingredients and a little patience can create something truly satisfying. It’s a reminder that comfort foods don’t need to be complicated, just well-made. As the summer heat persists, there’s nothing quite like a homemade slushie to brighten your day.

    So next time you crave a cold treat, remember how easy and delightful it is to turn vanilla into a frosty escape. It’s perfect for lazy weekends or spontaneous guests. And with this recipe in your back pocket, you’re always ready to serve up a bit of frosty happiness.

  • Hidden Gem: Roasted Butternut Squash Soup with a Twist

    Hidden Gem: Roasted Butternut Squash Soup with a Twist

    Cooking during the chilly months often leads me to seek comfort in familiar flavors. But this time, I decided to go a bit rogue: roasting butternut squash with a splash of cinnamon and a drizzle of honey before turning it into a velvety soup. The roasting process caramelizes the natural sugars and gives the soup an unexpectedly sweet depth.

    The smell alone of roasting squash with warm spices is enough to make anyone’s stomach rumble. It’s a symphony of cozy, autumnal aromas that fill the kitchen and evoke childhood memories of fall festivals and hayrides. It’s simple, yet each spoonful feels like a tiny celebration of seasonal bounty.

    Roasted Butternut Squash Soup

    This soup is made by roasting butternut squash until caramelized and tender, then blending it into a smooth, velvety purée. The roasting process enhances natural sweetness, while cinnamon and honey add warm, cozy flavors. The final dish has a creamy texture with a slightly thick, vibrant orange appearance.
    Prep Time 10 minutes
    Cook Time 45 minutes
    Total Time 55 minutes
    Servings: 4
    Course: Main Course
    Cuisine: comfort food
    Calories: 180

    Ingredients
      

    • 1 medium butternut squash peeled, seeded, and cut into chunks
    • 2 tbsp olive oil for roasting
    • 1 tsp ground cinnamon adds warm spice
    • 1 tbsp honey for natural sweetness
    • 4 cups vegetable broth or chicken broth
    • 1 cup cream or coconut milk optional, for creaminess
    • to taste salt and black pepper

    Equipment

    • Baking sheet
    • Blender or immersion blender
    • Large pot

    Method
     

    1. Preheat your oven to 400°F (200°C). Spread the butternut squash chunks evenly on a baking sheet, drizzle with olive oil, and sprinkle with ground cinnamon. Roast for about 25-30 minutes, or until the squash is golden and caramelized around the edges.
    2. Remove the roasted squash from the oven and transfer it to a large pot. Pour in the vegetable broth, add the honey, and bring the mixture to a gentle simmer over medium heat.
    3. Simmer the soup for about 10 minutes, allowing the flavors to meld and the squash to soften further.
    4. Use an immersion blender or transfer the soup in batches to a blender, then blend until completely smooth and creamy.
    5. If you like a richer texture, stir in the cream or coconut milk. Season the soup with salt and black pepper to taste, then warm it through for a few more minutes.
    6. Pour the velvety soup into bowls, garnish with a sprinkle of cinnamon or roasted seeds if desired, and serve hot.
    This roasted butternut squash soup is my current favorite because it changes the way I think about fall vegetables. Its rich, sweet flavor and creamy texture make it a perfect starter or cozy dinner. Plus, it’s a reminder that a little roasting elevates humble ingredients into something truly special.