Blog

  • Pumpkin Oatmeal: A Cozy Fall Breakfast with a Twist

    Pumpkin Oatmeal: A Cozy Fall Breakfast with a Twist

    Whether sharing it with family or enjoying it alone with a good book, this pumpkin oatmeal feels like a little ritual. It’s a warm, fragrant bowl that captures the essence of fall, making breakfast something to look forward to. Plus, it’s pretty forgiving—perfect for those mornings when you want something comforting without fuss.

    Spiced Pumpkin Oatmeal

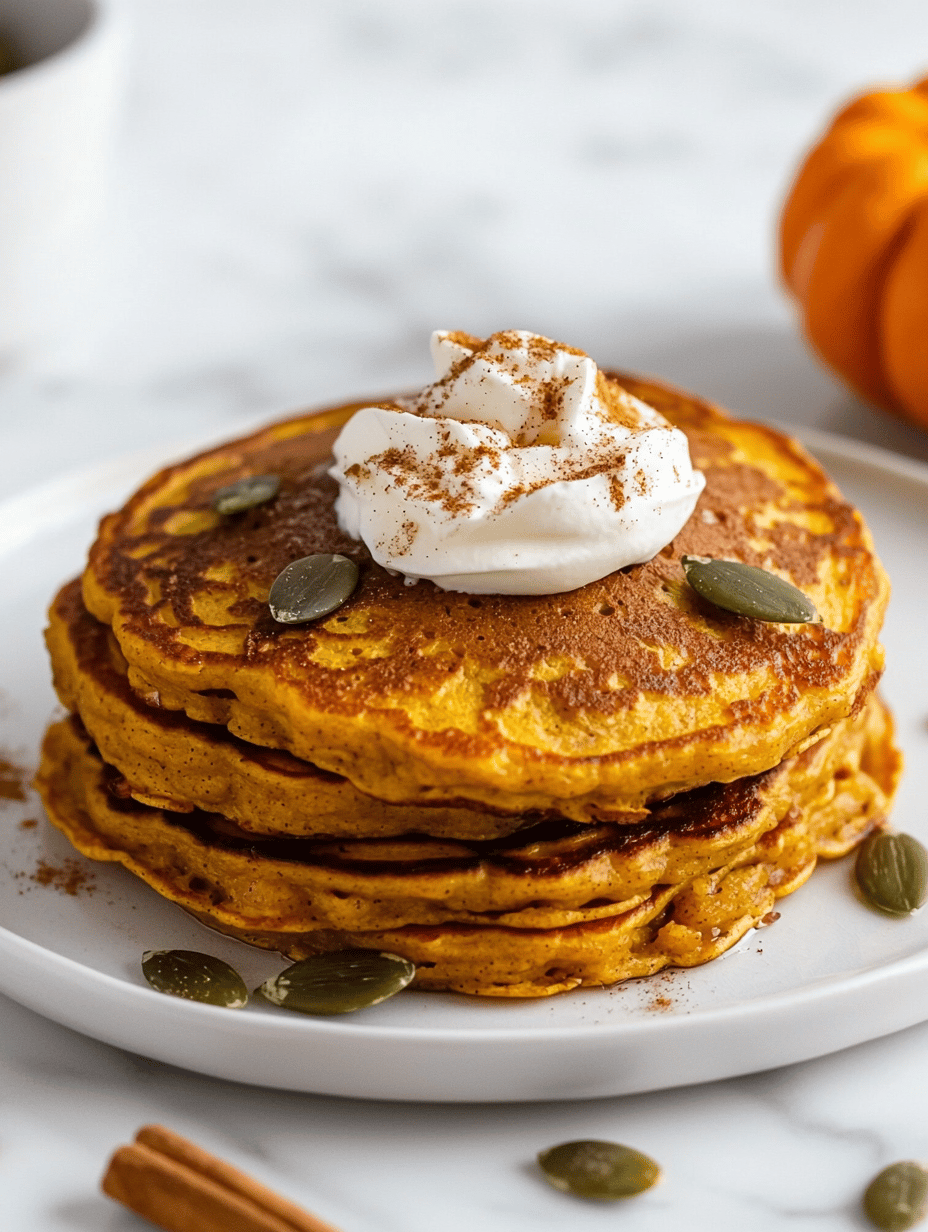
    This pumpkin oatmeal is a warm, creamy dish made by simmering oats with pumpkin puree and aromatic spices. The mixture develops a thick, velvety texture with a fragrant aroma, and is topped with comforting seasonings and sweeteners before serving.
    Prep Time 5 minutes
    Cook Time 15 minutes
    Total Time 20 minutes
    Servings: 2
    Course: Main Course
    Cuisine: American
    Calories: 250

    Ingredients
      

    • 1 cup rolled oats
    • 1/2 cup pumpkin puree unsweetened
    • 2 cups water or milk for cooking the oats
    • 1 teaspoon cinnamon
    • 1/2 teaspoon nutmeg optional
    • 1 tablespoon maple syrup or honey for sweetness
    • Pinch salt
    • Optional toppings: such as chopped nuts, additional cinnamon, or a drizzle of maple syrup

    Equipment

    • Saucepan
    • Wooden spoon

    Method
     

    1. Bring water or milk to a gentle simmer in a medium saucepan over medium heat.
    2. Add the rolled oats to the simmering liquid and stir well to combine.
    3. Stir in the pumpkin puree, along with cinnamon, nutmeg (if using), and a pinch of salt.
    4. Reduce the heat to low and let the mixture simmer gently, stirring occasionally to prevent sticking, for about 10 minutes until the oats are tender and the mixture thickens.
    5. Once thick and creamy, stir in the maple syrup or honey to sweeten the oats.
    6. Remove the saucepan from the heat and let it sit for a minute to allow the flavors to meld.
    7. Spoon the pumpkin oatmeal into bowls and top with your favorite extras like chopped nuts, extra cinnamon, or a drizzle of syrup for added texture and flavor.

    Notes

    Stir well before serving to evenly distribute the pumpkin and spices. For creamier oats, use milk instead of water.
    This pumpkin oatmeal offers a simple way to bring the flavors of fall into a hectic morning routine. It’s a nostalgic nod to cozy kitchen mornings but with a modern, wholesome touch. The warm spices, creamy pumpkin, and hearty oats make it a comforting staple perfect for the season.

    Sharing this bowl has become a cherished tradition for me, a way to slow down and savor the start of the day. No matter how busy life gets, a warm bowl of pumpkin oatmeal eventually makes everything feel just a little better.

  • Spooky Delight: Halloween Monster Eyeball Cake Pops

    Spooky Delight: Halloween Monster Eyeball Cake Pops

    Forget traditional Halloween treats—these monster eyeball cake pops bring a chaotic splash of fun to any spooky party. The moment you unpackage them, the smell of rich cake crumbs and sweet icing fills the air, instantly drawing curious glances and excited squeals. Each eyeball is a tiny masterpiece, ready to surprise guests with their quirky, slightly grotesque charm.

    What makes these irresistible is their perfect balance of creepy and cute. Breaking one open reveals a moist, flavorful cake interior, contrasted by a vividly colored icing that looks shockingly realistic. They’re easy enough to make in a chaotic kitchen—just watch out for the lava of chocolate or the splash of food coloring!

    Monster Eyeball Cake Pops

    Chocolate cake crumbs are mixed with sweet icing to form a dough, which is then shaped into small balls. These are coated in a layer of chocolate and decorated with vivid icing and edible decor to resemble creepy eyeballs. The final result is a set of moist, detailed cake pops with a spooky, realistic appearance.
    Prep Time 30 minutes
    Cook Time 10 minutes
    Total Time 40 minutes
    Servings: 12
    Course: Main Course
    Cuisine: Halloween
    Calories: 150

    Ingredients
      

    • 2 cups chocolate cake crumbs preferably homemade or store-bought crumbled
    • 1/2 cup sweet icing can be store-bought or homemade
    • 8 oz dark chocolate or melting chocolate for coating the cake pops
    • 1 cup white icing for eyeball details
    • food coloring red and black for bloodshot details and pupils

    Equipment

    • Mixing bowls
    • Lollipop sticks
    • Melting pot or microwave-safe bowl
    • Baking sheet
    • Parchment paper
    • Food coloring
    • Decorating tools

    Method
     

    1. Combine the cake crumbs and sweet icing in a mixing bowl, stirring until you get a uniform, dough-like mixture that holds together when pressed.
    2. Use your hands to shape the mixture into small, round balls about the size of a golf ball, then insert a lollipop stick into each one to serve as a handle.
    3. Place the cake pops on a parchment-lined baking sheet and chill in the refrigerator for at least 30 minutes to firm up.
    4. While they chill, melt the dark chocolate in a melting pot or microwave in short bursts until smooth and glossy.
    5. Dip each chilled cake pop into the melted chocolate, covering it completely, then gently tap off excess chocolate and place back on the parchment paper to set.
    6. Once the chocolate coating firms up, melt some white icing and dye small portions with red and black food coloring to create details like bloodshot veins and pupils.
    7. Using small decorating tools or toothpicks, add red streaks across the white icing for veins and draw black pupils in the center, creating a realistic eyeball look.
    8. Allow the decorated cake pops to fully dry or set in the refrigerator for about 15 minutes to ensure the details are firm.

    Notes

    Work quickly when decorating to prevent icing from drying out. Use different colors for more realistic effects.
    These eyeball cake pops are more than just a spooky snack; they’re a reminder of childhood Halloween fun, mixed with a dash of culinary chaos. Once assembled, they bring a whimsical, slightly gross look that’s perfect for a themed party or a festive day at home. No matter how many you make, they’re guaranteed to be a highlight.

    As the season shifts and our need for playful recipes grows, these eyeballs keep things lively and memorable. They’re quick to whip up and endlessly customizable, making your holiday a little more deliciously bizarre and a lot more fun.

  • Fizz Your Way to Nostalgia: The Sprite Slushie Revelation

    Fizz Your Way to Nostalgia: The Sprite Slushie Revelation

    So, here’s a twist on your typical summer cool-down: the Sprite Slushie, a burst of citrus and bubbly fun that takes me back to childhood barbecues and spontaneous sleepovers. By blending icy goodness with the unmistakable sparkle of Sprite, it’s like capturing a moment of joy in every sip.

    This recipe isn’t just about quenching thirst; it’s about reclaiming those carefree moments amid the chaos of life. The zing of lime, the crisp sweetness of Sprite, and the frosty texture create a sensory escape that’s surprisingly versatile—for brunch, parties, or just an emergency happiness boost.

    WHY I LOVE THIS RECIPE?

    • I love that it’s a quick fix—dump, blend, and enjoy with no fuss.
    • This recipe sparks spontaneous joy, even on the busiest days.
    • The nostalgic citrus aroma always reminds me of sunny days.
    • It’s a playful way to add sparkle to any gathering.
    • Perfect for those who love some chaos in their cool-down ritual.

    AVOID MY DISASTER (You’re Welcome)

    • FORGOT to freeze the soda—ended up with flat slush, not icy. Next time, freeze the Sprite first!
    • DUMPED too much soda in—made it too sweet and diluted. Use equal parts for balance.
    • OVER‑TORCHED my blender—lost some fizz, ruined texture. Keep the blend gentle and quick.
    • SKIPPED the lime—lost some brightness. Always add fresh lime for zing.

    QUICK FIXES THAT SAVE YOUR DAY

    • When flat, splash in a dash of lemon juice to revive the flavor.
    • Patch the ice-to-soda ratio—add more ice if it’s too watery.
    • Shield over-blended slush with a quick sprinkle of fresh lime zest.
    • When fizz is fading, swiftly add a splash of club soda for a shimmer.
    • Rely on your pantry: use lemon-lime soda if Sprite isn’t available—just as refreshing.

    In these sweltering months, this Sprite Slushie is a cheerful burst of refreshment you didn’t see coming. It’s perfect for impromptu gatherings, or simply when you need a little brightness in your day. The cold, bubbly texture is a sensory pick-me-up that makes the season’s heat bearable.

    Whether you’re reliving a childhood memory or just chasing a quick, fun way to beat the heat, this recipe fits right in. No fuss, just sparkle and chill—because sometimes, that’s all you need to turn an ordinary moment into something special.

    Sprite Slushie

    The Sprite Slushie is a cold, bubbly beverage made by blending icy cubes with lemon-lime soda and fresh lime juice until smooth and frosty. It features a vibrant, semi-opaque texture with a sparkling appearance and refreshing citrus flavor, perfect for hot days or cheerful gatherings.
    Prep Time 5 minutes
    Total Time 5 minutes
    Servings: 2
    Course: Main Course
    Cuisine: International
    Calories: 150

    Ingredients
      

    • 2 cups frozen ice cubes preferably frozen for best texture
    • 1 cup Sprite or lemon-lime soda chilled for better blending
    • 2 tablespoons fresh lime juice about one lime

    Equipment

    • Blender
    • Measuring Cup

    Method
     

    1. Place the frozen ice cubes in the blender, filling it about halfway to create a solid base for the slushie.
    2. Pour the chilled Sprite or lemon-lime soda over the ice, allowing it to evenly distribute and start chilling the cubes.
    3. Add the fresh lime juice directly on top of the soda and ice, giving the mixture a bright citrus aroma.
    4. Secure the lid on the blender and blend on a high speed for about 15-20 seconds until the mixture transforms into a smooth, frosty slush with a slightly bubbly appearance.
    5. Stop the blender and check the texture — it should be icy, thick, and with tiny bubbles throughout.
    6. Pour the slushie into chilled glasses, filling them generously and ensuring a bubbly, frost-covered surface.
    7. Garnish with a lime wedge or a sprig of mint if desired, and serve immediately for the best fizz and icy texture.

    Notes

    For extra fizz, add a splash of club soda just before serving. Adjust the ice amount for thicker or more liquid consistency. Best enjoyed immediately while bubbly and icy.
    This Sprite Slushie isn’t just a drink; it’s a vibe—bubbly, bright, and refreshingly simple. It captures a moment of spontaneous joy that feels both nostalgic and perfectly suited for today’s fleeting summer days. A splash of citrus, a burst of cold, and instant happiness—what more could you ask for?

    Enjoy it anytime, anywhere. It’s a little reminder that sometimes, the simplest recipes make the biggest impact, especially when the heat is on and you need a quick escape in a glass.

  • Unexpectedly Delicious: The Cinnamon-Infused Apple Cake

    Unexpectedly Delicious: The Cinnamon-Infused Apple Cake

    Few desserts evoke the scent of fall quite like apple cake, but this recipe takes a surprising turn with a dash of cinnamon and a hint of cardamom. It transforms the humble apple into a fragrant adventure, perfect for cozy afternoons. Baking this cake is like inviting a warm hug into your kitchen every time.

    What makes this apple cake stand out is its moist crumb and the burst of tart apples that contrast beautifully with the sweet cinnamon sugar glaze on top. The process is surprisingly playful — slicing apples thinly to fan out on the batter creates an elegant pattern, almost like a floral design in edible form. It’s both a feast for the senses and a testament to how simple ingredients can feel luxurious.

    Apple Cake with Cinnamon and Cardamom

    This apple cake combines thinly sliced tart apples layered on a moist batter, with fragrant spices like cinnamon and cardamom baked into the crumb. The finished cake has a tender texture with a golden crust, topped with a cinnamon sugar glaze that adds sweetness and crunch. Its elegant presentation makes it both a cozy dessert and a visual delight.
    Prep Time 30 minutes
    Cook Time 40 minutes
    Total Time 1 hour 10 minutes
    Servings: 8
    Course: Main Course
    Cuisine: American
    Calories: 380

    Ingredients
      

    • 3 large tart apples peeled, cored, and thinly sliced
    • 1 1/2 cups all-purpose flour
    • 1 cup granulated sugar
    • 1/2 cup unsalted butter melted
    • 3 large eggs
    • 1 tsp ground cinnamon
    • 1/2 tsp ground cardamom
    • 1 1/2 tsp baking powder
    • 1/4 tsp salt
    • 1/2 cup milk
    • 1/4 cup cinnamon sugar for topping

    Equipment

    • Mixing bowls
    • 9-inch round cake pan

    Method
     

    1. Preheat your oven to 350°F (175°C). Grease a 9-inch cake pan and set aside.
    2. Combine the dry ingredients: whisk together the flour, baking powder, salt, ground cinnamon, and ground cardamom in a large mixing bowl until well blended.
    3. In another bowl, beat the eggs with the sugar until the mixture is smooth and slightly pale, about 2 minutes.
    4. Stir in the melted butter and milk into the egg mixture until combined and creamy.
    5. Gradually fold the dry ingredients into the wet mixture, mixing gently until just blended and smooth.
    6. Spread the batter evenly into the prepared cake pan, smoothing the top with a spatula.
    7. Arrange the thinly sliced apples in a decorative pattern on top of the batter, fanning them out evenly across the surface.
    8. Bake in the preheated oven for about 40 minutes, or until the top is golden and a toothpick inserted into the center comes out clean.
    9. Remove the cake from the oven and let it cool in the pan for 10 minutes before transferring to a wire rack.
    10. Once cooled, sprinkle the cinnamon sugar evenly over the top of the cake for a sweet, crunchy glaze.
    11. Slice and serve the cake, enjoying its tender crumb, fragrant spices, and the contrast of crisp apple edges with a dusting of sweet cinnamon sugar.

    This cake is more than just a dessert; it’s a memory in the making, filled with the aroma of baking apples and spice. It pairs wonderfully with a scoop of vanilla ice cream or a dollop of whipped cream, especially when still warm from the oven. As autumn blurs into winter, this recipe adds a touch of seasonal magic to any table.

    In a season that calls for comfort and familiarity, this apple cake offers a delightful twist. It invites us to slow down, savor the moment, and enjoy the small pleasures of baking. The next time you need a quick, comforting treat, this cake might just become your new favorite secret weapon.

  • The Unusual Charm of a Cozy Fall Frittata

    The Unusual Charm of a Cozy Fall Frittata

    This fall, I decided to embrace the season’s unexpected flavors by crafting a frittata that’s anything but ordinary. Instead of the usual herbs, I infused my eggs with a hint of cinnamon and roasted squash, giving it a subtle but surprising warmth. The aroma that swirled through my kitchen was like a comforting blanket on a crisp morning, drawing everyone to the table.

    What makes this recipe stand out is its versatility. It’s breakfast, lunch, and dinner all rolled into one easy, oven-baked package. Plus, with only a few ingredients, it’s a perfect way to celebrate the bounty of fall without fussing over complicated steps.

    Roasted Squash and Cinnamon Frittata

    This frittata features eggs baked with roasted squash and a hint of cinnamon, creating a warm and flavorful dish. The mixture is cooked in the oven until set with a slightly golden top, resulting in a tender, sliceable texture that can be served hot or room temperature.
    Prep Time 10 minutes
    Cook Time 25 minutes
    Total Time 35 minutes
    Servings: 4
    Course: Main Course
    Cuisine: American
    Calories: 210

    Ingredients
      

    • 2 cups roasted squash, cubed preferably butternut or delicata
    • 6 large eggs
    • 1/2 teaspoon ground cinnamon
    • 1/4 teaspoon salt
    • 1 tablespoon olive oil for greasing the skillet
    • to taste black pepper

    Equipment

    • Knife
    • Cutting board
    • Mixing bowl
    • Whisk
    • Oven-safe skillet or baking dish

    Method
     

    1. Preheat your oven to 375°F (190°C). Grease an oven-safe skillet or baking dish with a tablespoon of olive oil to prevent sticking and set aside.
    2. Chop the roasted squash into bite-sized cubes, aiming for even pieces for uniform cooking. Arrange the cubes evenly in the prepared skillet.
    3. In a mixing bowl, crack in the eggs and whisk thoroughly until the yolks and whites are fully combined. Add the ground cinnamon, salt, and freshly ground black pepper, then whisk again to incorporate the spices deeply into the mixture.
    4. Pour the seasoned egg mixture evenly over the roasted squash, making sure all the pieces are submerged and well-coated. Gently shake or tilt the skillet to distribute evenly.
    5. Place the skillet into the preheated oven and bake for about 20 to 25 minutes. The eggs will puff up slightly and turn a light golden around the edges as they cook through.
    6. Check for doneness by inserting a toothpick or knife into the center—if it comes out clean and the top is set, the frittata is ready.
    7. Remove the skillet from the oven and let it rest for a few minutes—this helps the frittata set further and makes it easier to slice.
    8. Slice the frittata into portions and serve warm or at room temperature, enjoying the tender eggs balanced with sweet roasted squash and aromatic cinnamon.

    This frittata is my new fall staple—a dish that combines nostalgia with a touch of culinary adventure. Whether it’s for a cozy weekend brunch or a quick weeknight dinner, its hearty, sweet-salty balance keeps everyone coming back for more.

    As the temperature drops outside, I love how this dish warms up the table and the soul. It’s a reminder that sometimes, the simplest ingredients layered with a little seasonal magic make the most memorable meals.

  • Chill & Thrill: The Unconventional Way to Enjoy Whiskey Slushies

    Chill & Thrill: The Unconventional Way to Enjoy Whiskey Slushies

    Imagine a heatwave hitting during a late summer barbecue. The typical sip of lemonade doesn’t quite cut it anymore. Instead, you reach for something unexpected—a whiskey slushie that combines icy refreshment with a dash of daring.

    This recipe transforms your standard frozen drink into an adventure, blending smooth whiskey with sweet fruit and a whisper of chill. It’s perfect for those who crave a little chaos in their cool-down, or anyone curious enough to try a grown-up twist on a childhood favorite.

    Whiskey Fruit Slushie

    This whiskey fruit slushie is a frozen cocktail made by blending smooth whiskey with sweet fruit and ice until thick and icy. The mixture results in a vibrant, slushy texture with a refreshing yet daring flavor profile, perfect for hot summer days or lively gatherings.
    Prep Time 10 minutes
    Total Time 10 minutes
    Servings: 4
    Course: Main Course
    Cuisine: American
    Calories: 150

    Ingredients
      

    • 1 1/2 cups fresh fruit (such as berries, peaches, or mango) cut into chunks
    • 1 cup ice cubes
    • 1/2 cup whiskey your preferred type
    • 2 tbsp honey or simple syrup optional for extra sweetness
    • 1 tsp lemon juice to brighten flavors

    Equipment

    • Blender
    • Measuring cups and spoons

    Method
     

    1. Add the chopped fresh fruit, ice cubes, whiskey, honey, and lemon juice into a blender.
    2. Secure the lid on the blender and pulse a few times to break up the fruit and start mixing.
    3. Blend on high until the mixture is smooth, thick, and icy, about 30-60 seconds, with a slushy texture.
    4. Pause the blender and check the consistency; if it’s too thick, add a splash of water or more whiskey and blend briefly to combine.
    5. Once the mixture is evenly blended and scoopable, turn off the blender.
    6. Pour the slushie into chilled glasses or mugs, garnishing with fresh fruit if desired.
    7. Serve immediately with a straw or spoon, enjoying the icy, boozy refreshment.

    Notes

    For a non-alcoholic version, substitute whiskey with fruit juice and add a dash of vanilla or sparkling water.
    Whiskey slushies aren’t just a summer escape; they can be your go-to for unexpected gatherings or a solo night of indulgence. Pour one over a sunny patio or as a surprise on a cozy weekend evening.

    As the ice gently crushes between your teeth and the whiskey warms your palate, you’ll appreciate how this simple recipe sparks spontaneous smiles. Sometimes, all it takes is a frozen twist to transform your day into something memorable.

  • Chill with a zing: Gatorade Slushie Secrets

    Chill with a zing: Gatorade Slushie Secrets

    As the summer heat presses down, I find myself craving more than just a cold drink. I want something wild, a little chaotic, and delightfully nostalgic. That’s where this Gatorade slushie sneaks into the scene, turning your favorite sports drink into a freezing masterpiece.

    With every slush, I think about childhood afternoons spent racing bikes and the tangy zest of lemon-lime that makes this drink pop. Now, I’ve tweaked that memory into a frozen treat that’s perfect for beating the heat or just injecting some fun into a mundane afternoon. Plus, it’s way easier than you’d expect!

    Gatorade Slushie

    This Gatorade slushie is a frozen beverage made by blending sport’s drink with ice until smooth and icy. The main ingredients are flavored Gatorade and ice, which give the final product a bright, semi-frozen texture with a tangy, refreshing taste. It results in a vibrant, slushy treat perfect for hot days or nostalgic moments.
    Prep Time 5 minutes
    Total Time 5 minutes
    Servings: 2
    Course: Main Course
    Cuisine: American
    Calories: 100

    Ingredients
      

    • 2 cups Gatorade flavor of your choice
    • 1 cup ice cubes

    Equipment

    • Blender
    • Measuring cups and spoons

    Method
     

    1. Pour the Gatorade into the blender, ensuring it’s chilled for best results.
    2. Add the ice cubes to the blender, filling it to the top for a thick, icy texture.
    3. Secure the lid on the blender and pulse a few times to start breaking up the ice.
    4. Blend on high for about 30-45 seconds until the mixture is smooth, frosty, and has a slushy consistency.
    5. Stop the blender and check the texture—should be thick and scoopable but not too icy or runny. If needed, add more ice and blend again.
    6. Pour the slushie into glasses, and enjoy immediately for the most refreshing experience.

    Notes

    For extra flavor, add a slice of lemon or lime on the rim or a sprig of mint as a garnish.
    This icy concoction isn’t just a temporary cool-down; it’s a small rebellion against the ordinary. When the world feels hectic, squeezing a quick frozen sip can bring a burst of joy and refreshment. It’s perfect for spontaneous summer gatherings or moments you need a sweet, icy kick.

    So next time the weather turns unforgiving, remember this simple trick. Grab a bottle of Gatorade, toss it in the freezer, and enjoy a refreshing chaos with every cold, tangy slush.

  • Spooky & Sleek: Halloween Eyeball Caprese Bites That Wow

    Spooky & Sleek: Halloween Eyeball Caprese Bites That Wow

    Step aside traditional hors d’oeuvres—these Halloween Eyeball Caprese Bites bring a dash of macabre charm to your spooky table. Each bite looks like a tiny eyeball, with the fresh mozzarella and cherry tomato creating a startlingly realistic effect. Perfect for adding a bit of chaos and fun to your haunted feast.

    Crafting these bites is surprisingly easy, yet they look impressively creepy. The contrast of the creamy mozzarella and the vibrant red tomato makes every bite pop. Plus, the basil garnish adds a fresh, slightly bitter note that balances the mild cheese. These are sure to spark conversation and be a hit among guests.

    ## WHY I LOVE THIS RECIPE?
    – It’s quirky and perfect for kids and adults alike.
    – The combination of flavors is simple but memorable.
    – Creating these eyeballs adds a fun chaos to my kitchen during Halloween.
    – I love how these bites transform a classic appetizer into something eerie and delightful.
    – They bring nostalgia for childhood costume parties with a spooky twist.

    ## AVOID MY DISASTER (You’re Welcome)
    – FORGOT the basil! I ended up with sad, flavorless eyes. Always add fresh basil.
    – DUMPED the mozzarella balls! They rolled everywhere, causing chaos. Use a small spoon next time.
    – OVER‑TORCHED the cherry tomatoes! They burst and looked less eyeball-like. Keep a close eye on them.
    – MISSED the glue! I used dry toothpicks instead of soaked ones. Soaking keeps them flexible.

    ## QUICK FIXES THAT SAVE YOUR DAY
    – Splash a tiny bit of olive oil for a glossy, moist look.
    – Patch with a dab of cream cheese if an eyeball cracks.
    – Shield with plastic wrap to preserve the spooky effect.
    – When in doubt, sprinkle a little cracked black pepper for added eeriness.
    – If the mozzarella melts too much, refrigerate for five minutes before serving.

    Creating these Halloween Eyeball Caprese Bites gives your party a playful, spooky edge that’s both fun and festive. This simple, eye-catching appetizer embodies the spirit of the season. Plus, it’s a reminder that even the creepiest dishes can be delicious.

    Nothing beats the burst of fresh basil and creamy mozzarella as they`re paired with the tart cherry tomatoes. These bites are perfect for hefty parties or intimate gatherings, turning your table into a creepy, colorful spectacle. Enjoy making these spooky treats and watch as everyone marvels at your mad culinary skills.

    Halloween Eyeball Caprese Bites

    These Halloween Eyeball Caprese Bites are bite-sized appetizers featuring fresh mozzarella balls topped with cherry tomato halves, creating a spooky eyeball appearance. They are assembled by stacking and garnishing the ingredients to resemble creepy little eyes, finished with basil for a pop of color. The final presentation is a fun and eerie display perfect for Halloween parties.
    Prep Time 15 minutes
    Total Time 15 minutes
    Servings: 8
    Course: Main Course
    Cuisine: Halloween
    Calories: 85

    Ingredients
      

    • 16 pieces fresh mozzarella balls preferably small-sized
    • 8 pieces cherry tomatoes halved for eyeball pupils
    • 16 leaves fresh basil small leaves for garnish
    • 2 tablespoons olive oil for drizzling
    • to taste salt and freshly ground black pepper for seasoning

    Equipment

    • Small spoon
    • Toothpicks or small skewers
    • Knife
    • Cutting board

    Method
     

    1. Start by preparing all your ingredients: halve the cherry tomatoes and set aside, keep the mozzarella balls whole, and wash the basil leaves.
    2. Place a small mozzarella ball on your plate or serving tray.
    3. Using a small spoon, gently scoop a halved cherry tomato and place it on top of the mozzarella to resemble an eyeball’s iris.
    4. Thread a toothpick or small skewer through the center of the mozzarella and cherry tomato, securing them together.
    5. Repeat these steps for all your mozzarella and tomato pieces, creating a spooky eye effect.
    6. Garnish each eyeball with a basil leaf, placing it at the very top to resemble eye lashes or a creepy eyelid.
    7. Drizzle a little olive oil over the assembled eyeballs for shine and flavor. Season with salt and pepper to taste.
    8. Arrange your spooky eyeball bites on a tray and keep them chilled until ready to serve.
    9. When ready to serve, place them on your Halloween table and enjoy the creepy, fresh flavor of these fun appetizers.

    Notes

    To make the eyes extra realistic, slightly flatten the mozzarella balls before assembling, and use small toothpicks for easy handling. For a more dramatic effect, add a tiny dab of black sesame seed or olive for the pupil if desired.
    As the night winds down, these eyeball bites serve as a delightful reminder of the fun chaos of Halloween. Their creepy yet charming appearance is a hit no matter the age of your guests. Plus, they are quick to prepare, which means more time for ghost stories or costume picture ops.

    This recipe is more than just a festive snack; it’s a chance to unleash your creative side. Transforming simple ingredients into eerie edible art adds an extra layer of excitement to your holiday. Enjoy the magic and madness of Halloween, one eyeball at a time.

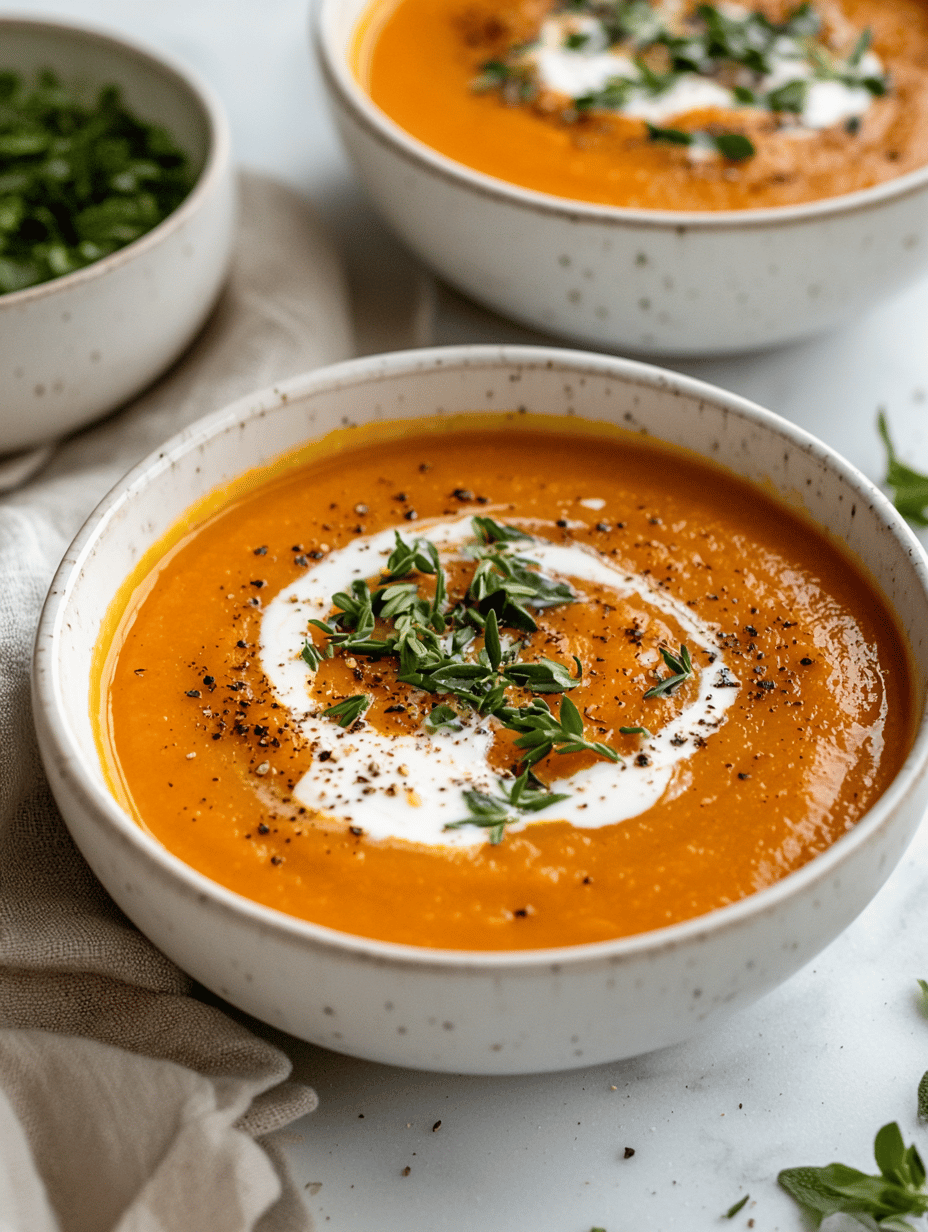
  • Whisper of Autumn: Creamy Pumpkin Soup with a Twist

    Whisper of Autumn: Creamy Pumpkin Soup with a Twist

    As the leaves turn fiery and the air takes on a crisp edge, I find myself craving a soup that feels both nostalgic and surprisingly innovative. This creamy fall pumpkin soup isnorgetortal, yet it has a secret ingredient that makes it stand out: a hint of toasted sage and a swirl of coconut milk. Itilling, yet so light, this bowl captures the essence of seasonal change in every spoonful.

    What makes this recipe truly special is how it balances that soothing pumpkin sweetness with unexpected savory depth. The slow roasted pumpkin gets caramelized at the edges, releasing a fragrant, nutty aroma that fills my kitchen. Itamiliar comfort with a whisper of adventure, perfect for a cozy night in or a casual dinner with friends.

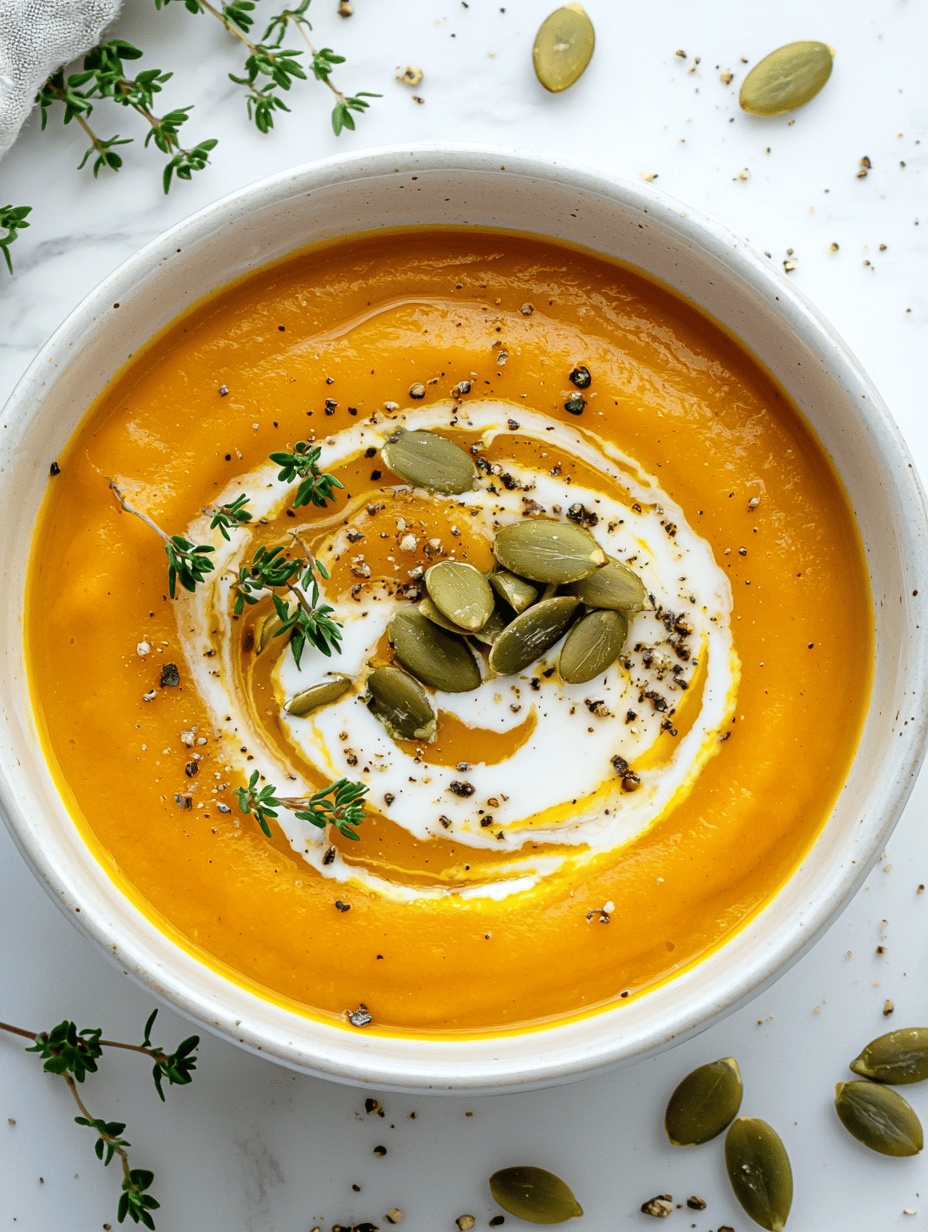
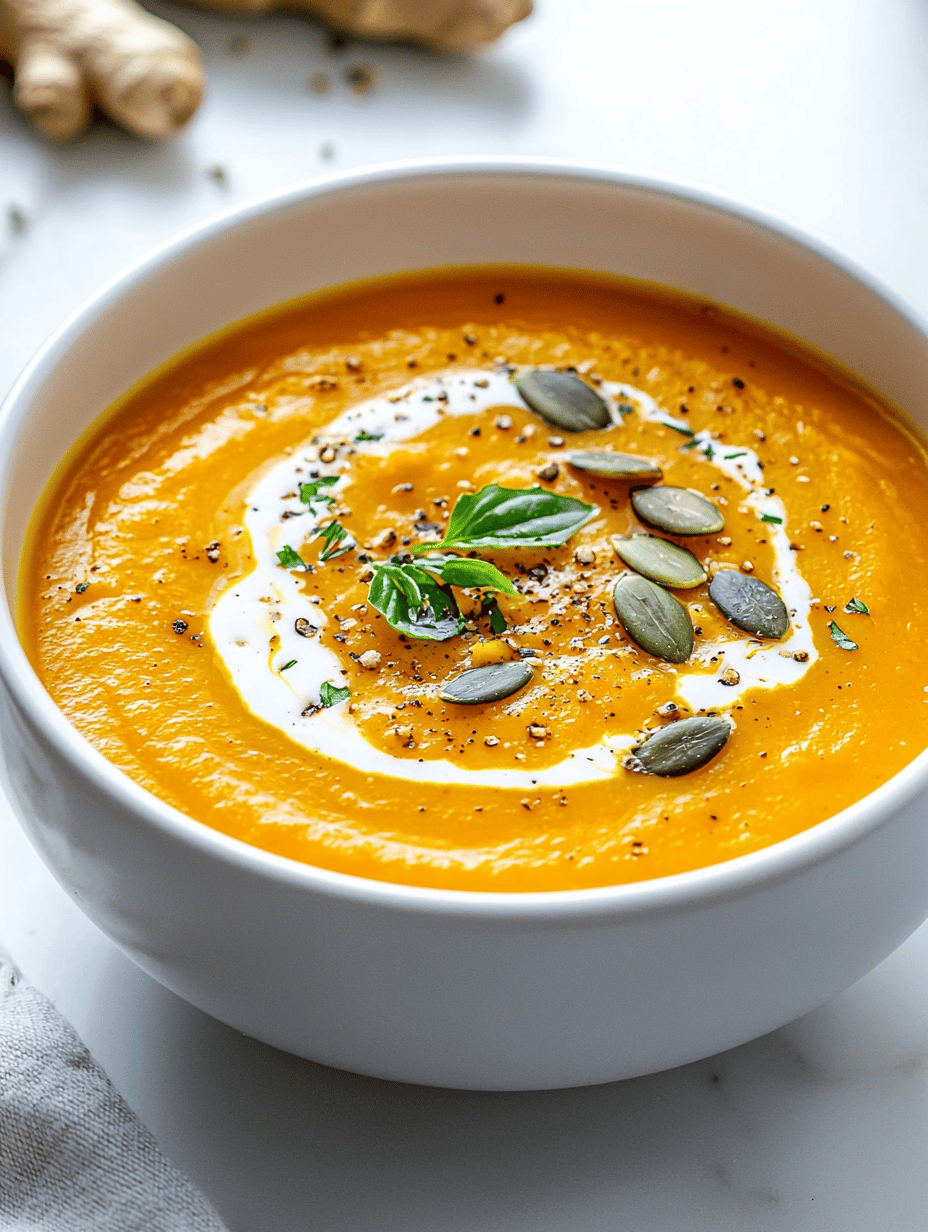
    Roasted Pumpkin Soup with Toasted Sage and Coconut Milk

    This creamy pumpkin soup features slow-roasted, caramelized pumpkin for a rich depth of flavor. It’s blended until smooth and finished with toasted sage and a swirl of coconut milk, creating a silky, velvety texture with contrasting savory and sweet notes. The final appearance is a warm, vibrant orange soup with garnishes hinting at its aromatic, seasonal character.
    Prep Time 15 minutes
    Cook Time 45 minutes
    Total Time 1 hour
    Servings: 4
    Course: Main Course
    Cuisine: fusion
    Calories: 230

    Ingredients
      

    • 1 kg pumpkin (preferably sugar or heirloom variety) peeled, seeded, and cut into chunks
    • 2 tablespoons olive oil for roasting
    • 4 fresh sage leaves sage for toasting and garnish
    • 1 can (400 ml) coconut milk full fat, for swirl and creaminess
    • 1 medium onion finely chopped
    • 2 cloves garlic minced
    • 2 cups vegetable broth for simmering
    • to taste salt and pepper for seasoning

    Equipment

    • Baking sheet
    • Blender
    • Saucepan
    • Kitchen towel
    • Cooking spoon

    Method
     

    1. Preheat the oven to 400°F (200°C). Spread pumpkin chunks on a baking sheet, drizzle with olive oil, and toss to coat evenly. Roast for about 30-40 minutes until the edges are caramelized and the pumpkin is tender.
    2. While the pumpkin roasts, gently toast the sage leaves in a dry skillet over medium heat until crispy and fragrant, about 1-2 minutes. Remove and set aside.
    3. Finely chop the onion and mince the garlic. In a large saucepan, sauté the onion and garlic in a splash of oil over medium heat until translucent and fragrant, about 5 minutes.
    4. Add the roasted pumpkin to the saucepan with the sautéed aromatics. Pour in the vegetable broth and bring to a simmer. Cook for 10 minutes to allow flavors to meld.
    5. Use an immersion blender or transfer the mixture to a blender and purée until smooth and velvety. Return the soup to the saucepan if needed, and season with salt and pepper to taste.
    6. Stir in the coconut milk to add creaminess and a subtle sweetness, warming the soup gently over low heat without boiling. Adjust seasoning as desired.
    7. Pour the hot soup into serving bowls. Garnish each with a few crispy sage leaves and a swirl of coconut milk for visual appeal.
    8. Serve immediately, enjoying the rich, warm aroma and smooth texture of this seasonal pumpkin soup.

    Notes

    For extra flavor, sprinkle with roasted pumpkin seeds or a drizzle of chili oil before serving.

    This pumpkin soup isnorgetor a perfect snapshot of fall, blending tradition with a touch of culinary curiosity. The warm spices and silky texture make it a dinner favorite on chilly evenings, inviting lingering conversations around the table.

    Every sip is a gentle reminder to appreciate the bounty of the season, capturing the fleeting beauty of each leaf and pumpkin patch. Its a simple pleasure that makes the transition into cooler weather a little sweeter. The smell of roasting pumpkin and herbs will linger long after the last spoonful.

  • The Secret Ingredient That Turns Your Chili Into a Comfort Symphony

    The Secret Ingredient That Turns Your Chili Into a Comfort Symphony

    Every time I make chili, I think about the chaos of my early cooking days—burnt spices, overcooked beans, and the frantic smell of everything boiling over. But I’ve recently uncovered a little trick that completely changed my approach: adding a splash of smoky bourbon at just the right moment.

    This recipe isn’t just about chili; it’s about transforming a humble dish into a story of nostalgia and adventure. As the ingredients simmer, the kitchen fills with a warm, intoxicating aroma—like a cozy campfire on a crisp fall evening. It’s a reminder that good food doesn’t just nourish the body, but also sparks your imagination.

    Smoky Bourbon Chili

    This chili is made by simmering ground meat, beans, and vegetables with spices, and finished with a splash of smoky bourbon to deepen the flavor. The dish develops a thick, hearty texture with a rich, smoky aroma and vibrant, tender ingredients. It’s a comforting stew with a glossy, inviting appearance and complex taste profile.
    Prep Time 15 minutes
    Cook Time 45 minutes
    Total Time 1 hour
    Servings: 4
    Course: Main Course
    Cuisine: American
    Calories: 450

    Ingredients
      

    • 1 lb ground beef or turkey or any ground meat of choice
    • 1 can kidney beans drained and rinsed
    • 1 can diced tomatoes 14.5 oz can
    • 1 medium onion finely chopped
    • 2 cloves garlic minced
    • 2 tbsp chili powder
    • 1 tsp cumin
    • 0.5 tsp smoked paprika
    • 0.25 tsp cayenne pepper optional, for heat
    • 1 cup beef or vegetable broth
    • 0.25 cup smoky bourbon
    • 2 tsp salt or to taste
    • 1 tbsp oil for sautéing

    Equipment

    • Large Pot or Dutch Oven
    • Wooden Spoon or Spatula

    Method
     

    1. Heat the oil in a large pot over medium heat. Add the chopped onion and cook until it becomes translucent and fragrant, about 3-4 minutes.
    2. Add the minced garlic and cook for another 30 seconds until it releases a fragrant aroma.
    3. Stir in the ground meat and cook, breaking it apart with your spoon, until browned and cooked through, about 5-7 minutes.
    4. Mix in the chili powder, cumin, smoked paprika, cayenne (if using), and salt. Cook for 1-2 minutes, allowing spices to toast and become fragrant.
    5. Add the diced tomatoes and drained beans to the pot, stirring well to combine everything evenly.
    6. Pour in the broth and bring the mixture to a gentle boil, then reduce heat to low and cover loosely.
    7. Allow the chili to simmer uncovered for 30-40 minutes, stirring occasionally, until it thickens and flavors meld together.
    8. Once the chili is nearly ready, pour in the smoky bourbon and stir gently into the mixture.
    9. Simmer the chili for an additional 5 minutes to let the bourbon infuse and deepen the smoky flavor.
    10. Taste the chili and adjust seasoning if needed. Serve hot, garnished with your favorite toppings, and enjoy the rich, smoky aroma and hearty texture.
    This chili is perfect for chilly nights when pressing pause feels like the best thing you can do. The richness and depth of flavors make it a meal to savor, not rush through. I love how it brings the family together, laughter and good smells filling the air.

    There’s an unspoken comfort in a pot like this—a dish that invites you back to simpler times while still feeling fresh and new. Whether enjoyed on its own or with a side of crusty bread, it’s a reminder that sometimes, the best meals are the ones made with love and a little bit of chaos.