Searing scallops might seem straightforward, but giving them a quiet moment to rest after cooking makes all the difference. It’s that little pause that lets the juices settle, keeping them tender and preventing that rubbery texture so many rush into.
I’ve learned to think of scallops like a delicate dance — quick to sear but with a gentle pause. Rushing the resting stage often leaves the surface a bit too firm and the inside less juicy. That extra minute or two can turn a good scallop into something memorable.
This approach changed how I cook seafood at home. It’s a small step, but it’s made me more confident. It’s about respecting the process, letting the heat do its work, and trusting that resting will bring out the best in each tender bite.
Focusing on the overlooked importance of the scallops’ resting time after searing, which ensures a perfect texture and prevents overcooking, making the difference between good and great.
The overlooked resting step
- Seared scallops remind me of seaside dinners in summer, simple yet luxurious.
- There’s a thrill in watching the golden crust form—like catching a fleeting sunset.
- I used to rush the resting stage, but now I see it’s where the magic settles.
- Cooking scallops this way has brought back memories of my grandma’s seafood feasts—comfort in a bite.
The overlooked resting step
- Seared scallops have always felt like a special treat, but it wasn’t until I started paying attention to their resting time that I realized how much that moment impacts the final bite. I used to rush from the pan to the plate, eager to dig in, but I’d end up with a chewy, overcooked center. Once I started giving them just a minute to settle after searing, everything changed. The texture became tender, and the flavors really popped through.
- That tiny pause—just long enough to let the juices redistribute—transformed my approach. It’s not about fancy equipment or secret ingredients, really. It’s just respecting that brief rest, like letting a good story unfold slowly. Now, searing scallops feels less like a gamble and more like a deliberate, mindful step that makes all the difference.
- heading
- story_type
Fun facts about scallops
- Pan searing scallops became popular in French cuisine, where their delicate texture and quick cooking process are prized.
- Historically, scallops were a luxury ingredient, often reserved for special occasions and elaborate banquets.
- The technique of searing seafood in a hot pan dates back centuries, but perfecting scallops’ crust took time and experimentation.
- In coastal regions, searing scallops over open flames was a traditional method before pans became widely accessible in homes.
- Quirky fact: In some cultures, scallops symbolize good luck and prosperity, making their searing a celebratory act.
Ingredient breakdown
- Scallops: I look for that firm, slightly springy texture and a translucent center. Skip dry scallops—they won’t sear well and might be rubbery.
- Salt: I prefer kosher salt for its clean flavor and better control. Season generously—this helps develop a good crust and enhances natural sweetness.
- Black pepper: Freshly cracked pepper adds a spicy kick and visual contrast. Add just before serving to avoid overcooking the spice.
- Butter: I use unsalted butter for clarity and control over salt. Its nutty aroma when browned is key—don’t rush the browning process.
- Oil: Neutral oils like grapeseed or canola give me a high smoke point for that perfect sear without smoky bitterness. No olive oil, it burns too fast.
- Lemon juice: Brightens the scallops with a zing. Squeeze just before serving—overdoing it can dull the delicate flavor.
- Herbs: A sprig of thyme or parsley adds freshness. Toss in at the end or sprinkle on for a burst of color and herbal aroma.
Spotlight on key ingredients
Scallops:
- I look for that firm, slightly springy texture and a translucent center. Skip dry scallops—they won’t sear well and might be rubbery.
- Salt: I prefer kosher salt for its clean flavor and better control. Season generously—this helps develop a good crust and enhances natural sweetness.
- Black pepper: Freshly cracked pepper adds a spicy kick and visual contrast. Add just before serving to avoid overcooking the spice.
Butter, oil, lemon juice:
- Butter: I use unsalted butter for clarity and control over salt. Its nutty aroma when browned is key—don’t rush the browning process.
- Oil: Neutral oils like grapeseed or canola give me a high smoke point for that perfect sear without smoky bitterness. No olive oil, it burns too fast.
- Lemon juice: Brightens the scallops with a zing. Squeeze just before serving—overdoing it can dull the delicate flavor.
Notes for ingredient swaps
- Seafood Alternatives: Use firm fish like halibut or cod if scallops aren’t available. They won’t sear quite the same but still delicious.
- Salt: Swap kosher salt for fine sea salt for a subtler seasoning. Adjust the amount to avoid over-salting.
- Pepper: Use pre-ground black pepper if fresh cracked isn’t handy, but keep in mind it’s less vibrant and aromatic.
- Oil: Grape seed or canola oil are high smoke point options. For a richer flavor, try clarified butter, but watch the heat to prevent burning.
- Lemon: Lime juice offers a similar bright acidity, just a touch more tart and slightly less sweet than lemon.
- Herbs: Parsley can be replaced with chives or basil for a different herbal note. Freshness is key, so avoid dried herbs here.
- Butter: Use vegan butter or ghee if you prefer dairy-free options. Keep in mind, ghee will give a nuttier aroma and slightly different melting behaviour.
Equipment & Tools
- Heavy-bottomed skillet: Ensures even heat for a consistent sear.
- Fish spatula: Helps flip delicate scallops without breaking.
- Paper towels: Dry scallops thoroughly for optimal searing.
- Tongs: Gently handle and turn scallops.
- Small bowl: Hold lemon juice or seasonings for finishing.
Step-by-step guide to pan searing
- Equipment & Tools: Gather a heavy-bottomed skillet (preferably cast iron), a fish spatula, paper towels, tongs, and a small bowl for lemon juice. The skillet ensures even heat for a perfect crust, while the spatula helps flip gently.
- Prepare the scallops: Pat them dry thoroughly with paper towels—moisture is the enemy of searing. If they have a side muscle, remove it for a cleaner presentation.
- Season generously: Lightly sprinkle both sides with kosher salt and freshly cracked black pepper. This enhances flavor and helps develop a golden crust.
- Heat the pan: Place the skillet over medium-high heat. Add a tablespoon of neutral oil (like grapeseed). Wait until the oil shimmers—about 1-2 minutes. It should be just on the edge of smoking.
- Sear the scallops: Carefully place them in the hot pan, spaced apart. Sear without moving for about 2 minutes. You’ll see a golden-brown crust form and hear a gentle crackle.
- Flip and cook: Use tongs or a spatula to gently turn each scallop. Sear the second side for another 1-2 minutes until the crust is deep amber and the scallops are just opaque in the center.
- Check doneness: The scallops should feel firm but still tender. The crust should be crisp and caramelized. If over-browned or rubbery, reduce heat slightly.
- Rest and settle: Remove from heat and transfer to a plate. Rest for exactly 1 minute—this allows juices to redistribute, keeping them tender inside.
- Final touch: Squeeze fresh lemon juice over the scallops. Optional: sprinkle chopped herbs for color and freshness. Serve immediately for best texture and flavor.
Transfer scallops to a warm plate and let rest for 1 minute. Squeeze fresh lemon over before serving. Serve immediately for optimal texture and flavor.
How to Know It’s Done
- Crust is deep golden-brown and caramelized.
- Scallops are just opaque through the center, with a tender texture.
- Juices slightly settle, and scallops feel firm but not rubbery.
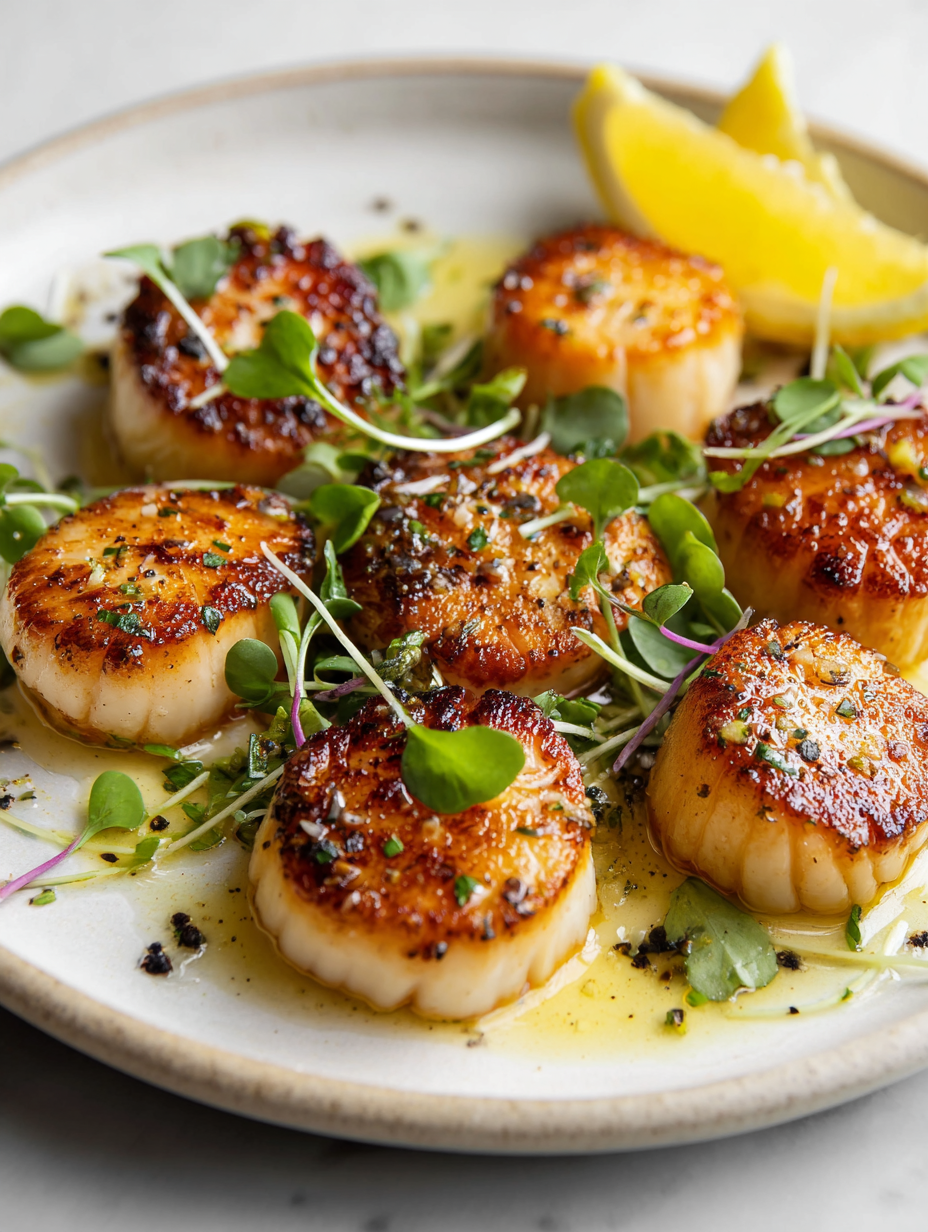
Perfect Pan-Seared Scallops
Ingredients
Equipment
Method
- Thoroughly pat the scallops dry with paper towels until their surface feels dry and slightly tacky—this step is key to achieving a good sear.
- Generously season both sides of each scallop with kosher salt and freshly cracked black pepper, pressing lightly to help seasonings adhere.
- Heat a heavy-bottomed skillet over medium-high heat until hot, then add a tablespoon of neutral oil. Wait until the oil shimmers and just begins to smoke—this ensures the pan is ready for searing.
- Gently place the scallops into the hot pan, spacing them apart so they don’t touch. Sear without moving for about 2 minutes, until the bottoms develop a deep golden-brown crust and you hear a gentle sizzle.
- Using tongs or a fish spatula, carefully flip each scallop and cook the second side for another 1-2 minutes, until the crust is deep amber and the scallops are just opaque in the center.
- Add a tablespoon of butter to the pan and cook for another 30 seconds, basting the scallops gently with the melted butter to enhance flavor.
- Transfer the scallops to a plate and let them rest for exactly 1 minute. This brief pause allows the juices to redistribute, ensuring a tender, juicy bite.
- Squeeze fresh lemon juice over the scallops and sprinkle with chopped herbs if using for a bright, herbal finish.
- Serve immediately, enjoying the crisp crust and tender interior with the fresh citrus aroma.
Notes
Pro tips for perfect scallops
- Dry scallops thoroughly: Moisture creates steam, so pat them dry until they feel like a paper towel’s surface.
- Preheat the pan: Wait until the oil shimmers and just begins to smoke—this ensures a crisp crust forms quickly.
- Don’t overcrowd: Give each scallop space; overcrowding drops the pan’s temperature and leads to steaming instead of searing.
- Resist the urge to move: Let them sit undisturbed for about 2 minutes on each side until a deep golden crust forms.
- Use a fish spatula: Gently flip the scallops—this helps preserve their shape and prevents tearing or breaking.
- Rest before serving: Transfer to a plate and rest for 1 minute; it lets the juices settle, keeping them tender inside.
- Finish with lemon: Squeeze fresh lemon juice right before serving for a bright, zingy contrast to the rich crust.
Common mistakes and how to fix them
- FORGOT to dry scallops thoroughly → Moisture causes steaming, not searing. Always pat dry with paper towels.
- DUMPED oil into hot pan → Add oil carefully, swirl to coat, then wait for shimmer before adding scallops.
- OVER-TORCHED the scallops → Reduce heat if the crust darkens too quickly or smells burnt.
- MISSED resting step → Rest scallops for at least 1 minute after searing to keep them tender and juicy.
Quick fixes and pantry swaps
- If scallops stick, splash a little water in the pan to loosen them.
- When in doubt, patch with a tiny bit of hot oil to revive a dull sear.
- DUMPED too much oil? Wipe excess with a paper towel before searing again.
- Overcooked? Rest scallops immediately and serve with a squeeze of lemon for moisture.
- Rescue a burnt crust by scraping the surface lightly and starting fresh with new scallops.
Prep, store, and reheat tips
- Prep scallops: thoroughly pat dry and season just before cooking for optimal searing texture.
- Store raw scallops in an airtight container in the coldest part of the fridge; use within 24 hours for best freshness.
- Cooked scallops can be kept in an airtight container in the fridge for up to 2 days; reheat gently to avoid overcooking.
- Reheating scallops: warm in a low oven or a non-stick pan over gentle heat until just warmed through, watching for texture changes.
- Sensory note: reheated scallops lose some of their original crispness but remain tender if reheated carefully.
Top questions about pan seared scallops
1. How do I pick the best scallops?
Look for scallops that are firm, slightly springy, and have a translucent center. Avoid dry ones that feel mushy or overly wet.
2. Why are my scallops sticking to the pan?
Pat them dry thoroughly with paper towels. Moisture on the surface prevents proper searing and can cause steaming instead.
3. How hot should the pan be?
Use a hot, lightly oiled skillet—wait until the oil shimmers and just begins to smoke before adding scallops.
4. How long should I sear the scallops?
Sear each side for about 2 minutes without moving them to develop a deep golden crust. Adjust time based on size.
5. How do I flip scallops without breaking them?
Flip them gently using a fish spatula. Don’t move them too early; let the crust set first.
6. Should I rest scallops after searing?
Remove from heat and let rest for 1 minute. This lets the juices redistribute, keeping them tender inside.
7. When should I add lemon juice?
Finish with a squeeze of fresh lemon juice just before serving to brighten the flavor profile.
8. How can I tell if scallops are cooked properly?
Overcooking makes scallops rubbery. Use visual cues like opaqueness and firmness to judge doneness.
9. What if I overcook or burn the scallops?
If scallops are over-browned or smell burnt, lower the heat and reduce the cooking time on the next batch.
10. How do I reheat leftover scallops?
Reheat gently in a low oven or skillet, just until warmed through. Reheating too fast can toughen them.
Taking the time to rest scallops after searing really elevates the dish. It’s that small pause that seals in the juices and keeps the texture perfect. No need for fancy tricks—just patience and attention make all the difference.
This simple step reminds me how much respect seafood deserves. It’s about appreciating the delicate work of searing, then letting the scallops finish their magic quietly. When done right, each bite is tender, flavorful, and memorable in a way that keeps me coming back.

Hi, I’m Emily Carter, the creator and recipe developer behind Salt Strategist. I’m so happy you’re here. This blog is where my love for flavor, creativity, and thoughtful cooking comes together in one beautiful, ever evolving space.


