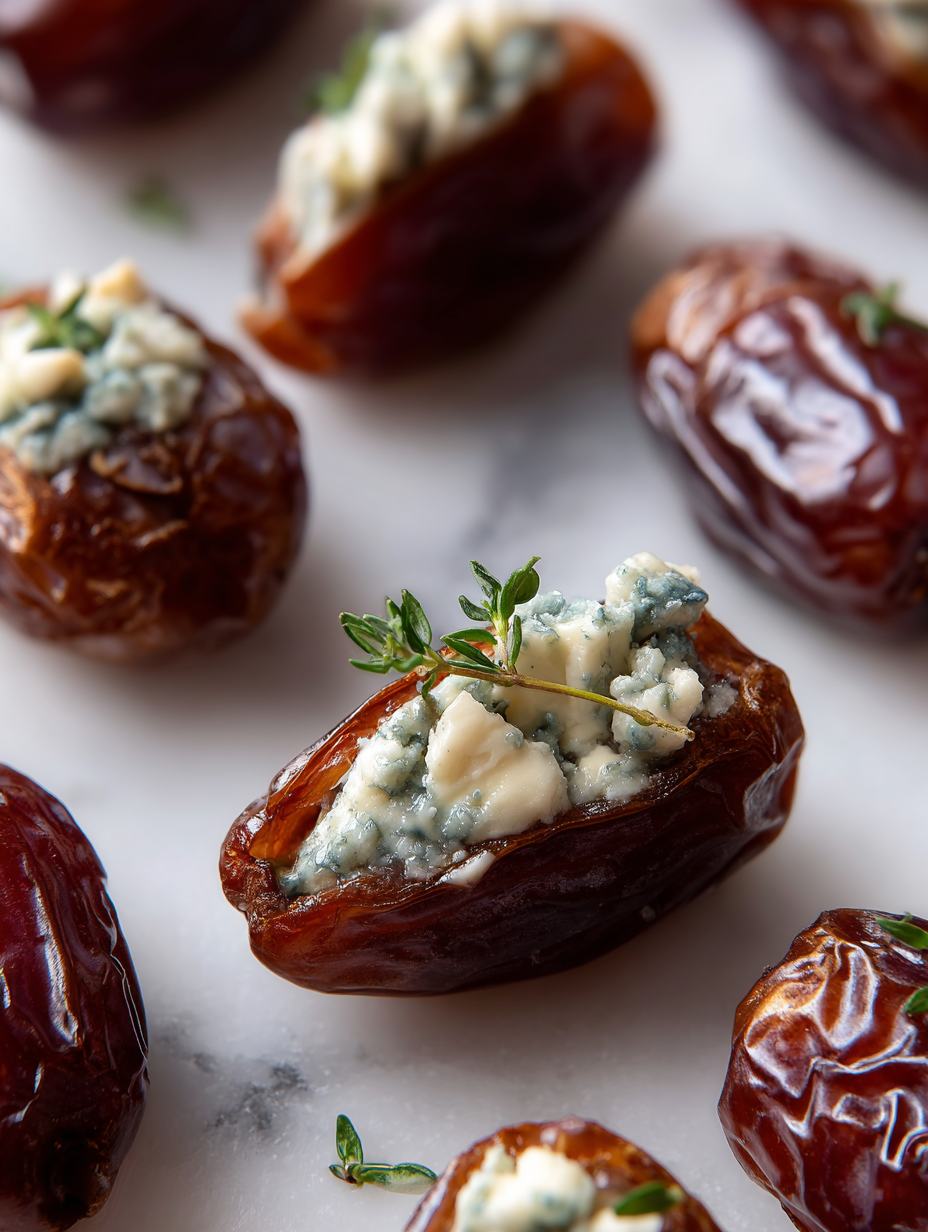
Stuffed dates with blue cheese might sound like an odd combo, but it’s a flavor adventure worth taking. The sweet, chewy dates serve as perfect little cups, holding that sharp, creamy punch of blue cheese. It’s one of those bites that surprises your palate and keeps you reaching back for more.
I first stumbled on this combo at a casual dinner party, where I watched people’s eyes widen as they took their first bites. That instant mix of sweetness, salt, and tang is addictive, and honestly, it’s become my go-to when I want something quick but memorable. It’s a tiny dish with big personality, especially when you want to impress without fuss.
This recipe is all about balance—rich, sweet, savory, and a little bit wild. It’s perfect for when you’re craving something different, maybe for a holiday platter or just a cozy night in. No fancy ingredients, just honest flavors that come together in a flash and hit all the right notes.
Focusing on the surprising savory twist of adding blue cheese to stuffed dates, a combination that balances sweetness with a bold, tangy kick. This unexpected pairing transforms a simple snack into a sophisticated appetizer, perfect for when you want to impress without fuss.
Unexpected savory sweetness
- These stuffed dates remind me of summer picnics in my childhood, where sweet and savory snacks were the highlight.
- I get a little thrill every time I combine the sticky, caramel-like dates with the sharp tang of blue cheese—it’s a flavor dance.
- Nothing beats the moment when I see guests’ surprised faces as they taste that unexpected cheesy richness inside the sweet date shell.
- I love how this simple combo feels fancy but is just a handful of ingredients—perfect for when I want easy elegance.
- Each bite is a tiny explosion of contrast—sweet, salty, creamy, and a little wild—that keeps me coming back for more.
The story behind this recipe
- This recipe came together one rainy afternoon when I had a handful of dates and a craving for something both salty and sweet. I remembered how my grandmother used to stuff dried figs with nuts, a simple, rustic treat. That nostalgic memory made me think—why not switch to dates and go savory with cheese? It’s a small twist that feels like a big flavor leap.
- I started experimenting late into the night, balancing the richness of blue cheese with the chewy sweetness of dates. The moment I bit into that first stuffed date, I knew I’d hit on something special. It’s that perfect little snack that feels fancy but is honestly just a handful of ingredients and a bit of patience.
- heading: The inspiration behind this snack
Historical and cultural tidbits
- Dates have been a staple snack in Middle Eastern cultures for thousands of years, often used in religious and festive dishes.
- Stuffed dates likely originated from ancient Persia, where they were considered a luxurious treat reserved for special occasions.
- The practice of stuffing fruits with nuts or cheese spread across many Mediterranean and Middle Eastern cuisines, adapting over centuries.
- Blue cheese and dates pairing became popular in modern tapas bars, blending rustic tradition with contemporary flair.
- In some traditions, stuffed dates symbolize abundance and are offered during celebrations to bring good fortune.
Ingredient breakdown
- Medjool dates: I love their rich, caramel-like sweetness and chewy texture—look for plump, glossy ones, and if yours are a bit dry, give them a quick soak in warm water. Swap with Deglet Noor if you prefer a firmer bite, but they’re less juicy.
- Blue cheese: The creamy, tangy punch really makes this dish pop. I suggest crumbling it finely—if you want milder flavor, try gorgonzola. Skip if you’re sensitive to strong blue cheeses, but don’t skip that distinctive aroma.
- Nuts: Walnuts or pecans add crunch and richness. Toast them lightly until golden—your nose will catch the toasty smell. If allergic, shredded coconut offers a sweet, tropical twist, though it’s less crunchy.
- Honey: Just a drizzle, but it balances the saltiness beautifully. Use raw honey for more depth—if you prefer a less sticky bite, opt agave syrup. Skip for a vegan version, but consider a splash of maple syrup for a smoky sweetness.
- Optional herbs: A tiny sprig of thyme or a sprinkle of smoked paprika can add complexity. I like fresh thyme for a subtle earthiness, but dried works in a pinch. Keep it simple if you want pure flavor focus.
- Sea salt: A pinch enhances all the flavors. Flake salt adds a nice crunch—if you’re watching salt intake, go easy, but don’t skip it entirely, as it’s key to balancing the sweetness.
- Lemon zest (optional): Brightens up the cheese and cuts through the richness. Use a microplane—if you want more zing, add a squeeze of lemon juice, but be cautious not to overpower the other flavors.
Spotlight on key ingredients
Medjool dates and Blue cheese:
- Medjool dates: I love their rich, caramel-like sweetness and chewy texture—look for plump, glossy ones, and if yours are a bit dry, give them a quick soak in warm water. Swap with Deglet Noor if you prefer a firmer bite, but they’re less juicy.
- Blue cheese: The creamy, tangy punch really makes this dish pop. I suggest crumbling it finely—if you want milder flavor, try gorgonzola. Skip if you’re sensitive to strong blue cheeses, but don’t skip that distinctive aroma.
Notes for ingredient swaps
- Dairy-Free: Use cashew cream or vegan cheese instead of blue cheese for a milder, nutty flavor.
- Vegan: Swap blue cheese for crumbled firm tofu mixed with a dash of nutritional yeast and lemon juice for tang.
- Gluten-Free: Ensure nuts are roasted without added flour or coatings to keep it gluten-free.
- Sweetener: Replace honey with maple syrup or agave nectar for a different, slightly caramelized sweetness.
- Nuts: Almonds or pistachios can be used instead of walnuts or pecans, adding their own unique crunch and flavor.
- Date Type: Deglet Noor dates are firmer and less sweet; Medjool dates are juicier and more decadent.
- Herbs & Spices: Fresh thyme or smoked paprika can elevate the flavor, or skip if you prefer pure sweetness and cheese pairing.
Equipment & Tools
- small sharp knife: to slit and pit the dates precisely
- spoon or toothpick: to stuff the cheese into the dates
- baking sheet: to hold the stuffed dates while baking
- parchment paper: to prevent sticking and make cleanup easier
- mixing bowl: to crumble and hold the blue cheese
Step-by-step guide to stuffed dates
- Gather your equipment: a small sharp knife, a spoon or toothpick, a baking sheet, and a mixing bowl. Preheat your oven to 180°C (350°F).
- Slice each date lengthwise, about three-quarters of the way through, to create a pocket without cutting all the way through.
- Remove the pit carefully, keeping the date intact. If the pit is stubborn, gently pry it out with the tip of your knife or a toothpick.
- Mix your blue cheese: crumble it finely in a bowl. If it’s too crumbly, let it sit at room temperature for 10 minutes to soften slightly.
- Stuff each date with a small amount of blue cheese—about a teaspoon—using a spoon or finger. Be generous but not overflowing.
- If using nuts, chop them finely and sprinkle a few inside each stuffed date or press them gently into the cheese for added crunch.
- Place the stuffed dates on a parchment-lined baking sheet, spaced apart. Drizzle lightly with honey if desired for extra glaze.
- Bake in the preheated oven for 10-12 minutes, until the cheese is bubbling and edges are slightly caramelized. Keep an eye on them to prevent over-browning.
- Once out of the oven, let the dates rest for 3-5 minutes. They’ll be hot and gooey; resting helps the flavors settle and prevents sticking.
- Plate the dates carefully, drizzle with a little extra honey or a sprinkle of fresh herbs if you like. Serve warm or at room temperature.
Let the baked dates rest for 3-5 minutes. Finish with a drizzle of honey or a sprinkle of herbs. Serve warm or at room temp, ensuring they’re not too hot to handle.
How to Know It’s Done
- Cheese is melted and slightly caramelized on top.
- Dates feel soft but hold their shape when gently pressed.
- Honey has a shiny, slightly sticky appearance, indicating it’s baked enough.
Stuffed Dates with Blue Cheese
Ingredients
Equipment
Method
- Using the sharp knife, slice each date lengthwise about three-quarters of the way through without cutting all the way through.
- Carefully remove the pit from each date, gently prying it out with the tip of the knife or a toothpick, leaving a hollow pocket.
- In a mixing bowl, crumble the blue cheese finely until it resembles small crumbs and is easy to stuff.
- Use a spoon or your fingers to stuff each date with about a teaspoon of blue cheese, pressing gently to fill the pocket completely.
- Sprinkle the chopped toasted nuts into the stuffed dates, pressing them slightly into the cheese for added crunch.
- Arrange the stuffed dates on a parchment-lined baking sheet, spaced apart to allow for even baking.
- Drizzle each stuffed date with a small amount of honey for a shiny, caramelized glaze.
- Bake the dates in a preheated oven at 180°C (350°F) for 10-12 minutes, until the cheese is bubbling and the edges are golden brown.
- Remove the baking sheet from the oven and let the dates rest for 3-5 minutes, allowing the flavors to settle and the cheese to firm slightly.
- Optionally, garnish with fresh herbs or a sprinkle of smoked paprika for extra flavor, then serve warm or at room temperature.
Notes
Pro tips for stuffed dates
- Use slightly softened dates for easier stuffing and better flavor absorption.
- Crumble blue cheese finely to ensure it melts evenly and coats the dates thoroughly.
- Toast nuts lightly until just fragrant to enhance their crunch and aroma.
- Drizzle honey in thin streams to control sweetness and achieve a glossy finish.
- Bake at a consistent 180°C (350°F) to prevent burning and ensure even melting.
- Rest the stuffed dates briefly after baking to allow flavors to settle and cheese to firm up.
- Use parchment paper for easy cleanup and to prevent sticking during baking.
Common mistakes and how to fix them
- FORGOT to check for pit removal → Gently pry out stubborn pits with a toothpick.
- DUMPED cheese too early → Wait until cheese is bubbly and edges are caramelized.
- OVER-TORCHED dates → Remove from oven once edges are golden and cheese is melted.
- MISSED resting time → Let stuffed dates sit 3-5 minutes before serving for optimal flavor.
Quick fixes and pantry swaps
- If dates feel dry, splash them with a little warm water and pat dry.
- When cheese isn’t melting properly, increase oven temperature slightly or extend baking time.
- Splash a touch of lemon juice if dates are too sweet or bland for your taste.
- Patch over cracks by gently pressing the cheese back into the slit before baking.
- Shield dates with foil if tops brown too quickly, preventing burnt edges.
Prep, store, and reheat tips
- Prep the stuffed dates a few hours ahead by assembling and placing them on a plate; keep covered in the fridge. The flavors meld better after resting, and the cheese stays fresh without drying out.
- Store leftovers in an airtight container in the fridge for up to 24 hours. The dates may soften further, intensifying their sweetness, while the cheese might firm up slightly—best enjoyed warm or at room temp.
- Reheat gently in a 150°C (300°F) oven for 5-8 minutes until warmed through and cheese is melty again. Keep an eye on them to avoid overcooking, which can make the dates mushy and lose their chewy bite.
- For best sensory experience, serve within a day. The dates will lose some of their initial caramelized aroma, but the cheese and nuts will still pop with flavor if gently reheated.
Top questions about stuffed dates
1. Can I use other types of dates?
Medjool dates are best—they’re chewy, sweet, and juicy, making the stuffing extra indulgent. Deglet Noor works if you prefer a firmer texture.
2. What cheese can I use instead of blue cheese?
Blue cheese adds that sharp, creamy punch, but you can substitute gorgonzola or even goat cheese for a milder flavor.
3. Can I prepare stuffed dates in advance?
Yes, you can stuff dates ahead and keep them covered in the fridge for a few hours. Reheat gently before serving.
4. My dates are dry—what can I do?
A quick dip in warm water can revive dried-out dates, making them soft and easier to stuff. Just dry them off thoroughly before filling.
5. How do I know when they’re done?
Bake at 180°C (350°F) until the cheese is bubbly and edges caramelized, usually 10–12 minutes. Look for a golden glow and a fragrant smell.
6. What nuts work best?
Use toasted nuts like walnuts or pecans for crunch. If allergic, shredded coconut adds a sweet, tropical note, but less crunch.
7. Can I make this vegan?
For a vegan version, swap blue cheese for crumbled tofu mixed with nutritional yeast and lemon juice for that tangy zing.
8. How do I toast nuts properly?
Lightly toast nuts to bring out their aroma and crunch. Keep an eye so they don’t burn—just until fragrant and golden.
9. They’re burning—what now?
If the dates over-brown or burn, cover them with foil mid-bake or reduce oven temperature slightly. Remove once edges are golden and cheese is melted.
10. How should I serve them?
For extra flavor, drizzle honey or sprinkle fresh herbs just after baking. Serve warm or at room temperature for best texture and taste.
These stuffed dates feel like a quiet rebellion—simple ingredients, bold flavors, and a bit of unexpected charm. They remind me that sometimes, the best bites come from just trusting your instincts and balancing the sweet with the savory.
When I make them, I think about how a small, honest dish can spark conversation and bring people together. It’s not fancy, but it’s honest, and that’s what makes it worth sharing—over a casual gathering or just a quiet night in.

Hi, I’m Emily Carter, the creator and recipe developer behind Salt Strategist. I’m so happy you’re here. This blog is where my love for flavor, creativity, and thoughtful cooking comes together in one beautiful, ever evolving space.


