Baking shrimp might sound simple, but it’s a little trick to get that perfect crispy coating without the splatter or smell of frying. I’ve always liked the idea of oven-cooked seafood that’s just as satisfying, and this baked breaded shrimp hits that sweet spot. It’s honest, straightforward, and honestly, way less mess in the kitchen.
This recipe is my go-to when I want something crispy and satisfying but don’t want to deal with the fuss of deep-frying. Plus, the oven does most of the work, giving me time to prep a quick salad or just relax a bit. It’s one of those dishes that feels fancy but is dead simple to pull off, especially on a weeknight when I need dinner fast and reliably.
What I really love about this baked breaded shrimp is how adaptable it is. You can tweak the seasoning, use different types of breadcrumbs, or even make it gluten-free without losing the crunch. It’s just one of those little recipes that makes me feel like I’ve got a shortcut to restaurant-quality seafood, right at home.
Focusing on the underrated joy of oven-baking shrimp for a healthier, less messy, yet equally crispy alternative to frying.
The story behind this recipe
- This baked breaded shrimp recipe came from a moment of kitchen chaos. I was trying to make something quick and crispy without the mess of frying, and I realized oven-baked shrimp could actually work. That crunchy coating, without the greasy splatter, felt like a little win in my busy weeknight rotation.
- I remember the first time I tested it, I was half-watching a movie while waiting for the oven. The smell of toasted breadcrumbs and shrimp cooking together was unexpectedly comforting. It’s become a dish I turn to when I want something satisfying but don’t want to spend ages fussing over it.
- heading: “The story behind this recipe”
Ingredient breakdown: key components
- Panko breadcrumbs: I like the airy crunch they give, but you can swap with crushed cornflakes for more texture.
- Shrimp: Fresh shrimp are sweeter and juicier, but frozen works fine—just thaw and pat dry for best coating attachment.
- Egg wash: It helps the breadcrumbs stick, but for a richer flavor, add a splash of milk or a touch of Dijon mustard.
- Seasonings: I use paprika and garlic powder for that smoky, savory punch—adjust to your taste, maybe a pinch of cayenne for heat.
- Oil spray: It’s my secret for even browning without greasing up the dish—don’t skip it if you want that golden finish.
- Lemon: Brightens everything with a zing that cuts through the richness—squeeze just before serving for peak freshness.
- Optional herbs: Parsley or dill add a fresh note, but dry herbs can work if fresh isn’t available—just use half as much to avoid overpowering.
Spotlight on key ingredients
Panko breadcrumbs:
- I like the airy crunch they give, but you can swap with crushed cornflakes for more texture.
- Shrimp: Fresh shrimp are sweeter and juicier, but frozen works fine—just thaw and pat dry for best coating attachment.
Shrimp:
- Their firm, slightly sweet flesh responds beautifully to gentle baking, staying juicy yet tender.
- During baking, they turn opaque and pink, with a slight jiggle—signs they’re perfectly cooked.
Notes for ingredient swaps
- Dairy-Free: Use almond or coconut milk in the egg wash for a subtle nutty flavor and vegan appeal.
- Gluten-Free: Swap regular breadcrumbs for crushed rice crackers or gluten-free panko for a similar crunch.
- Spicy Kick: Add a pinch of cayenne or hot paprika to the breadcrumb mixture if you like heat.
- Herb Variations: Fresh thyme or oregano can replace parsley or dill for a different aromatic profile.
- Citrus Brightness: Lime zest instead of lemon adds a slightly different tang and a vibrant aroma.
- Crunch Upgrade: Mix in crushed cornflakes or crispy rice cereal for an extra crispy coating.
- Oil Spray: Use avocado oil spray for a richer flavor and higher smoke point, ensuring even browning.
Equipment & Tools
- Baking sheet: To hold the shrimp while baking evenly.
- Parchment paper or non-stick spray: To prevent sticking and make cleanup easier.
- Three shallow dishes: For flour, egg wash, and breadcrumbs setup.
- Tongs: To handle coated shrimp without mess.
- Mixing bowls: To prepare ingredients and hold the coating mixtures.
Step-by-step guide to baked shrimp
- Preheat your oven to 200°C (400°F). Line a baking sheet with parchment paper or lightly grease it. Set aside.
- Gather your equipment: a shallow dish for the flour, another for the beaten eggs, and a third for the breadcrumbs. A pair of tongs will help handle the coated shrimp without mess.
- Peel and devein the shrimp if not already done. Pat them dry thoroughly with paper towels; moisture is the enemy of crisp coating.
- Start with the flour: toss each shrimp in the flour, ensuring an even coating. Tap off excess—this helps the egg wash stick better.
- Next, dip the floured shrimp into the beaten eggs. Let the excess drip off—this prevents clumping of breadcrumbs.
- Then, roll or press the shrimp into the breadcrumbs, coating evenly. For extra crunch, you can press them gently into the breadcrumbs again.
- Arrange the coated shrimp on your prepared baking sheet in a single layer, leaving space between each piece. Lightly spray the tops with cooking spray for extra crispness.
- Bake for 10–12 minutes. The shrimp should turn pink and opaque, and the coating should be golden and crispy. When you smell toasted breadcrumbs, it’s ready.
- Halfway through, turn the shrimp with tongs for even browning. If the coating looks uneven, give them a gentle shake or rotate the sheet.
- Once out of the oven, let the shrimp rest for 2 minutes. They’ll be hot and crispy. Serve immediately with lemon wedges or your favorite dipping sauce.
Let the shrimp rest for 2 minutes to firm up. Serve hot with lemon wedges or a quick dip. Plate directly to keep the crunch intact—no stacking, or they’ll lose their crispness.
How to Know It’s Done
- The coating is golden and crispy, not pale or soggy.
- Shrimp are opaque and firm, with a slight jiggle but no translucence.
- The aroma is toasted and savory, with a hint of garlic or herbs if used.
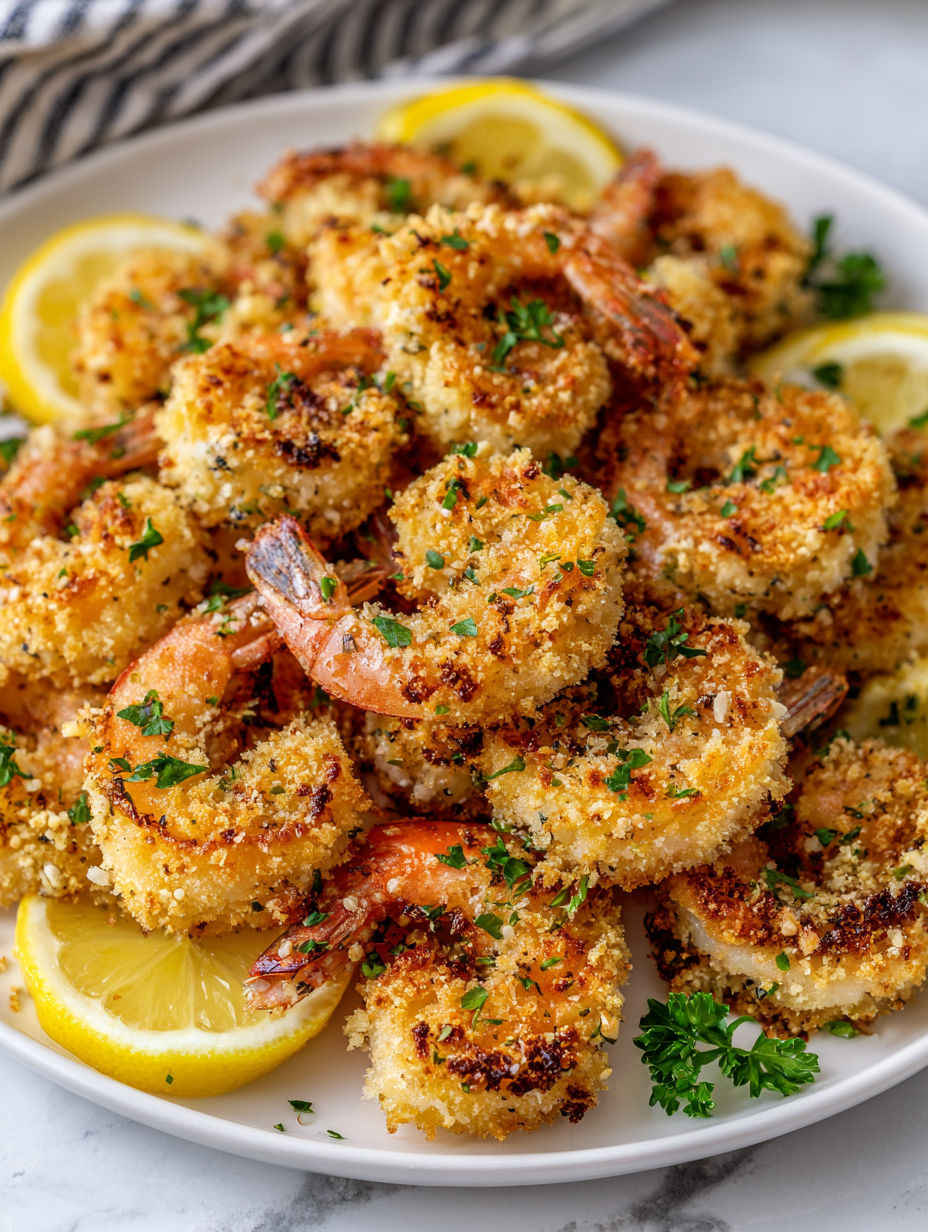
Baked Breaded Shrimp
Ingredients
Equipment
Method
- Preheat your oven to 200°C (400°F). Line a baking sheet with parchment paper or lightly spray it with non-stick spray. Set aside.
- Arrange three shallow dishes: one with flour, one with beaten eggs, and one with panko breadcrumbs mixed with paprika, garlic powder, salt, and pepper.
- Peel and devein the shrimp if not already done. Pat them thoroughly dry with paper towels to ensure the coating sticks well.
- Start by tossing each shrimp in the flour, ensuring an even coating. Tap off any excess flour.
- Next, dip the floured shrimp into the beaten eggs, letting any excess drip off to prevent clumping.
- Then, press or roll the shrimp into the seasoned panko breadcrumbs, coating evenly. Gently press again for extra crunch if desired.
- Place the coated shrimp onto the prepared baking sheet in a single layer, leaving space between each piece.
- Spray the shrimp lightly with cooking spray or oil to help achieve a golden, crispy exterior.
- Bake in the oven for 10–12 minutes, or until the shrimp turn opaque, pink, and the coating is golden and crispy. The aroma of toasted breadcrumbs will fill your kitchen.
- Halfway through, turn the shrimp with tongs for even browning. Keep an eye on them to prevent overcooking.
- Remove the shrimp from the oven and let them rest for 2 minutes to set the coating. Serve immediately with lemon wedges for a bright, fresh finish.
Notes
Pro tips for crispy baked shrimp
- coating: Use coarse breadcrumbs for a hearty crunch that holds up well in the oven.
- oil spray: Lightly spritz the shrimp before baking for an even, golden finish.
- temperature: Keep the oven at 200°C (400°F) to ensure crispy coating without overcooking the shrimp.
- timing: Start checking at 10 minutes; they should turn pink and golden, not pale or burnt.
- handling: Use tongs when coating and transferring to avoid crushing the breading or getting greasy fingers.
- resting: Let the baked shrimp sit for 2 minutes after baking; it helps the coating set and stay crispy.
- layer: Press breadcrumbs gently onto the shrimp again if needed for extra crunch before baking.
Common mistakes and how to fix them
- FORGOT to preheat the oven → Ensure oven is fully preheated to 200°C (400°F).
- DUMPED the coating mixture → Mix thoroughly to prevent uneven breading.
- OVER-TORCHED the shrimp → Watch closely after 10 minutes; remove once golden and crispy.
- SKIPPED resting time → Rest for 2 minutes before serving to keep the coating intact.
Quick fixes and pantry swaps
- When burnt coating → Splash with a bit of lemon juice to neutralize bitterness.
- When shrimp is overcooked → Patch with a quick squeeze of fresh lemon for brightness.
- If coating isn’t crispy → Shield with an extra light spray of oil and bake 2 more minutes.
- When breadcrumbs are soggy → Rescue with a quick broil, watching carefully for perfect golden color.
- When short on breadcrumbs → Swap with crushed crispy cereal or rice crackers for added crunch.
Prep, store, and reheat tips
- Prepare the shrimp: Peel, devein, and thoroughly dry the shrimp ahead of time. Keep covered in the fridge for up to 24 hours to prevent excess moisture.
- Assemble coating stations: Bread the shrimp up to a day in advance, arrange on a plate, and refrigerate covered. The coating stays crisp if kept cold and dry.
- Shelf life: Baked shrimp are best enjoyed within 24 hours of baking. After that, the coating may soften, and flavors diminish.
- Reheating: Warm in a preheated oven at 180°C (350°F) for 5–7 minutes. Expect the coating to regain some crispness, with a slightly smoky aroma returning.
- Sensory note: The reheated shrimp should smell toasted and savory, with a firm, crispy exterior and tender inside. Avoid reheating in the microwave, as it makes the coating soggy.
Top questions about baked shrimp
1. Can I use frozen shrimp?
Use medium-sized, peeled, deveined shrimp for even cooking and easy breading. They stay juicy and cook quickly.
2. How do I thaw frozen shrimp quickly?
Yes, thaw them thoroughly, pat dry, and they’ll work just as well. Just ensure no excess moisture.
3. How long should I bake the shrimp?
Bake at 200°C (400°F) for 10-12 minutes. Look for pink, opaque shrimp and golden coating as signs of doneness.
4. Do I need oil on the shrimp?
Spray the shrimp lightly with oil before baking to enhance crispiness and even browning.
5. Can I use regular breadcrumbs?
Use coarse panko breadcrumbs for best crunch. For extra texture, mix in crushed cornflakes or crispy rice cereal.
6. Should I rest the shrimp after baking?
Serve immediately after resting 2 minutes for maximum crunch and flavor. Add lemon or your favorite dip.
7. How do I avoid overcooking the shrimp?
Overcooking turns shrimp rubbery and coating dark. Check at 10 minutes, remove once pink and crispy.
8. Can I skip the egg wash?
Use a mixture of egg and a splash of milk or mustard for richer flavor and better coating adhesion.
9. How do I reheat baked shrimp?
Reheat in a 180°C (350°F) oven for 5–7 minutes. Expect the coating to crisp up again and smell toasted.
10. Can I make this dish spicy?
Add a pinch of cayenne or hot paprika to spice up the coating or a squeeze of lemon for brightness.
This baked breaded shrimp recipe is a reminder that simplicity can still deliver real satisfaction. The smell of toasted breadcrumbs and the sight of pink, crispy shrimp just feels right for a quick, honest meal. It’s one of those dishes I keep coming back to for its straightforward charm.
In times when I need comfort without fuss, this recipe always delivers. It’s a little reminder that good food doesn’t have to be complicated, especially when it’s made with a bit of care and a lot of honest ingredients. And honestly, that crispy coating never gets old.

Hi, I’m Emily Carter, the creator and recipe developer behind Salt Strategist. I’m so happy you’re here. This blog is where my love for flavor, creativity, and thoughtful cooking comes together in one beautiful, ever evolving space.


