
These baked cauliflower bites are my go-to when I need something crispy and satisfying, but without the greasy mess of fried snacks. They’re simple to toss together and bake up golden and crunchy, perfect for busy nights or just when I crave a little comfort without overdoing it on oil. Plus, they’re a sneaky way to get more veg into your day, and they hold up surprisingly well for leftovers.
What I love most is how versatile they are—serve them as a snack, a side, or even toss them into a salad for some crunch. They’re a bit of a cheat, really, because you get that satisfying crispy bite without the fuss of frying. And honestly, once you get the hang of baking them just right, you’ll find yourself reaching for these cauliflower bites way more often than you’d think. They’re humble, but they pack a punch of flavor and texture.
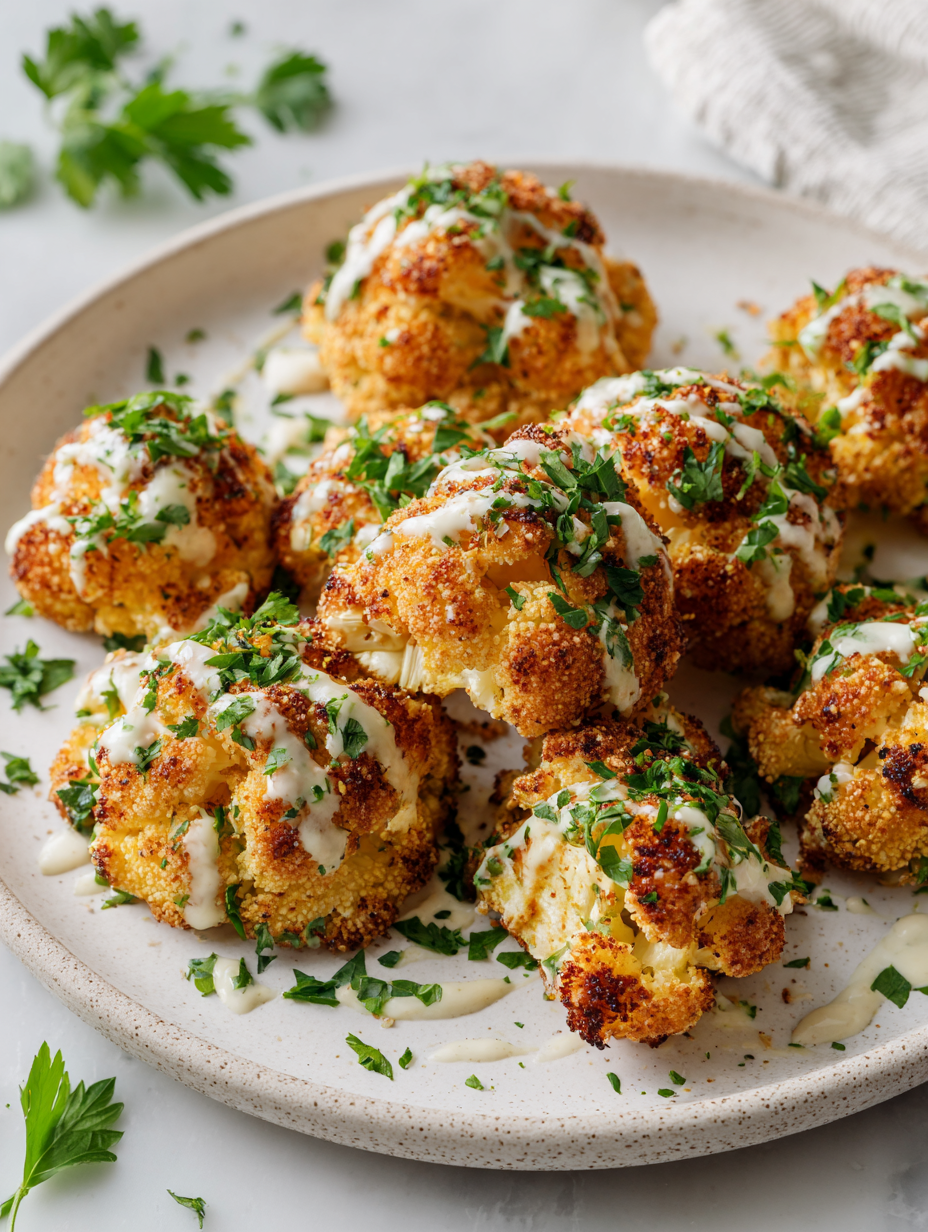
Focusing on how baked cauliflower bites can serve as a satisfying, crispy snack that rivals fried versions without the mess or oil, making it perfect for busy weeknights or when craving comfort food with less guilt.
The story behind this recipe
- I first made these baked cauliflower bites during a chaotic week when I needed something quick, healthy, and satisfying. I was tired of the greasy takeout and wanted a crunch that wouldn’t weigh me down. It hit me that cauliflower, with its humble nature, could turn into something crispy and flavorful if handled right.
- One rainy evening, I threw some florets in a simple batter, baked them till golden, and tasted that perfect crunch. The smell of roasted cauliflower mingling with spices was oddly nostalgic—reminding me of childhood snacks but with a grown-up twist. From that moment, I was hooked, and these bites became my go-to for everything from snacks to side dishes.
- story_type
Ingredient breakdown: key components
- Cauliflower: I choose firm, fresh florets that feel heavy and look bright white; for a more tender bite, try smaller pieces, but avoid broken or yellowed ones.
- Breadcrumbs: I prefer panko for extra crunch, but regular ones work; toast them lightly if you want a nuttier flavor before mixing with spices.
- Eggs: The binding agent that keeps everything together; use large eggs and beat well—if you’re vegan, try a flaxseed slurry, though the texture will change slightly.
- Spices: I keep it simple with paprika and garlic powder, but a pinch of cumin or cayenne adds a smoky or spicy kick—adjust to your heat tolerance.
- Oil: A light spray or drizzle of neutral oil like canola or vegetable helps crisp up the bites; too much, and they’ll feel greasy, so keep it light.
- Lemon juice: Brightens the flavor and cuts through the richness; a splash right before serving lifts the whole dish with zesty freshness.
- Salt: I season generously but taste as I go; a good pinch helps all the flavors pop without overwhelming the natural cauliflower taste.
Spotlight on key ingredients
Cauliflower:
- I pick firm, bright white florets that feel heavy for their size; avoid yellows or broken pieces for the best bite.
- It roasts beautifully, developing a nutty aroma and tender bite if cooked just right—watch for browning edges.
- During baking, it releases a faint roasted smell, signaling crispness and doneness, without turning mushy.
Breadcrumbs:
- I prefer panko for extra crunch and lightness; toasting them lightly beforehand adds a toasted, nutty flavor.
- They create that satisfying crispy exterior, and the texture can be tailored from fine to coarse—just watch for clumping.
- When coated evenly, they crisp up in the oven, giving each bite a satisfying crunch that’s not greasy.
Notes for ingredient swaps
- Dairy-Free: Swap eggs for a flaxseed slurry (1 tablespoon ground flaxseed mixed with 3 tablespoons water). It adds a slight nuttiness but helps bind just as well.
- Gluten-Free: Use a gluten-free breadcrumb or crushed rice cereal instead of panko. Expect a slightly different crunch, but still satisfying.
- Vegan: Replace eggs with aquafaba (chickpea brine) or additional flaxseed slurry. The texture will be a bit softer but still delicious.
- Spice Variations: If paprika isn’t your thing, try smoked chipotle or turmeric for earthy, smoky, or vibrant color shifts without losing flavor depth.
- Oil Choices: Switch neutral oil with melted coconut or sesame oil for a richer aroma. Keep in mind, these oils can influence the overall flavor profile.
- Lemon Juice: Use lime or vinegar for a different citrus brightness—adjust quantity to keep the fresh zing.
- Breadcrumbs: Swap panko with crushed nuts or seeds for more texture and flavor, but keep an eye on moisture to avoid sogginess.
Equipment & Tools
- Baking sheet: To hold the cauliflower bites during baking.
- Parchment paper: To prevent sticking and make cleanup easier.
- Mixing bowls: To prepare the batter and toss the florets.
- Spatula: To turn and transfer the cauliflower.
- Wire rack: To cool the baked bites evenly and prevent sogginess.
- Pastry brush or spray bottle: To lightly oil the bites for crispiness.
Step-by-step guide to baked cauliflower bites
- Preheat your oven to 220°C (425°F). Line a baking sheet with parchment paper for easy cleanup.
- Prepare equipment: a large mixing bowl for batter, a baking sheet, a spatula, and a wire rack for resting.
- Cut cauliflower into bite-sized florets, about 2-3 cm (1 inch). Rinse and pat dry thoroughly, so they don’t steam during baking.
- In the large bowl, whisk together 2 beaten eggs (or flax slurry for vegan), 1 teaspoon smoked paprika, 1 teaspoon garlic powder, and a pinch of salt. The mixture should be smooth and slightly frothy.
- Add 1 cup panko breadcrumbs to the bowl, tossing to coat evenly, creating a crunchy exterior. If you prefer more crunch, double the breadcrumbs.
- Toss the cauliflower florets in the batter, ensuring each piece is well coated. Use a spatula to gently lift and turn, avoiding clumps.
- Using a spatula, transfer coated florets to the prepared baking sheet. Spread them out in a single layer, leaving space between pieces for even crisping.
- Spray or lightly brush the cauliflower with neutral oil. This helps achieve a golden, crunchy crust. Don’t skimp on this step.
- Bake for 25-30 minutes. Halfway through, flip the florets with a spatula for even browning. Watch for a deep golden color and crispy edges.
- Check doneness: the bites should be golden and crispy, with a slight jiggle in the center. The smell should be roasted with a hint of smokiness.
- Remove from oven and let rest for 5 minutes on the rack. This allows the crust to set and prevents sogginess.
- Finish with a squeeze of lemon juice for brightness. Plate immediately, garnished with fresh herbs if desired.
Let the cauliflower bites rest on the rack for 5 minutes. Squeeze fresh lemon over the top for a zing. Serve hot, with dips or as a snack.
How to Know It’s Done
- Color: deep golden and crispy edges.
- Texture: bite should be crunchy but not hard or burnt.
- Appearance: evenly coated with batter and no soggy spots.
Baked Cauliflower Bites
Ingredients
Equipment
Method
- Preheat your oven to 220°C (425°F) and line a baking sheet with parchment paper.
- Cut the cauliflower into bite-sized florets about 2-3 cm, rinsing and thoroughly drying them to prevent steaming during baking.
- In a large mixing bowl, whisk together the beaten eggs (or flaxseed slurry), smoked paprika, garlic powder, and a pinch of salt until smooth and slightly frothy.
- Add the panko breadcrumbs to the bowl and toss to coat evenly, creating a crispy coating for the cauliflower.
- Toss the cauliflower florets in the batter, ensuring each piece is well coated with the seasoned breadcrumbs mixture.
- Using a spatula, transfer the coated florets onto the prepared baking sheet, spreading them out in a single layer to allow even baking.
- Lightly spray or brush the cauliflower with neutral oil to promote crispness and golden color.
- Bake for 25-30 minutes, flipping the florets halfway through, until they are deep golden and crispy at the edges.
- Once baked, remove from the oven and let the bites rest on a wire rack for 5 minutes to set the crust and prevent sogginess.
- Squeeze fresh lemon juice over the cauliflower bites for brightness, then serve hot with your favorite dips or salads.
Pro tips for crispy cauliflower bites
- Use panko for extra crunch, and toast lightly for a nuttier flavor.
- Spray or brush lightly with oil before baking to achieve a golden crust.
- Flip the florets halfway through baking to ensure even crisping and browning.
- Watch closely near the end; remove when golden and crispy to prevent burning.
- Rest on a wire rack after baking to keep the crust crisp and prevent sogginess.
- Add a splash of lemon juice right before serving to brighten the flavors.
- For a spicier kick, sprinkle with a pinch of cayenne or smoked paprika before baking.
Common mistakes and how to fix them
- FORGOT to preheat the oven → Always preheat to ensure even crisping.
- DUMPED the cauliflower raw in batter → Coat thoroughly for a crispy exterior.
- OVER-TORCHED the bites → Remove when golden, not burnt, for perfect crunch.
- MISSED resting time → Rest on a rack to prevent sogginess and set the crust.
Quick fixes and pantry swaps
- When cauliflower releases a strong smell, splash with lemon juice to brighten it up.
- If bites are soggy, patch with an extra minute in the oven at 220°C (425°F).
- DUMPED in too much oil? Shield with a paper towel and bake a few extra minutes for crispness.
- When breadcrumbs clump, rescue with a gentle toss in a dry pan to re-toast and loosen.
- If the oven smolders with smoke, swap baking sheets for a wire rack to improve air circulation.
Prep, store, and reheat tips
- You can prepare the cauliflower florets and coat them with batter up to a day ahead; keep covered in the fridge, which helps the flavors meld and saves time later.
- Store baked cauliflower bites in an airtight container in the fridge for up to 3 days. Expect the texture to soften slightly, but they still taste great with a quick reheat.
- Reheat in a 180°C (350°F) oven for 8-10 minutes until crispy again. The aroma of roasted cauliflower and spices will re-emerge, and the bites should crackle at the edges.
- For longer storage, freeze baked bites in a single layer on a tray, then transfer to a bag for up to 1 month. Reheat directly from frozen for best crunch, adding a minute or two to the reheating time.
Top questions about baked cauliflower bites
1. How do I choose the best cauliflower for this recipe?
Look for firm, bright white florets with no yellowing or browning. They should feel heavy and fresh. Smaller florets tend to roast more evenly and get crispier.
2. Can I substitute different breadcrumbs?
Use panko breadcrumbs for extra crunch, but regular ones work fine. Toast them lightly before mixing for a nuttier flavor. If you want gluten-free, try crushed rice cereal or gluten-free breadcrumbs.
3. Are there vegan options for the batter?
Yes, you can use aquafaba or a flaxseed slurry instead of eggs. The texture might be slightly softer, but they still bind well and keep the bites crispy.
4. How do I know when the cauliflower bites are ready?
Bake at 220°C (425°F) for about 25-30 minutes. Flip halfway through for even browning. The bites are done when they’re golden, crispy, and smell roasted with a hint of smokiness.
5. Should I oil the cauliflower before baking?
Spray or brush lightly with neutral oil like canola or vegetable before baking. This helps achieve a crispy, golden crust without making them greasy.
6. Can I add lemon before or after baking?
Yes, a squeeze of lemon or lime juice just before serving brightens the flavor and adds a fresh, zesty contrast to the crispy bites.
7. How should I store and reheat leftovers?
Store leftovers in an airtight container in the fridge for up to 3 days. Reheat in a 180°C (350°F) oven for 8-10 minutes until crispy and fragrant again.
8. What if they turn soggy after baking?
If bites turn soggy, pop them back in the oven at 220°C (425°F) for a few minutes. For extra crispness, sprinkle with a little more oil or breadcrumbs before reheating.
9. My cauliflower smells too strong, what can I do?
When cauliflower releases a strong, sulfurous smell, a splash of lemon juice or fresh herbs can mask it and revive the aroma.
10. How can I get more even crisping?
If you notice uneven browning, flip the cauliflower more frequently or use a wire rack for better air circulation during baking.
These baked cauliflower bites are a reminder that simple ingredients can turn into something unexpectedly satisfying. They’re perfect for when you want a crispy snack that doesn’t leave you feeling greasy or weighed down. Plus, the smell of roasting cauliflower with spices is oddly comforting, like a quiet hug in the kitchen.
In times when quick, healthy comfort food feels elusive, this recipe offers a straightforward fix. Once you get the hang of baking them just right, you’ll find yourself reaching for these bites more often than you’d admit. They’re not fancy, but they’re honest, crunchy, and just right for a busy, craving-filled moment.
At Salt Strategist, we believe food is more than just nourishment; it’s a story, a memory, and an experience meant to be shared. Our blog is dedicated to exploring the art of cooking with a focus on everyday meals, kitchen tips, and inspiring recipes that bring people closer together around the table.
Our Story
Salt Strategist was founded by Emily Carter, a passionate home cook and culinary storyteller from Portland, Oregon. Growing up in a family that valued Sunday dinners and homemade meals, Emily discovered early on that food has the power to connect hearts and cultures.
Her vision for Salt Strategist is simple: to make cooking approachable, exciting, and rewarding for everyone. Whether you are a seasoned chef or just starting your cooking journey, this blog is here to inspire confidence in the kitchen with easy-to-follow recipes, clever cooking strategies, and flavour-packed ideas.